WordPress revolutionized website creation with the introduction of the Block Editor, commonly known as Gutenberg, which replaced the Classic Editor in WordPress 5.0.
If you’re looking to build a powerful WordPress website without coding knowledge, mastering the WordPress Block Editor is essential.
This comprehensive guide will show you how to use the WordPress Block Editor effectively, from basic concepts to advanced techniques.
What is the WordPress Block Editor (Gutenberg)?
The WordPress Block Editor, or Gutenberg, is a content editing system that uses blocks as the primary content components.
Unlike the previous Classic Editor which operated like a standard word processor, the Block Editor allows you to build pages using individual content blocks for paragraphs, images, videos, tables, and countless other elements.
Each block functions as an independent unit that you can manipulate, style, and arrange anywhere on your page.
This gives you unprecedented control over your website’s layout and design, without requiring knowledge of HTML or CSS.
Why Use the WordPress Block Editor?
Before diving into how to use Gutenberg WordPress, let’s understand why the Block Editor has become the standard for WordPress website creation:
- Visual Editing: What you see is what you get (WYSIWYG) – edit content exactly as it will appear on your site
- Drag-and-Drop Interface: Easily move content blocks to create complex layouts
- Consistent Design: Apply uniform styling across your entire website
- Responsiveness: Blocks automatically adapt to different screen sizes
- Extensibility: Add functionality through block patterns, reusable blocks, and plugins
- Future-Proof: As WordPress continues to develop the block system, your site remains compatible with future innovations
Getting Started with the WordPress Block Editor
Accessing the Block Editor
To use Gutenberg WordPress, simply log into your WordPress dashboard and:
- Go to “Pages” or “Posts” in your dashboard menu
- Click “Add New” or edit an existing page/post
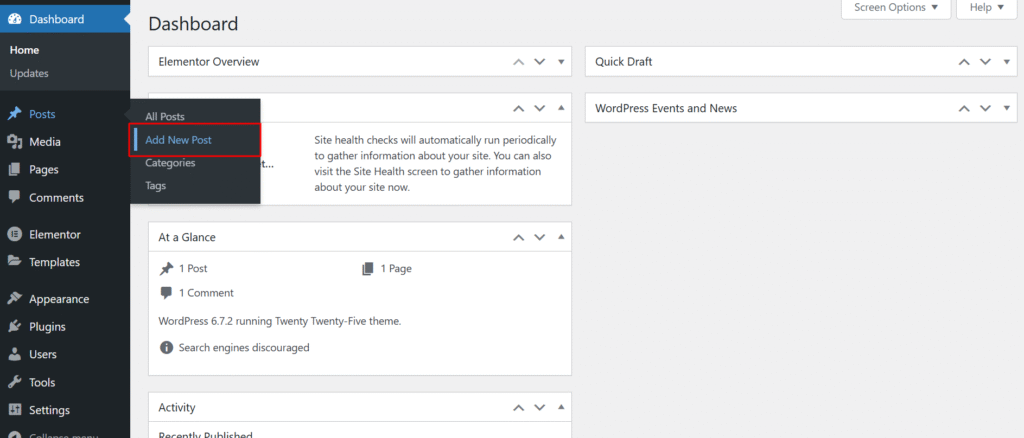
- The Block Editor will automatically load
If you’re using an older WordPress version or have the Classic Editor plugin installed, you may need to click “Switch to Block Editor” to access Gutenberg.
- Make sure your site runs WordPress 5.0 or later.
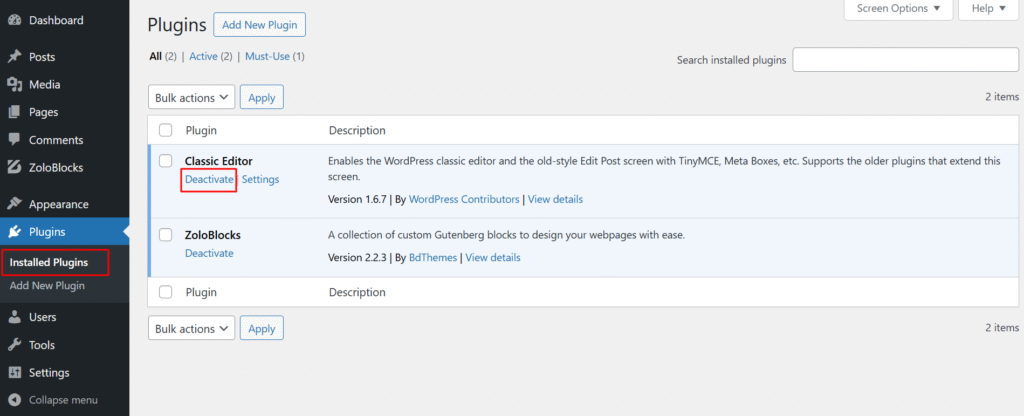
- If the Classic Editor plugin is installed, go to Plugins > Installed Plugins, locate Classic Editor, and deactivate it.
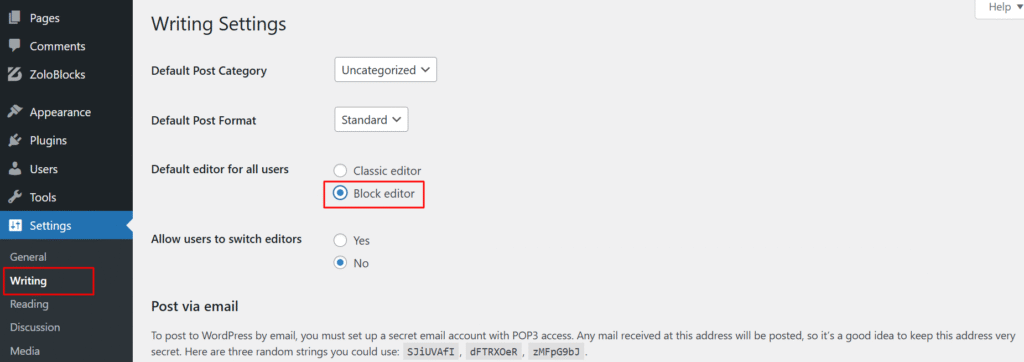
- You can also Manually Enable Gutenberg from Settings > Writing and choosing Block Editor as the default editor and Save Changes.
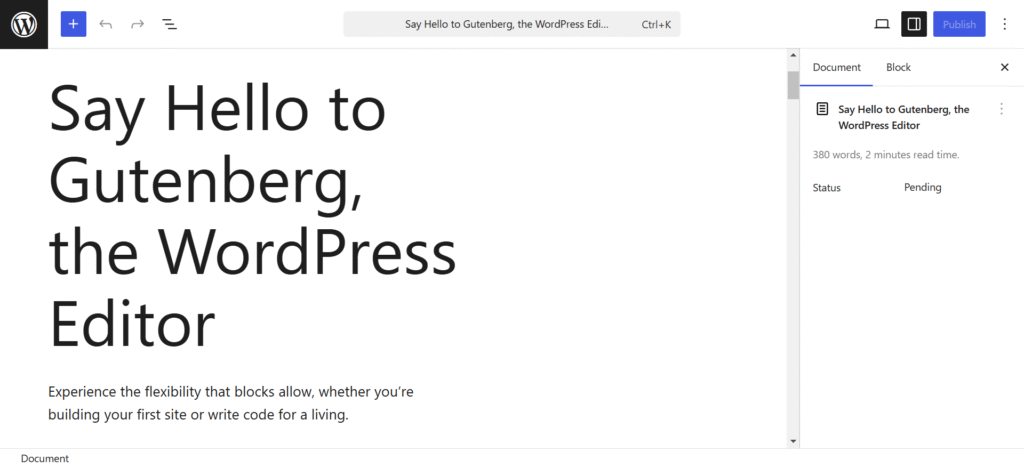
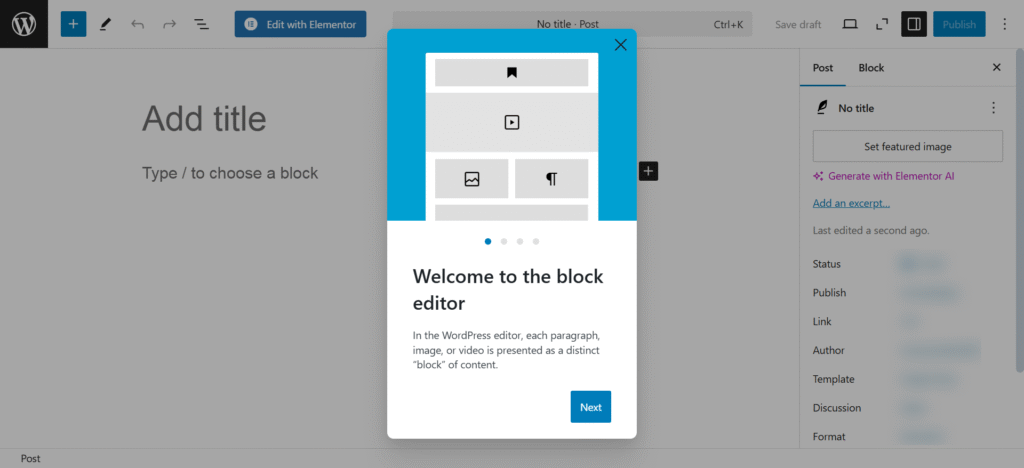
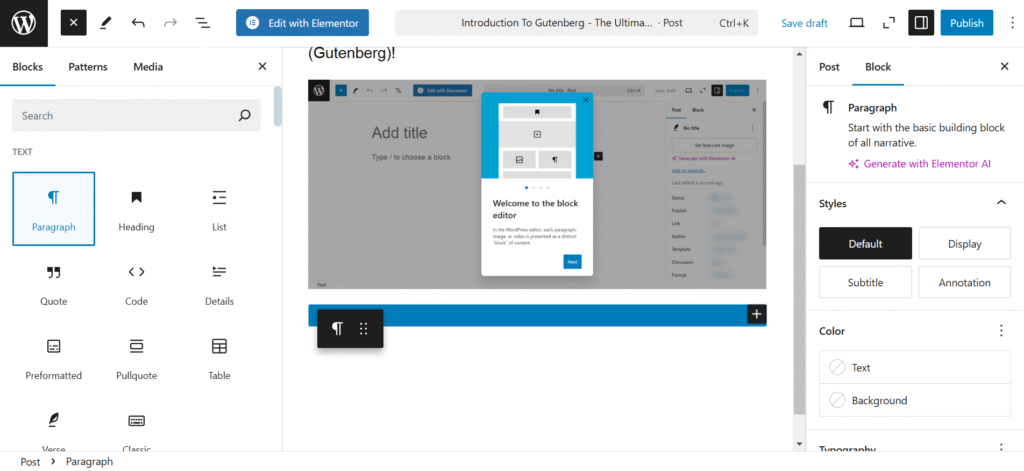
Understanding the Block Editor Interface
When you first open the WordPress Block Editor, you’ll see:
- Top Toolbar: Contains saving options, undo/redo buttons, and editor settings
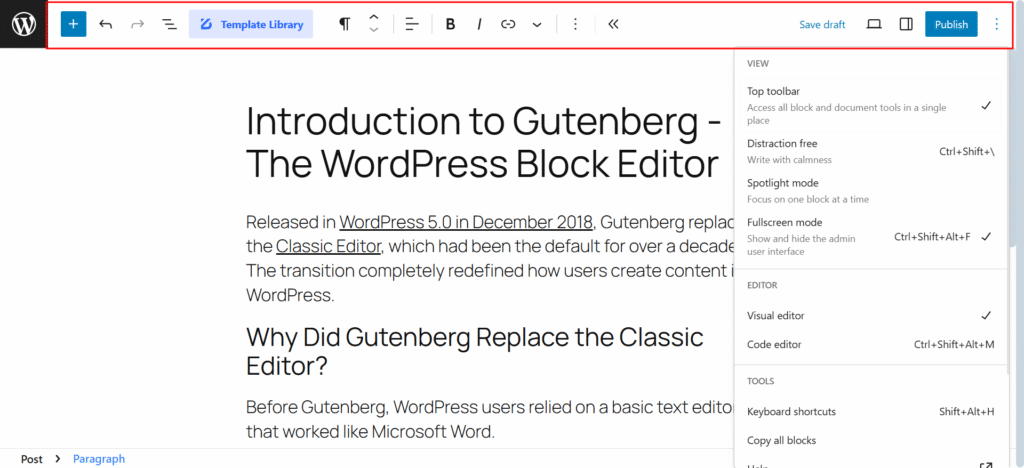
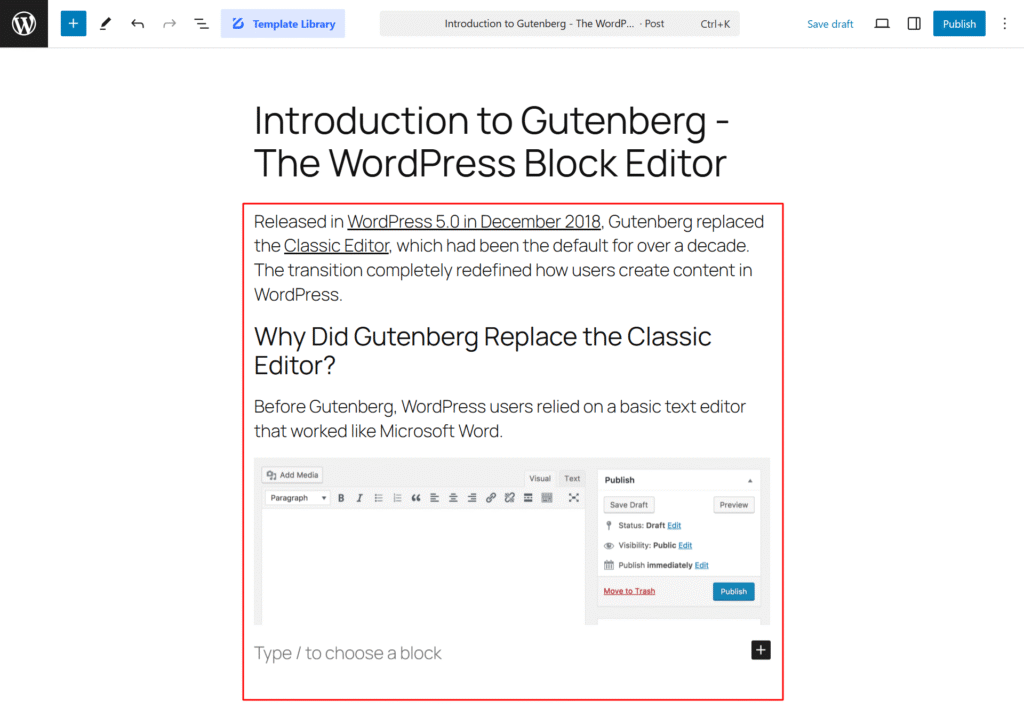
- Content Area: The main editing space where you’ll add blocks
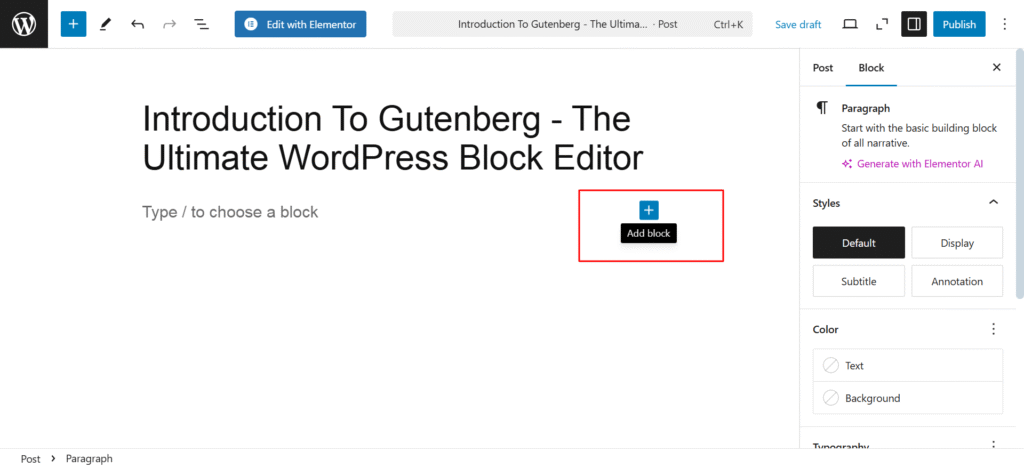
- Block Inserter (+): Click to add new blocks
- Settings Sidebar: Shows block-specific settings and document settings
- Block Toolbar: Appears above selected blocks with formatting options
How to Add Your First Block
To start using the WordPress Block Editor:
- Click the “+” icon to open the block inserter
- Browse categories or search for specific block types

- Click on a block to add it to your page
- Type or add content to the block
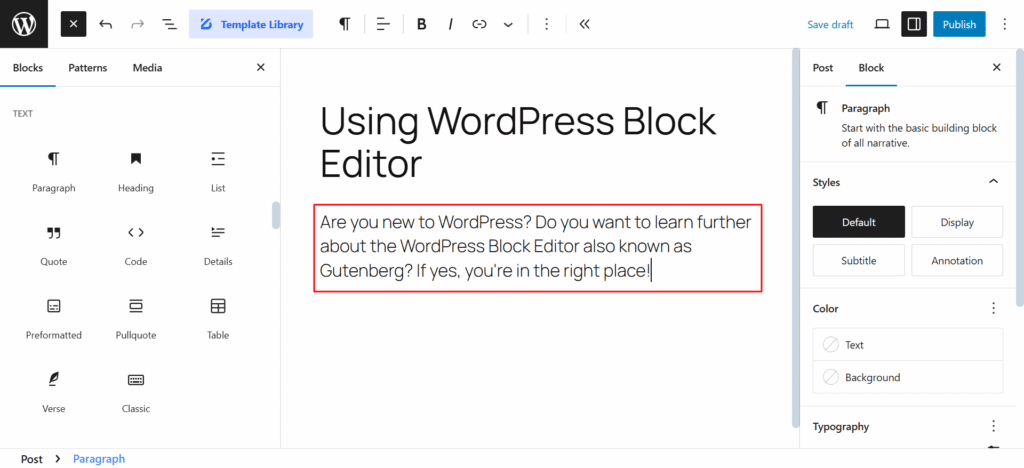
The most common block is the Paragraph block, which is added by default when you start typing.
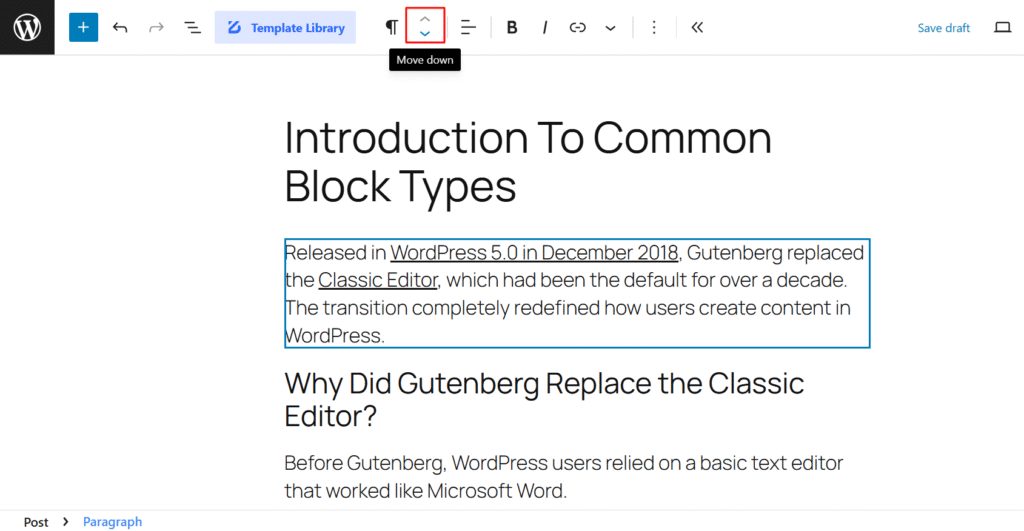
Basic Block Edits
Here’s how to use Gutenberg WordPress for basic block operations:
- Select a block: Click on it
- Move a block: Drag the six-dot handle on the left of the block, or use the up/down arrows in the block toolbar
- Delete a block: Select it and press Delete, or click the three-dot menu and select “Remove Block”
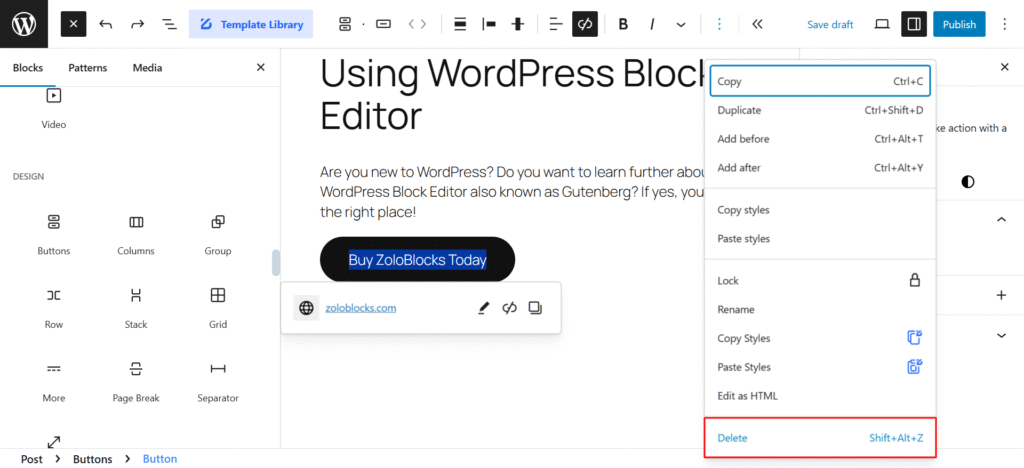
- Duplicate a block: Click the three-dot menu and select “Duplicate” or use the keyboard shortcut Ctrl+D (or Cmd+D on Mac)
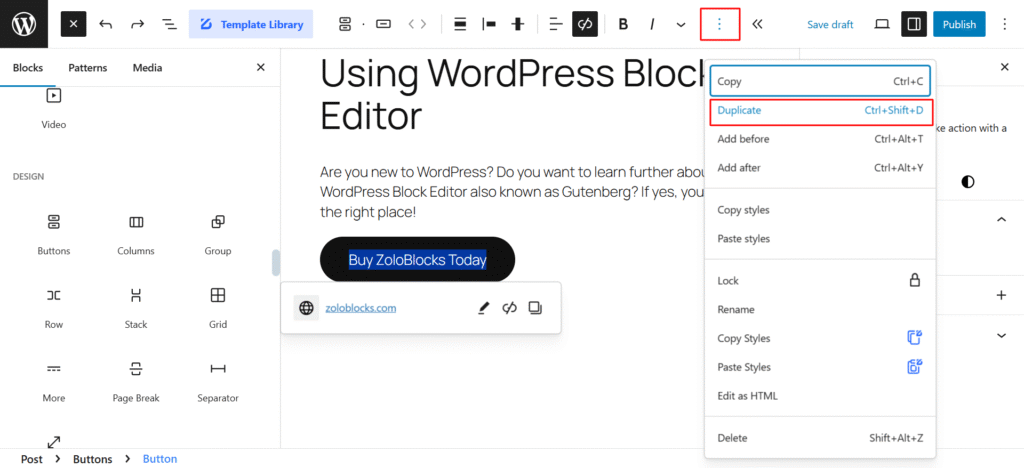
- Save a block for reuse: Click the three-dot menu and select “Add to Reusable blocks”
Essential Blocks for Beginners
Learning how to use the WordPress Block Editor starts with understanding these fundamental blocks:
Paragraph Block

The Paragraph block is automatically inserted when you start typing. It includes formatting options like:
- Text alignment
- Bold, italic, and strikethrough formatting
- Text color and background color
- Drop cap option
- Font size adjustment
Heading Block
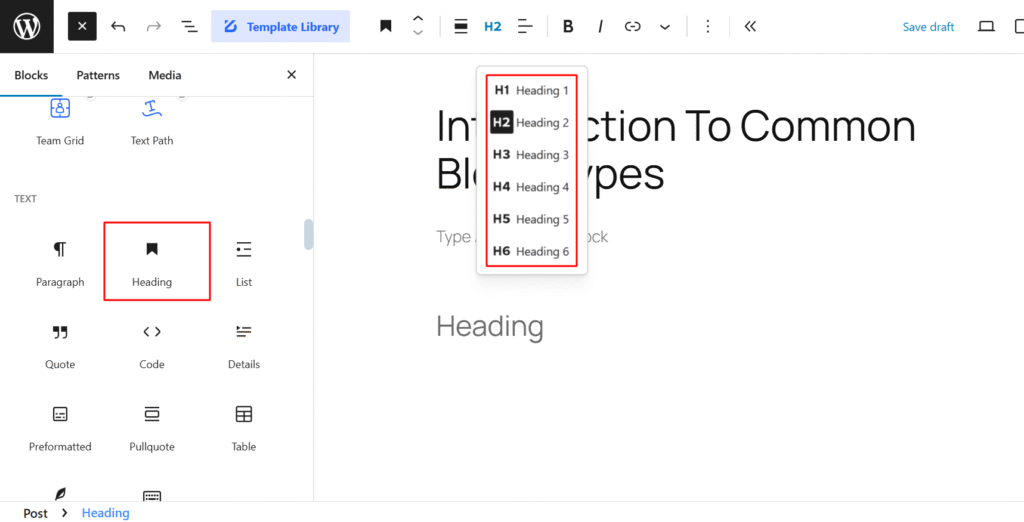
Use Heading blocks to structure your content with H1-H6 tags, which are crucial for SEO and accessibility. To add a Heading block:
- Click the “+” icon
- Select “Heading”
- Choose your heading level (H2-H6) from the toolbar
- Type your heading text
Image Block
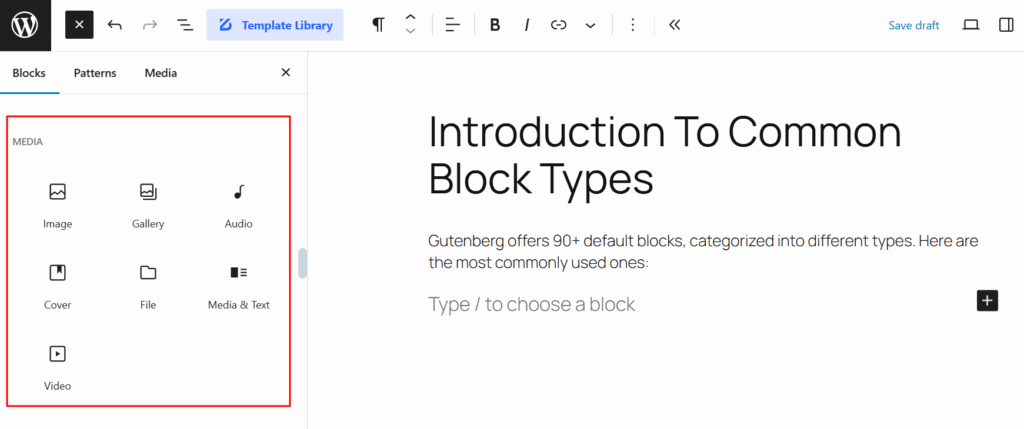
To add images using the WordPress Block Editor:
- Insert an Image block
- Upload a new image, select from your media library, or insert a URL
- Use the sidebar settings to adjust size, add alt text, and set alignment
List Block
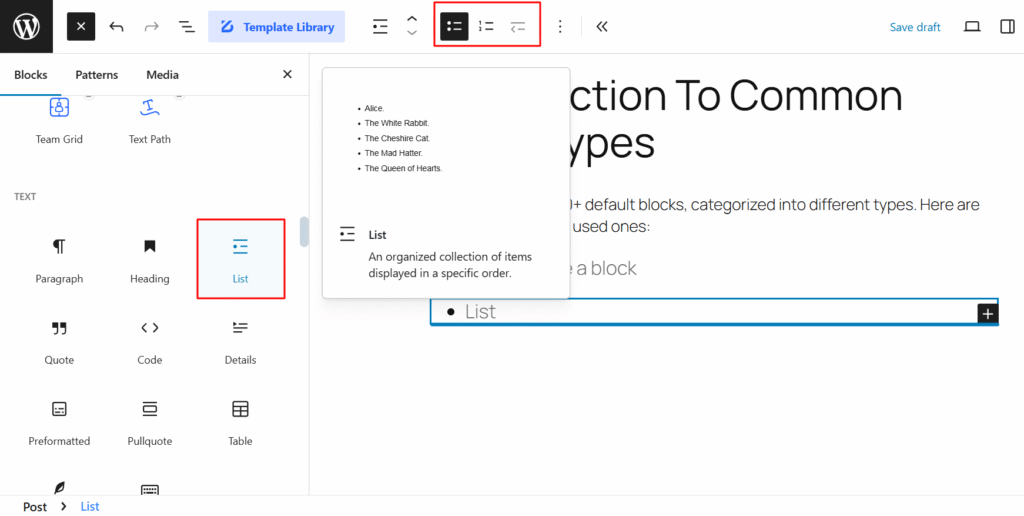
Create ordered (numbered) or unordered (bullet) lists easily:
- Add a List block
- Select list type (ordered or unordered) from the toolbar
- Type your list items, pressing Enter to create new items
- Use Tab to create nested lists
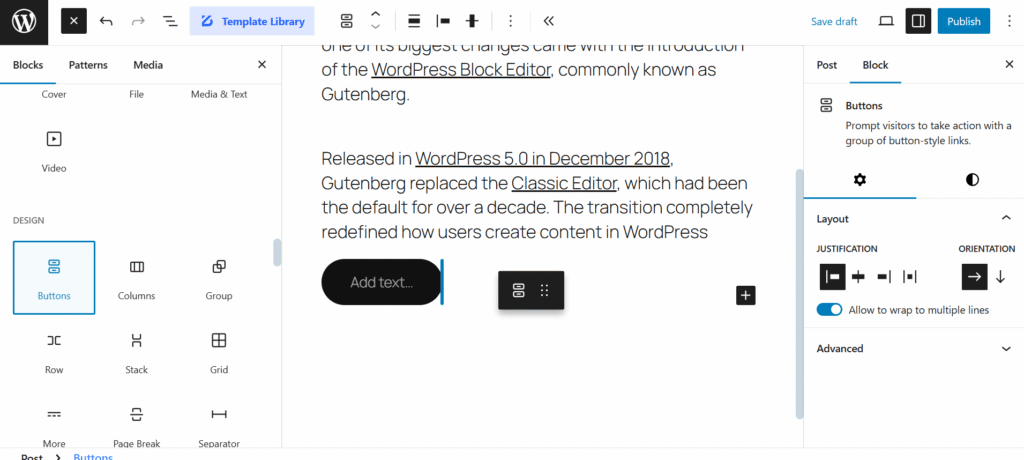
Columns Block

The Columns block lets you create multi-column layouts:
- Add a Columns block
- Select the number of columns you want
- Add blocks inside each column
- Adjust column widths using the resize handles
Working with WordPress Block Editor Templates
WordPress Block Editor templates give you pre-designed layouts to speed up page creation. Here’s how to use WordPress Block Editor templates:
Using Pre-made Block Patterns
Block patterns are pre-designed block arrangements that you can insert and customize:
- Click the “+” icon in the editor
- Select the “Patterns” tab
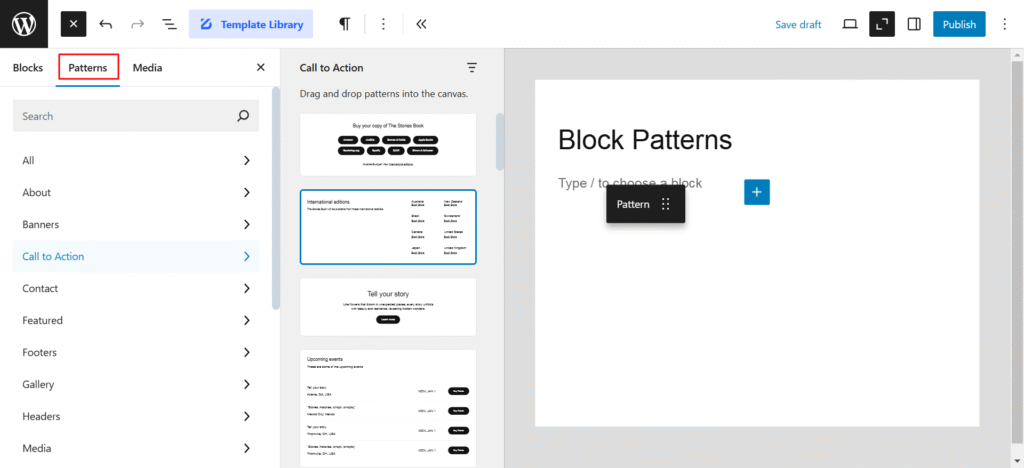
- Browse available pattern categories
- Click on a pattern to add it to your page
Creating and Saving Block Templates
To create your own templates for reuse:
- Build a layout using multiple blocks
- Select all blocks you want to include
- Click the three-dot menu and select “Add to Reusable blocks”
- Name your template
- Access it later from the Reusable tab in the block inserter
Using Full Site Editing Templates (FSE)
If your theme supports Full Site Editing:
- Go to Appearance > Editor in your dashboard

- Browse available templates, such as Header, Footer, Single Post, and more.
- Edit these templates using blocks to change your entire site’s structure
Advanced Block Editor Techniques
Once you understand the basics of how to use Gutenberg, try these more advanced techniques:
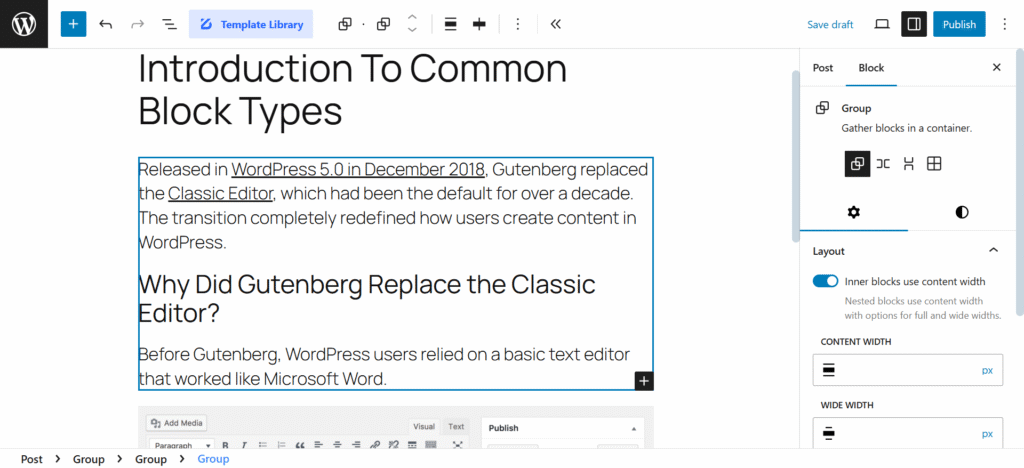
Block Groups and Nesting
Group related blocks together for easier manipulation:
- Select multiple blocks
- Click “Group” in the toolbar
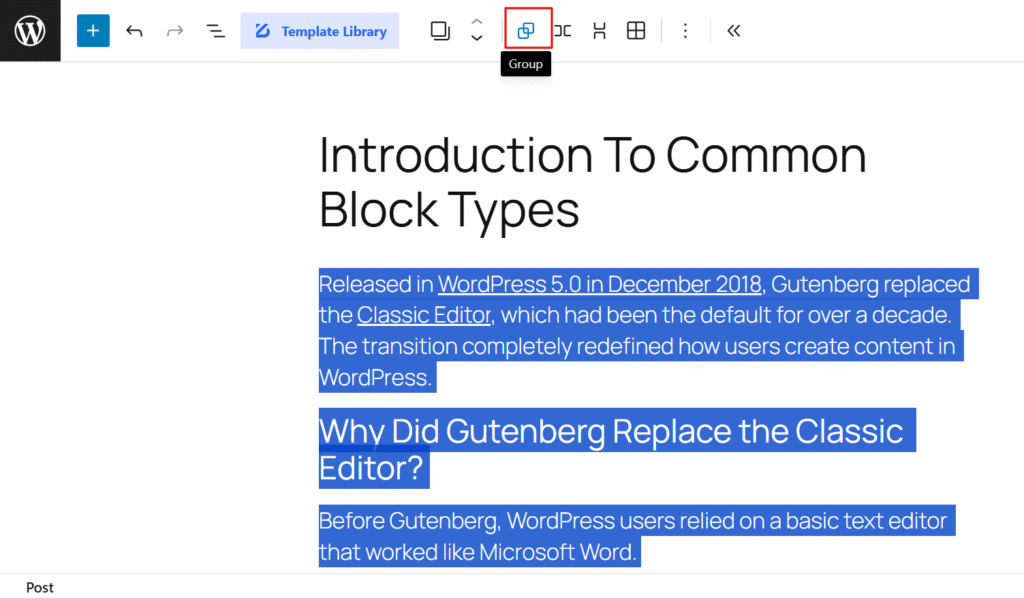
- Add styling to the entire group at once
You can also nest blocks within other blocks for complex layouts.
Using the Block Navigation
For complex pages with many blocks:
- Click the “List View” icon in the top toolbar
- See a hierarchical list of all blocks on your page
- Click any block in the list to jump to it
- Drag blocks in the list view to reorder them
Custom CSS for Blocks
For more design control:
- Select a block
- In the sidebar, open the “Advanced” dropdown
- Add custom CSS classes or inline CSS
12 Advanced Tips for WordPress Block Editor Mastery
Now that you know how to use the new WordPress Block Editor, here are 12 advanced tips to take your Gutenberg skills to the next level:
Tip 1: Master Keyboard Shortcuts
Speed up your workflow with these essential shortcuts:
- / – Start typing to search for blocks
- Ctrl+Z / Cmd+Z – Undo
- Ctrl+Shift+Z / Cmd+Shift+Z – Redo
- Ctrl+S / Cmd+S – Save changes
- Shift+Alt+H – Display all keyboard shortcuts
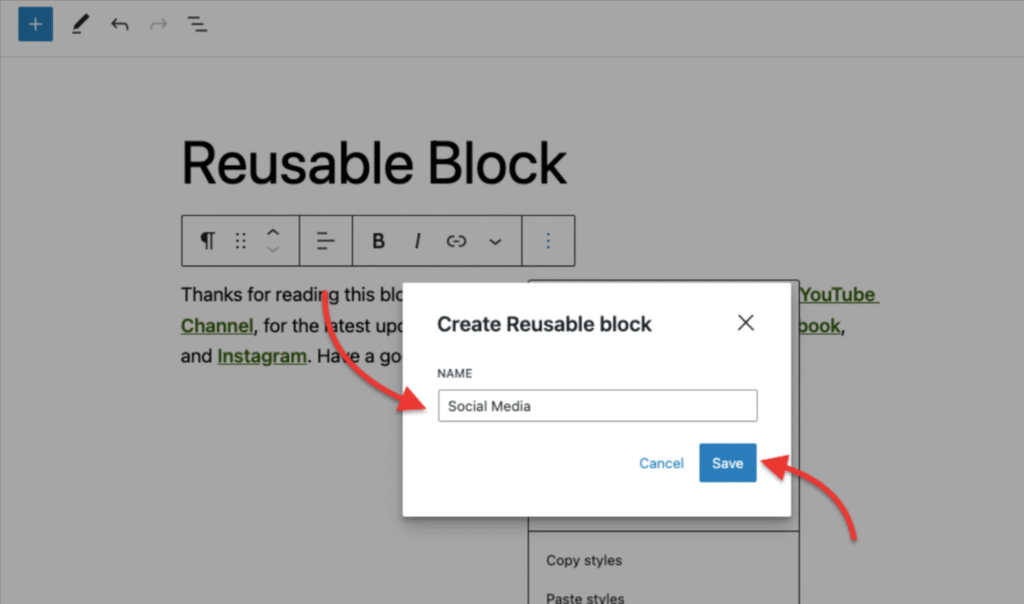
Tip 2: Create Reusable Block Libraries
Build a library of reusable blocks for elements you frequently use:
- Create and style a block or group of blocks
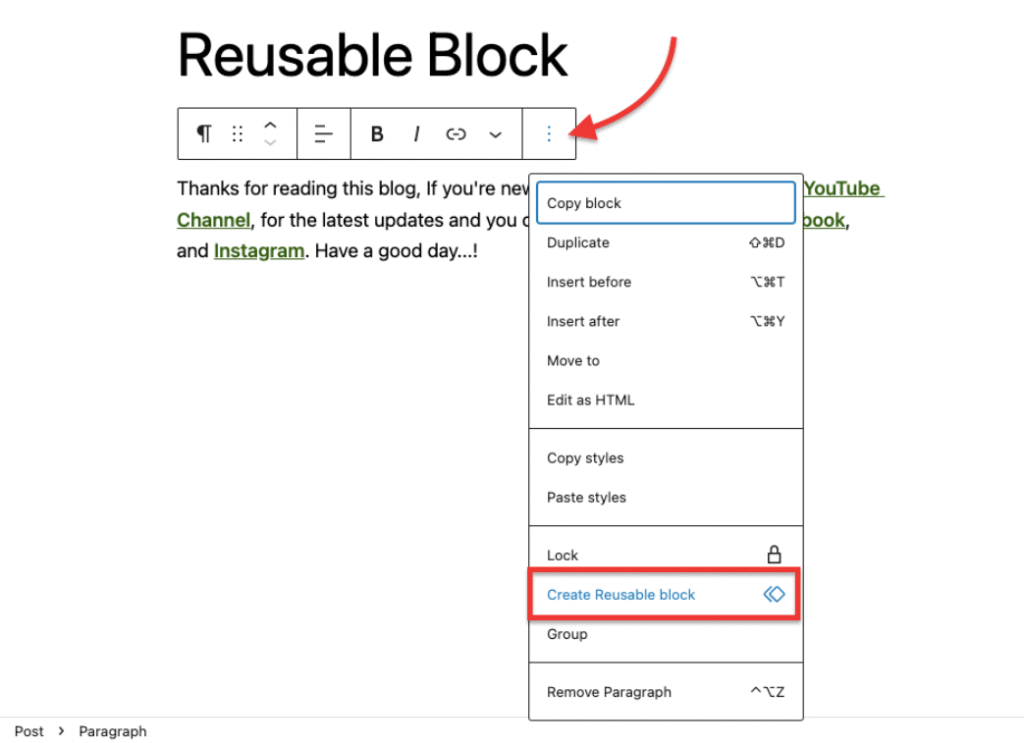
- Select the block(s) and click the three-dot menu
- Choose “Add to Reusable blocks” and name it
- Access your library via the Reusable tab in the block inserter

- Manage all reusable blocks at Dashboard > Reusable Blocks
When you update a reusable block, the changes apply to every instance across your site.
Tip 3: Utilize Block Patterns for Complex Layouts
Block patterns can dramatically speed up page creation:
- Install pattern-rich themes or plugins
- Create your own patterns with the Code Snippets plugin
- Use the Pattern Directory at WordPress.org for inspiration
Tip 4: Implement Custom Block Styles

Add custom styling options to existing blocks:
- Install the Styles API plugin or add code to your theme’s functions.php
- Create style variations for blocks
- Access these styles from the block sidebar
Tip 5: Master Block Transformations
Convert blocks from one type to another while preserving content:
- Select any block
- Click the block type icon in the toolbar
- Select “Transform to” from the dropdown
- Choose the desired block type
For example, transform paragraphs to lists, quotes to headings, or multiple paragraphs to columns.
Tip 6: Use Advanced Query Loops

Create dynamic content displays with Query Loop blocks:
- Add a Query Loop block
- Configure post type, categories, tags, and other filtering options
- Select a display template (list, grid, etc.)
- Customize the template to show exactly what you want
Perfect for portfolios, testimonials, product catalogs, or news sections.
Tip 7: Implement Block Locking

Prevent accidental changes to important content:
- Select a block or group
- Click the three-dot menu
- Choose “Lock”
- Select whether to prevent moving, removing, or both
Particularly useful for templates used by multiple team members.
Tip 8: Create Custom Block Templates for Post Types
Set default block layouts for specific post types:
- Add this code to your theme’s functions.php:
function register_custom_post_template() {
$post_type_object = get_post_type_object( ‘post’ );
$post_type_object->template = array(
array( ‘core/heading’, array(
‘level’ => 2,
‘placeholder’ => ‘Add title here…’
) ),
array( ‘core/paragraph’, array(
‘placeholder’ => ‘Write introduction here…’
) ),
array( ‘core/image’ ),
array( ‘core/paragraph’ ),
);
}
add_action( ‘init’, ‘register_custom_post_template’ );
- Customize the template array with your preferred blocks
- Every new post will start with this structure
Tip 9: Utilize Block-Specific CSS Classes
Target specific blocks with CSS for detailed customization:
- Add the Additional CSS Class in a block’s Advanced settings
- Use these classes in your theme’s custom CSS
- Create block-specific styling without affecting other content
For example:
.wp-block-cover.hero-section {
min-height: 80vh;
animation: fadeIn 1s ease-in;
}
Tip 10: Implement Conditional Block Display
Show different blocks based on user conditions using a plugin like Block Visibility:
- Install and activate the Block Visibility plugin
- Select any block
- Configure visibility conditions (logged-in status, user role, date/time, etc.)
- Save your settings
Great for membership sites, time-sensitive content, or role-specific information.
Tip 11: Master Full Site Editing

If your theme supports it, take advantage of Full Site Editing:
- Use Template Parts for reusable sections
- Create custom templates for different page types
- Build template hierarchies for consistent branding
- Edit global styles for site-wide design control
Tip 12: Optimize Blocks for Performance
Keep your site running smoothly:
- Use WebP images instead of PNGs or JPEGs
- Implement lazy loading for image blocks
- Minimize use of heavy blocks like embeds on critical pages
- Use the Performance Lab plugin to identify block-specific optimizations
- Consider AMP compatibility if using Google’s Accelerated Mobile Pages
Creating Effective Contact Forms with Ultra Addons for Contact Form 7
An essential element of any WordPress website is a well-designed contact form.
Let’s explore how to use Gutenberg WordPress to implement contact forms using Contact Form 7 with the powerful Ultra Addons for Contact Form 7 extension.
Why Choose Contact Form 7 with Ultra Addons for Contact Form 7?
Contact Form 7 is one of the most popular WordPress form plugins, with over 5 million active installations. When enhanced with Ultra Addons for Contact form 7, you gain access to:
- Advanced form styling options
- Conditional fields
- Multi-step forms
- Form templates
- Enhanced anti-spam protection
- Advanced validation
- Custom redirects
Installing and Activating Contact Form 7 and Ultra Addons
To get started, install and activate both the Contact Form 7 plugin and the Ultra Addons for Contact Form 7 plugin
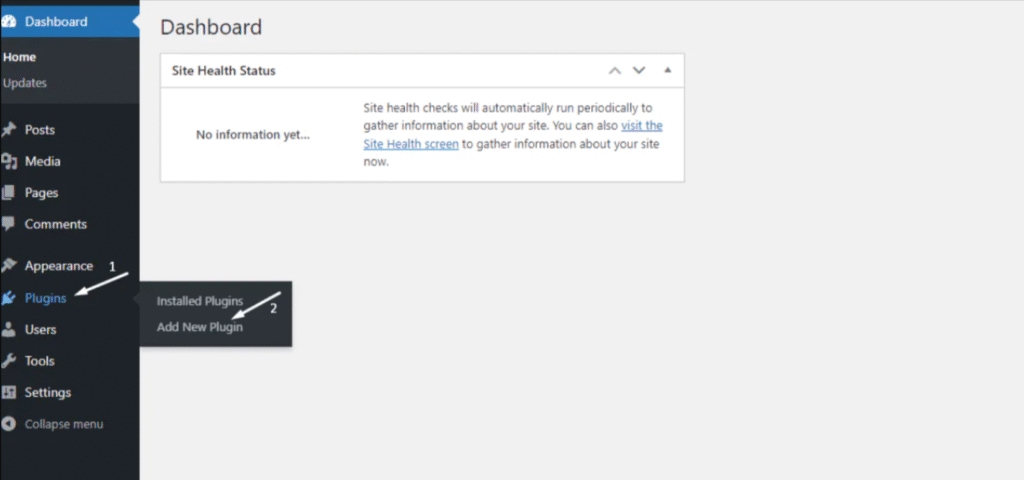
- From your WordPress dashboard, head to Plugins > Add New Plugin.
- Search for ‘Contact Form 7’ in the plugin search box.
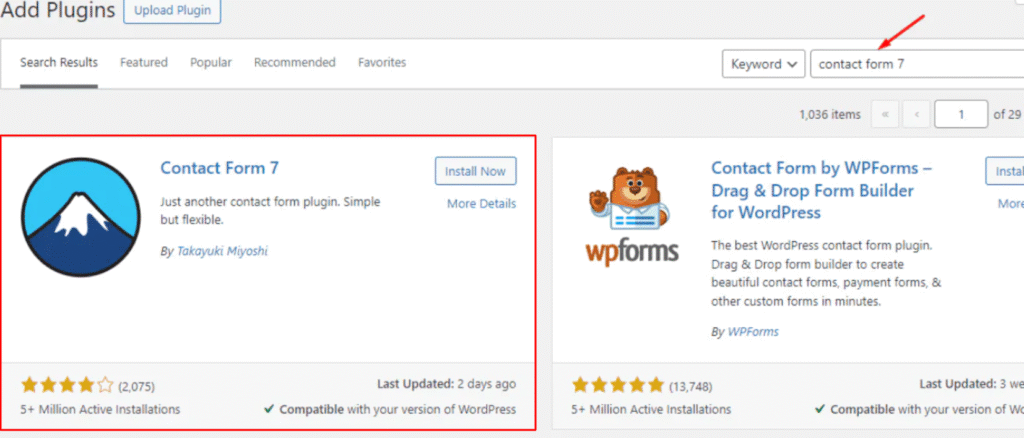
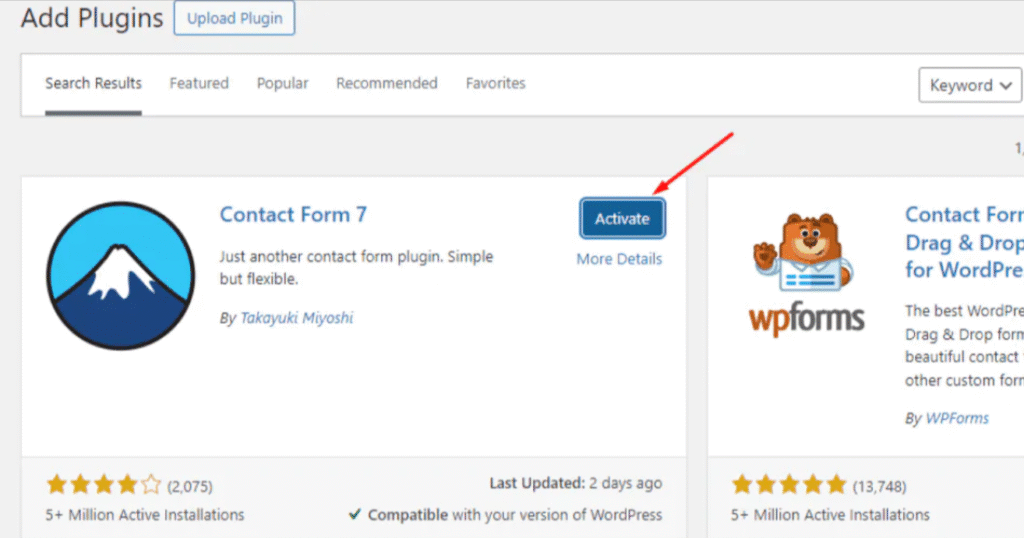
Once the plugin appears:
- Install and Activate the plugin.
- In a similar way, search for CF7Addon on the plugin search box by heading to Plugins > Add New Plugin from your WordPress dashboard.
- Search for ‘Ultimate Addons for Contact Form 7’ in the plugin search box.

- Select Install.

- Hit Activate.

Setting Up Ultra Addons for Contact Form 7
Once installed, you’ll be redirected to the Setup Wizard page.
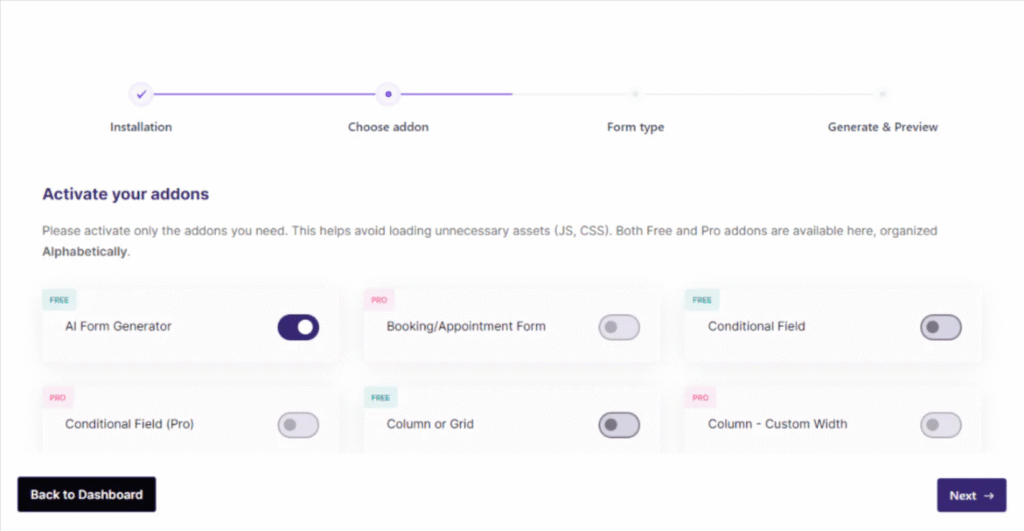
- Slowly scroll down the wizard page and enable all the free features you need.
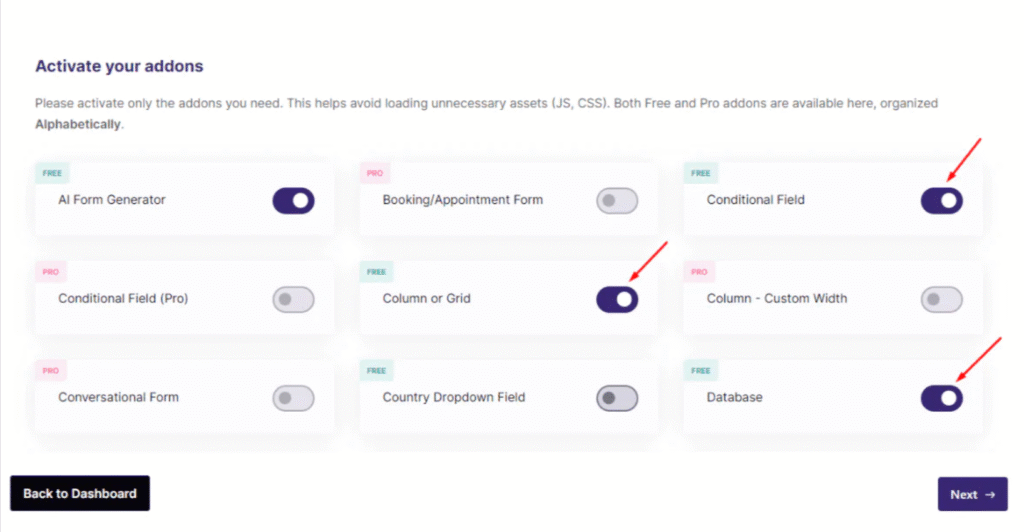
- Ensure that the Multi-step Form feature is toggled on.

- Once you’ve selected all necessary features, click the Next button.

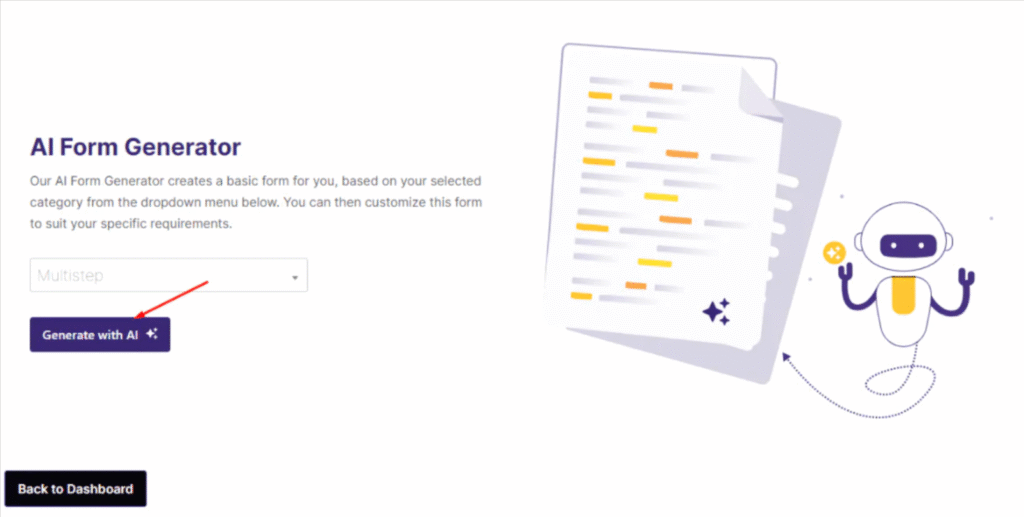
Using the AI Form Generator to Create a Multi-Step Form
- On the next screen, you will see the AI Form Generator page.
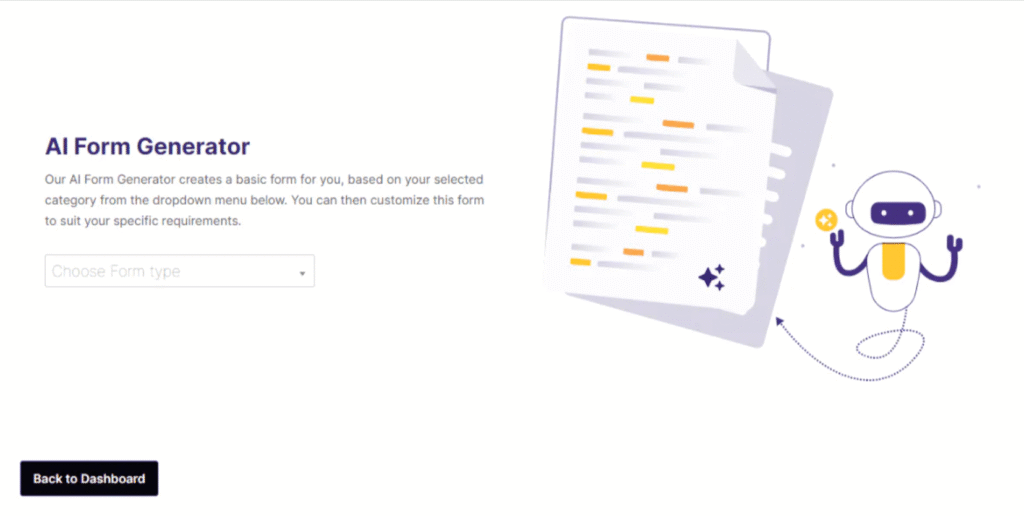
- You can either use the AI generator or click Back to Dashboard to exit.
For this guide, select Multistep from the form type dropdown menu in the AI Form Generator.
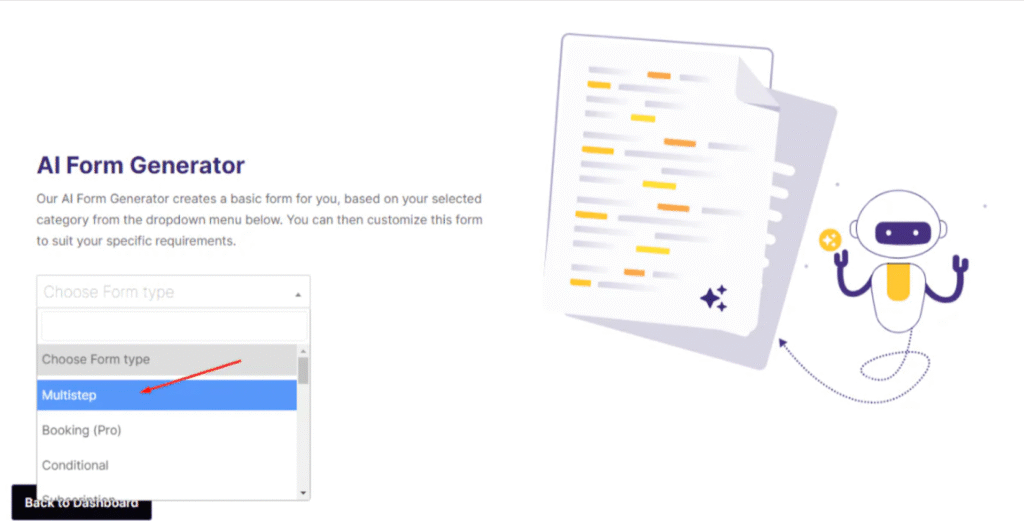
- Click the Generate with AI button.
- Then, click the Create your form button.
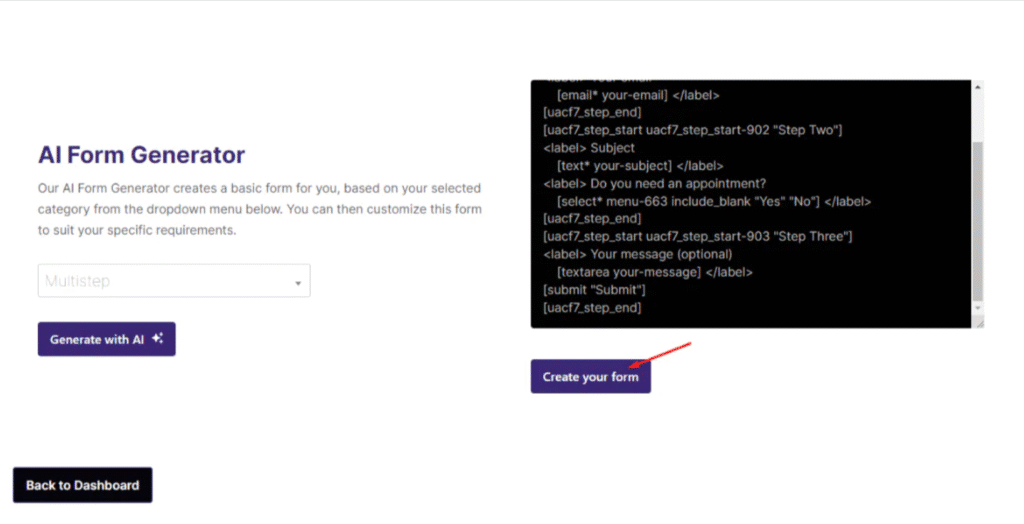
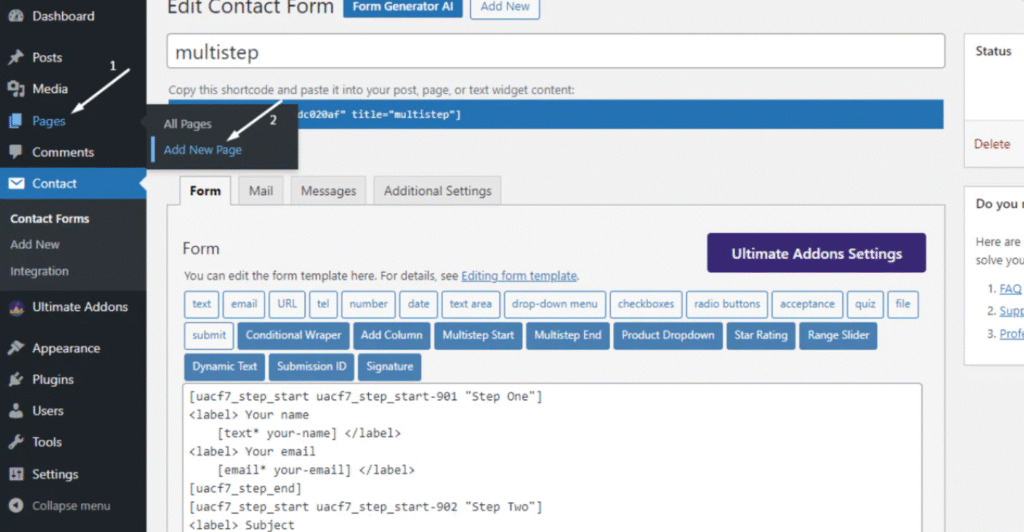
After this, you’ll be redirected back to your WordPress Admin Dashboard, and a new contact form titled multistep will appear.
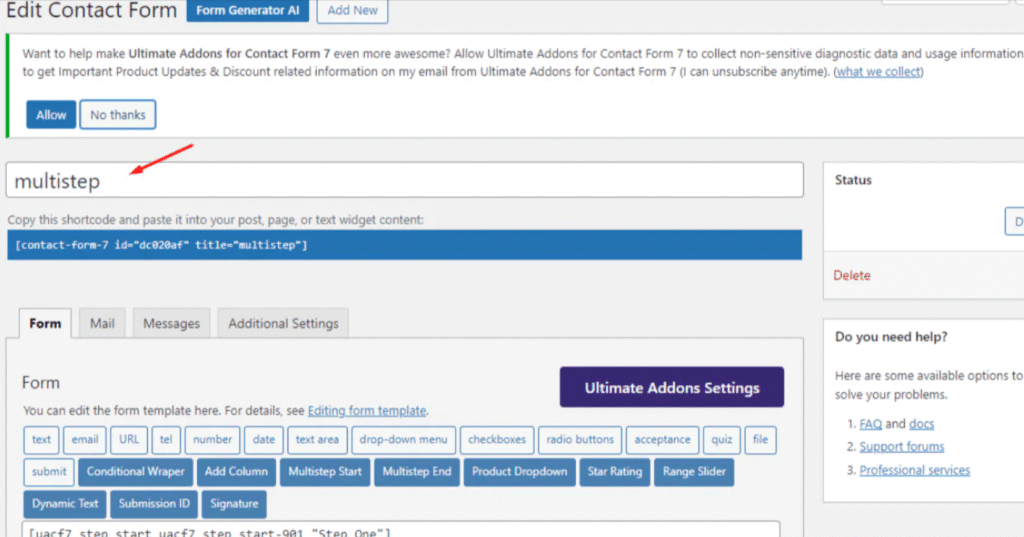
You may also see a message from Ultimate Addons for Contact Form 7 regarding user consent. Choose Allow or No Thanks as preferred.
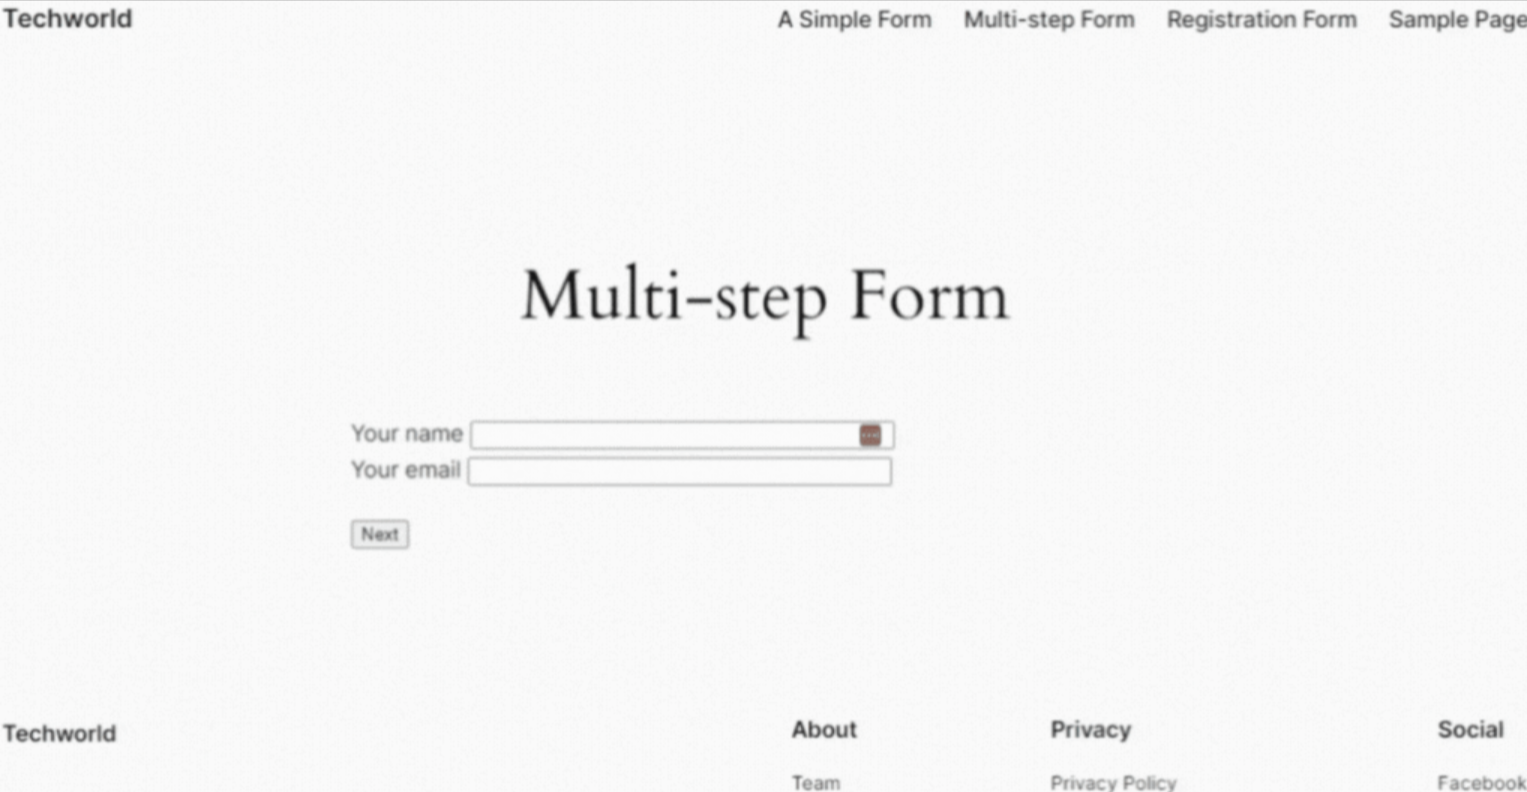
Displaying the Multi-Step Form on a Page
- Copy the shortcode for the newly created multi-step form.
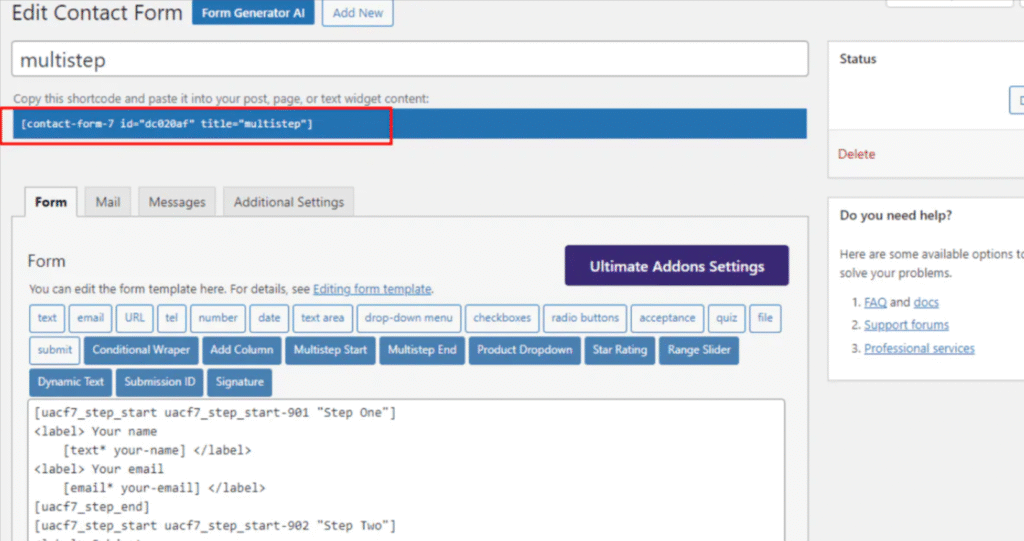
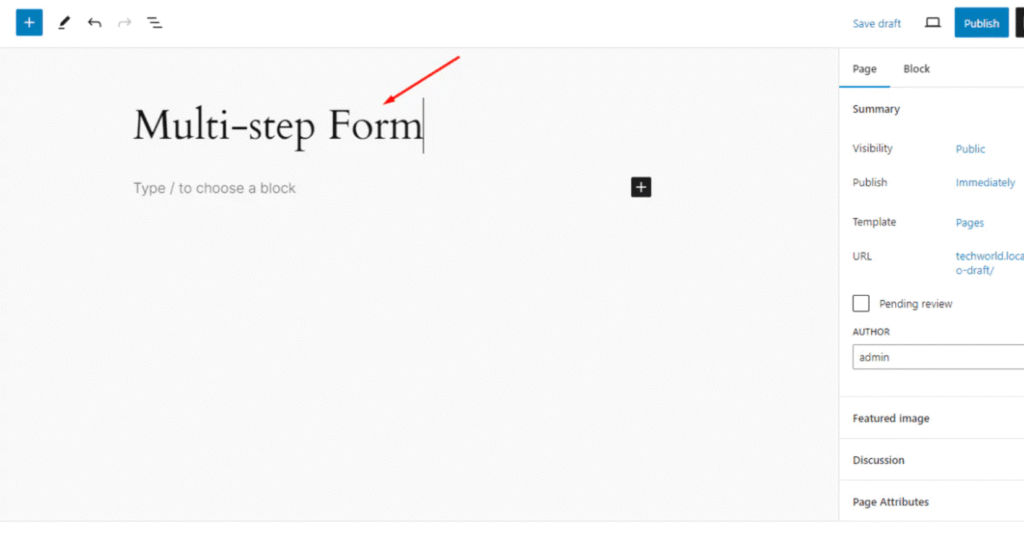
- Navigate to Pages > Add New.
- Name your new page (e.g., “Multi-step Form”).
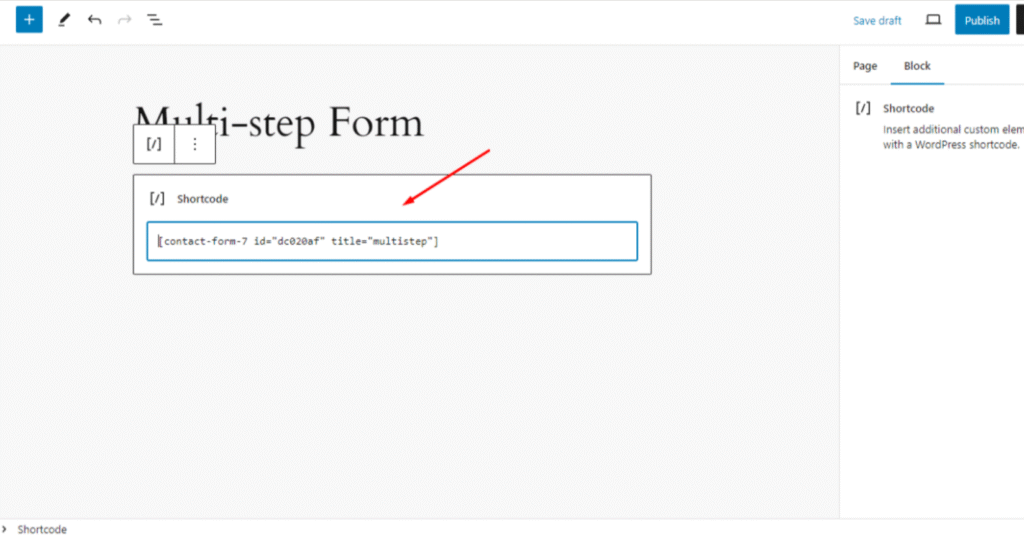
- Paste the copied shortcode into a block on this page.
- Click the Publish button.
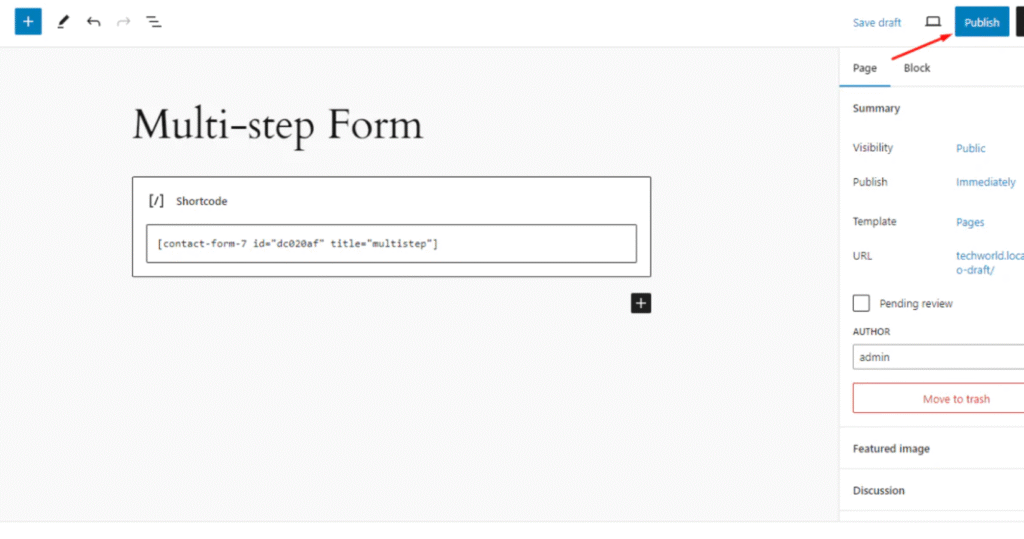
Now, visit the page you just created to view the multi-step form in action.
For more advanced features and tutorials, visit the CF7Addons documentation.
Optimizing Your WordPress Block Editor Experience
As you continue to use Gutenberg WordPress for your website building, consider these optimization strategies:
Keep Plugins Updated
The WordPress Block Editor continues to evolve, as do the plugins that extend it. Regular updates ensure compatibility and access to new features.
Consider Block-Optimized Themes
Themes designed specifically for the Block Editor, especially those supporting Full Site Editing, provide the best Gutenberg experience.
Use Browser Developer Tools
When working with complex layouts, your browser’s developer tools can help troubleshoot display issues or identify CSS classes for custom styling.
Optimize Your Workflow
Create templates for common page layouts, develop a reusable block library, and establish brand style guidelines to maintain consistency.
Conclusion
The WordPress Block Editor (Gutenberg) has transformed how websites are built on WordPress, empowering users with unprecedented design flexibility without requiring coding knowledge. By understanding how to use the WordPress Block Editor effectively, you can create sophisticated, responsive websites that stand out from the crowd.
From basic block manipulation to advanced template creation, mastering Gutenberg opens up endless possibilities for your WordPress projects. As you implement the 12 advanced tips covered in this guide and explore the power of integrations like Ultra Addons for Contact Form 7, you’ll discover that the Block Editor is not just an editing tool but a complete website-building system.
Ready to start building? Log in to your WordPress dashboard, create a new page, and begin experimenting with the WordPress Block Editor today!