The wait is over! Now, you can apply more Contact Form 7 styles to make your website forms look more attractive and act more functional. Many use this popular form builder tool to build easy-to-use forms on their WordPress websites.
But only a few consider stylizing those forms to match their website theme and brand identity. Some remain successful at designing fantastic forms, while others fail since they don’t have the privilege to customize their website forms.
Nonetheless, following this comprehensive tutorial, you’ll be able to succeed at stylizing forms on your website. In this context, we discuss how to design and style a form built with contact form 7 using only a little CSS and a dedicated plugin.
Hence, let’s get straight into it.
Create a form with Contact Form 7
You can create a simple form with Contact Form 7 in just a few minutes. To create one, make sure you carefully follow all the steps below:
Step 1: Configuring a form with Contact Form 7
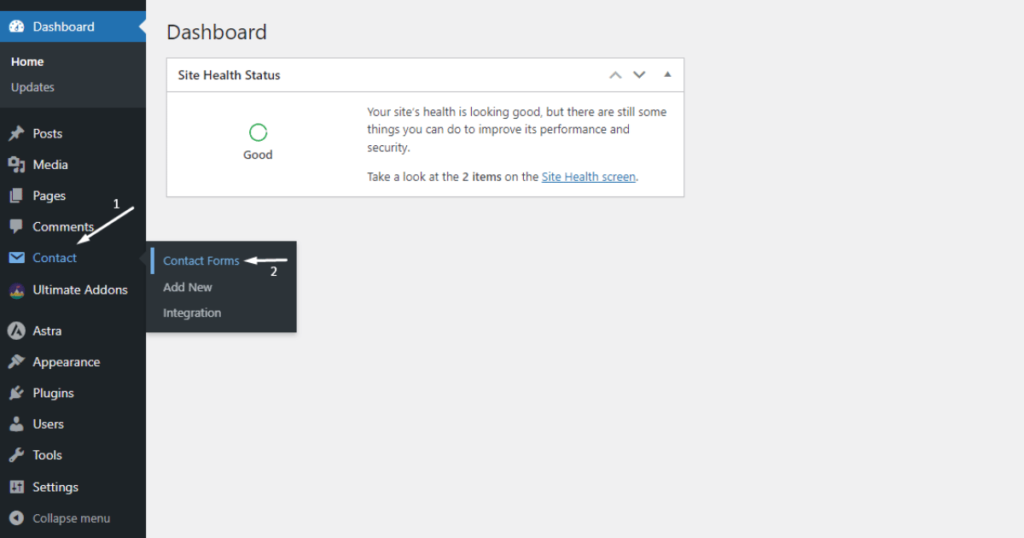
You just need to go to the WordPress Admin Dashboard and then navigate to Contact > Add New.

Now, give your contact form a name.
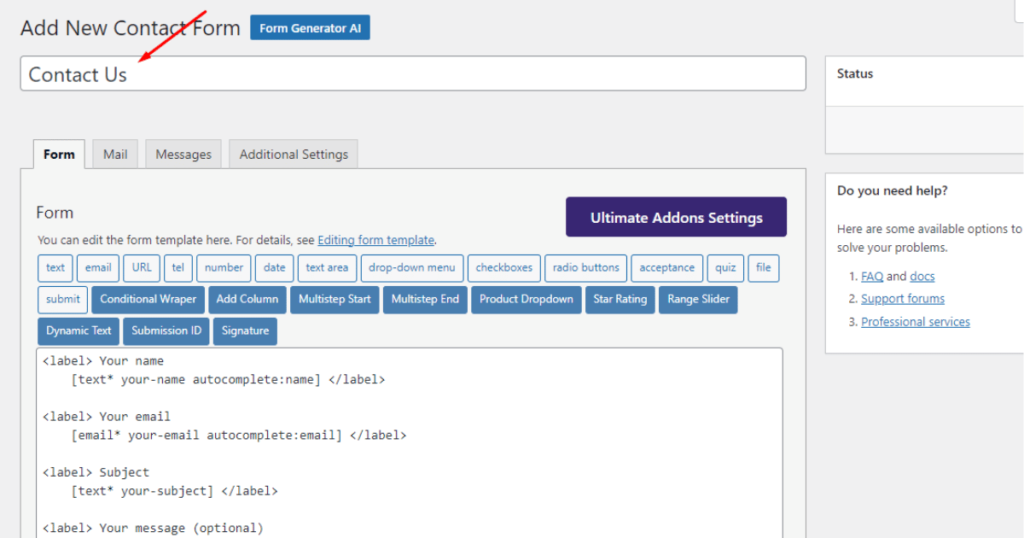
After that, scroll down to the bottom of this page and click the Save button.
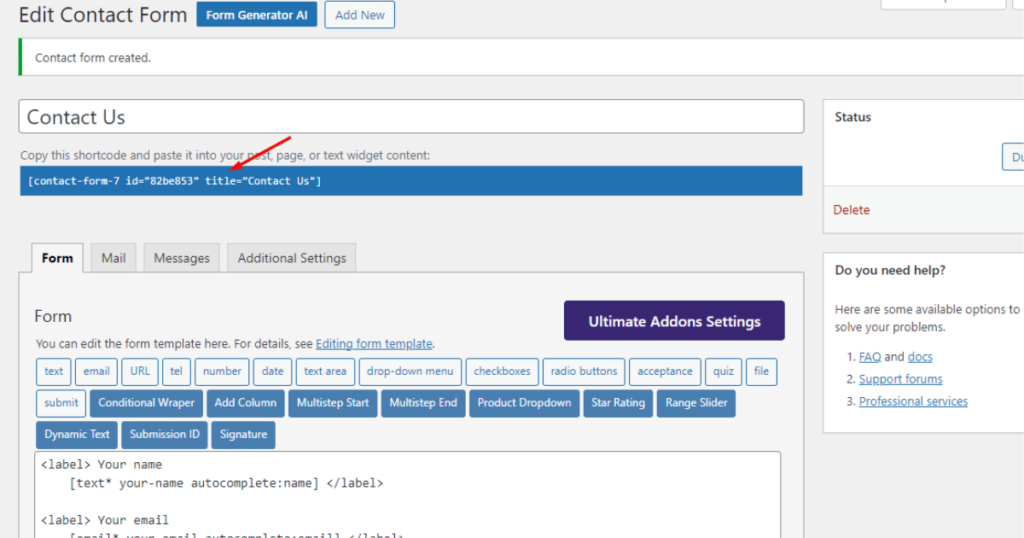
You’ll notice a shortcode underneath the title field. You need to copy it and save it in the notepad so you can use this code later for insertion.
Step 2: Publishing the Form
It’s time to display the contact form. You can show it on a new/existing page, a post, or a text widget content. We’ll insert this shortcode on a new page. So, to accomplish this task, we’ll head to Pages > Add New Page from the WordPress Admin Dashboard.

Afterward, we’ll add a title to that page.

Then, we’ll paste the copied contact form shortcode into a block underneath the title block.

Lastly, we’ll click the Publish button.

View from the frontend
Now, visit the page to see how this newly built form looks. Our one appears like the screenshot below. Your one may look different based on your WordPress theme.
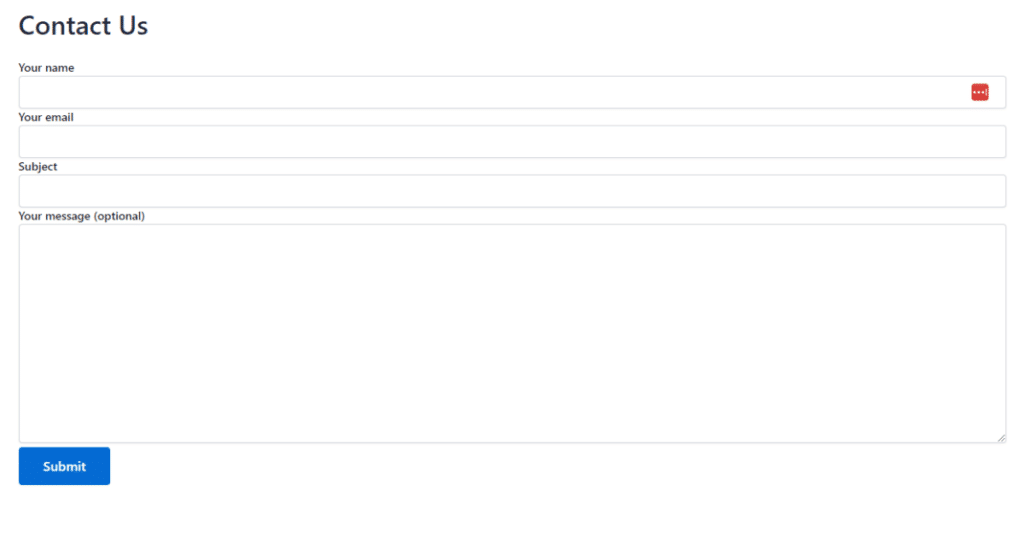
As you can see, it looks pretty simple. We’ll give this form a more professional outlook.
First, we’ll do this by customizing it with custom CSS, and then we’ll use a plugin called Ultra Addons For Contact Form 7.
Please read all the steps regarding the contact form design in the following sections. Hence, let’s begin with stylization.
Customize Contact Form 7 in WordPress with custom CSS
Before beginning, you need to thoroughly understand HTML and CSS to design a contact form without plugins. That said, in this article, we’ll show you a few Contact Form 7 CSS styling examples.
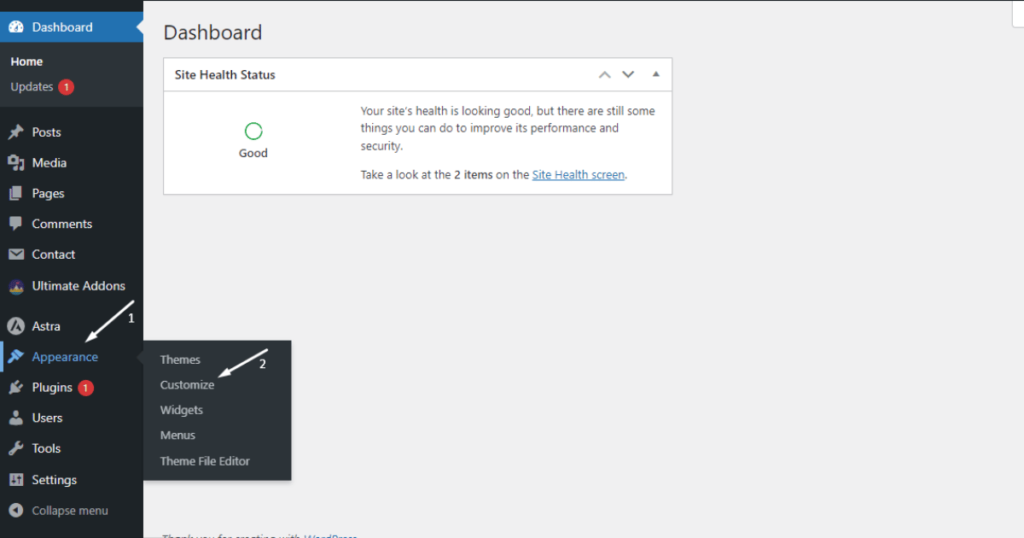
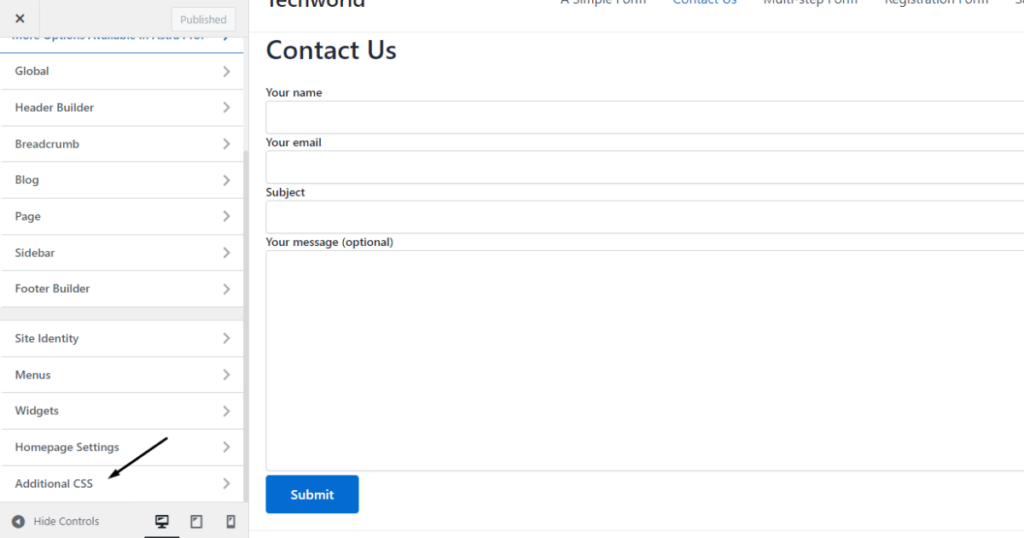
Let’s get started with Contact Form 7 stylization with custom CSS. First, navigate to Appearance > Customize from the WordPress Admin Dashboard.
Then, click the page where you’ve inserted the shortcode of a contact form. We’ve inserted our one on the Contact Us page. So, we’ll click on this page.
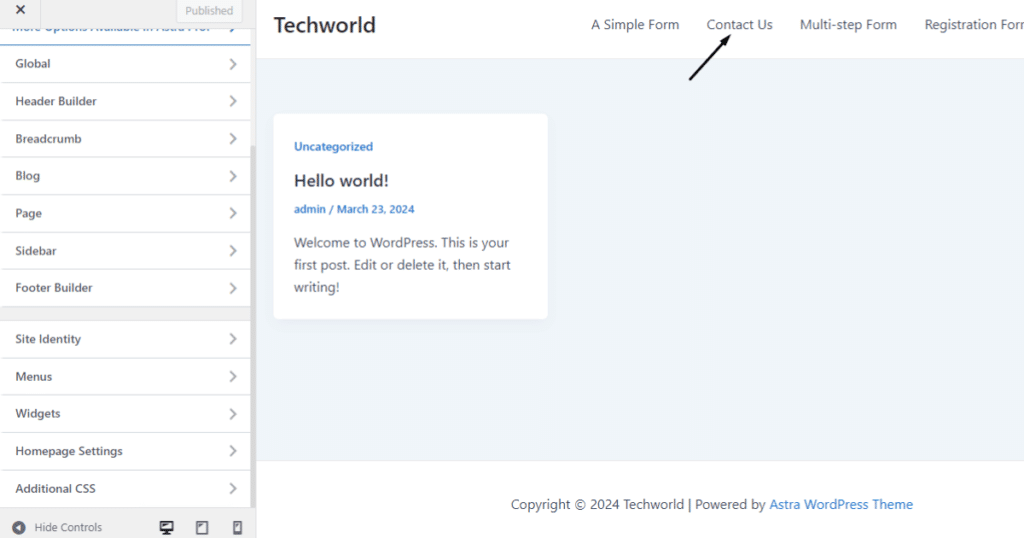
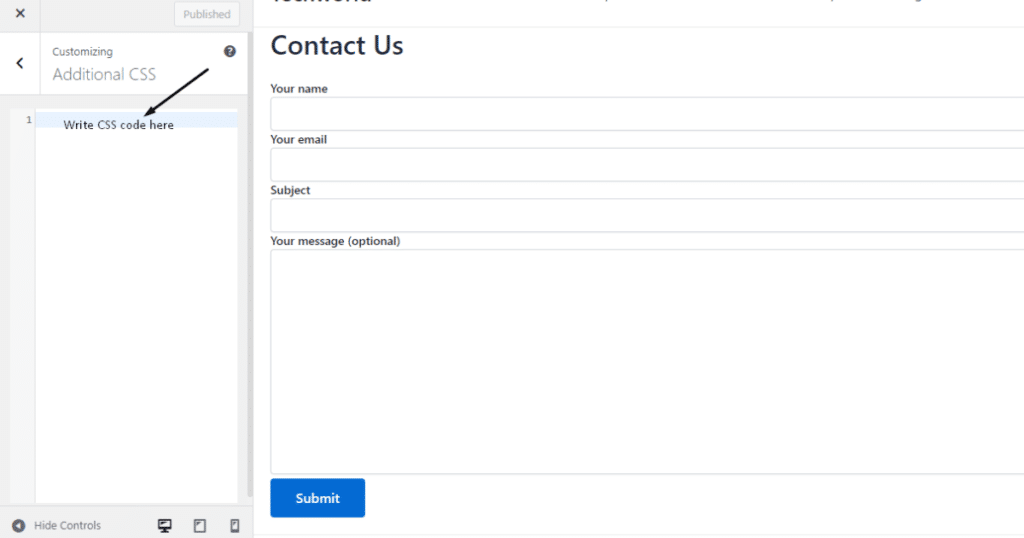
We click this page to see the changes we make using CSS in real time. We’ll now go to the Additional CSS tab from the left sidebar.
Then, we’ll see a box to write down CSS code to design the contact form.
Before writing down the CSS code, let’s discuss how the contact form works/interacts with different code elements.
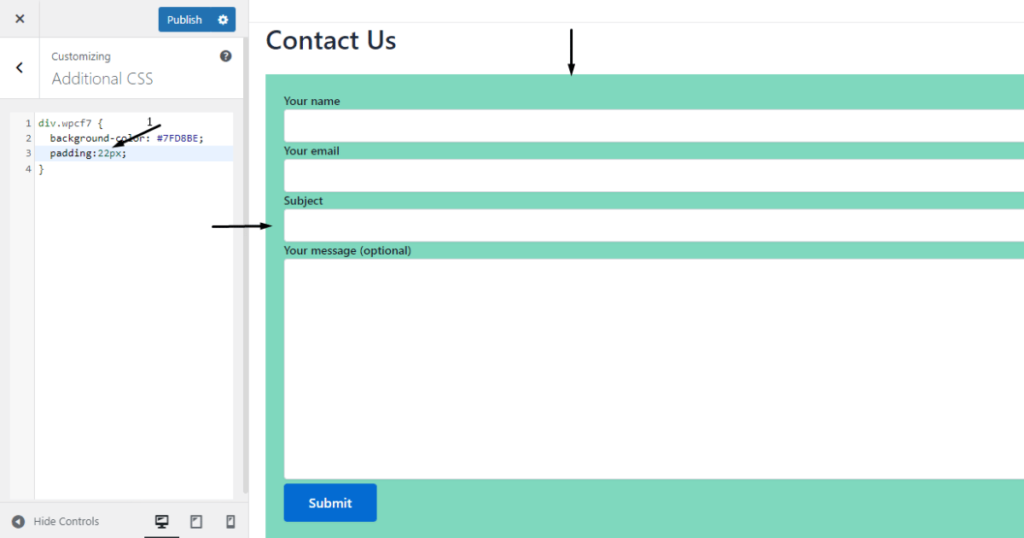
Contact Form 7 yields standard-compliant codes for forms, each with an ID and a Class. Specifically, Contact Form 7 uses the CSS class .wpcf7, which you can select to design a form.
Let’s see how to do this job. We’ll change the background color of the contact form. Hence, we write down the CSS code “div.wpcf7 { background-color: #7FD8BE; }” in the Additional CSS box.

We’ll now add 22px padding to this form to refine and make it look appealing. So, we write “padding:22px;” underneath the background-color code inside the .wpcf7 class.
Finally, we’ll finish stylizing this contact form by adding a border color. We’ll write the border code “border: 2px solid #22715a;” under the padding code.

Then, hit the Publish button.
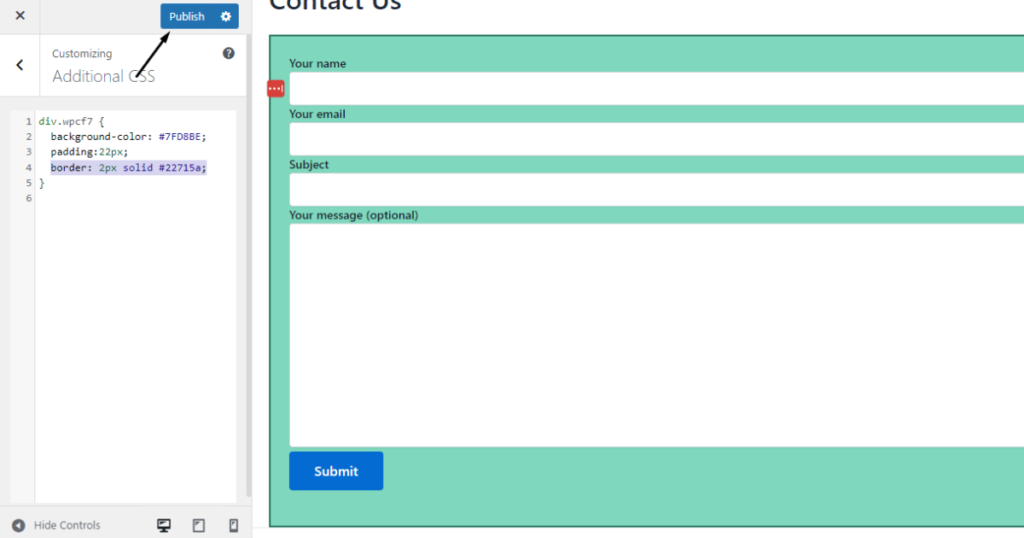
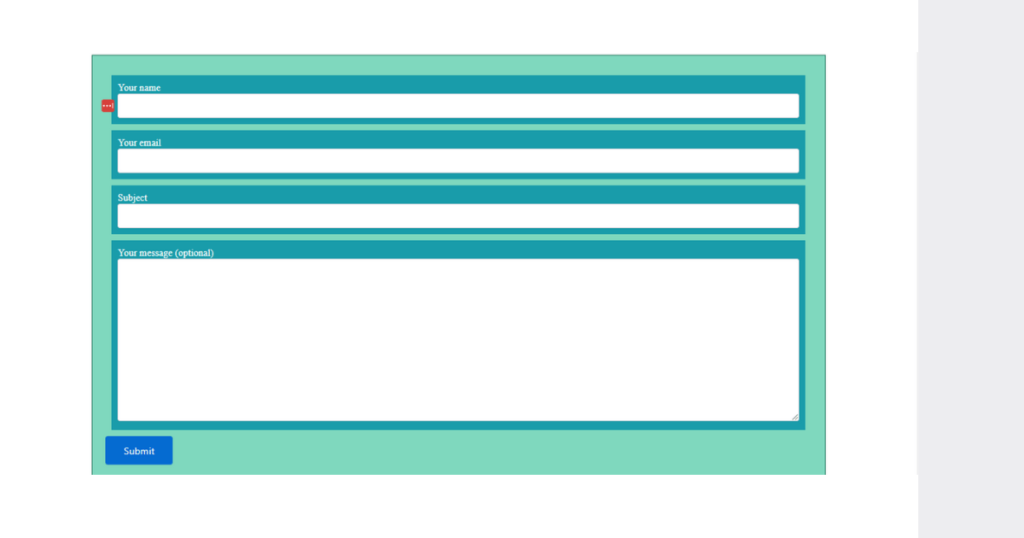
Now, visit the contact form page and see how it looks. Our one appears like the screenshot below.
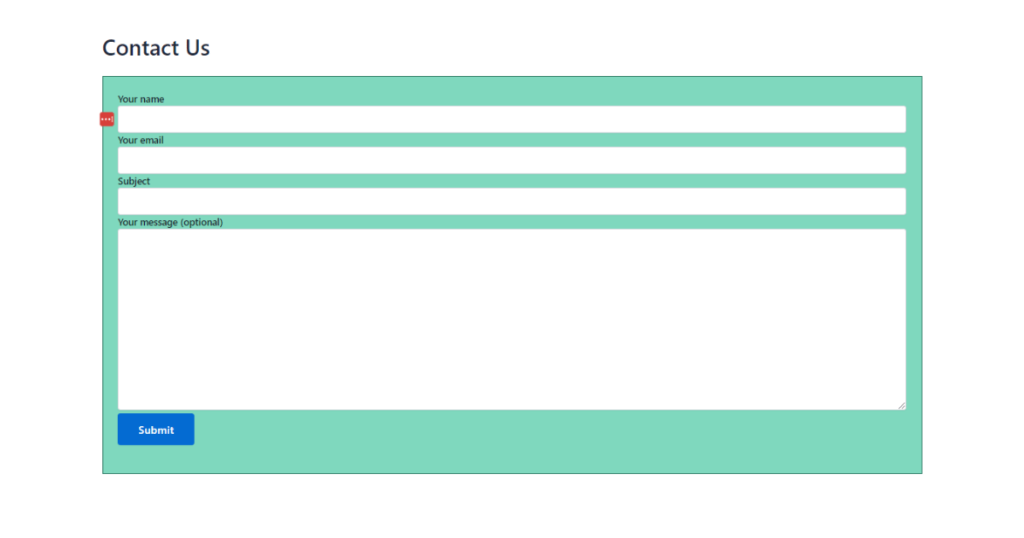
So, that’s how you design a contact form using CSS. As you can see, it’s just a basic design. But we’ll dig deeper and apply advanced customization to this form to make it look more professional.
We’ll begin our journey of advanced stylization in the following section.
Stylize Contact Form 7 with Ultra Addons For Contact Form 7 Style
Welcome to the section on advanced customization of Contact Form 7. Here are some practical methods to stylize the Contact Form 7 like a pro. Let’s begin.
Install Ultra Addons For Contact Form 7
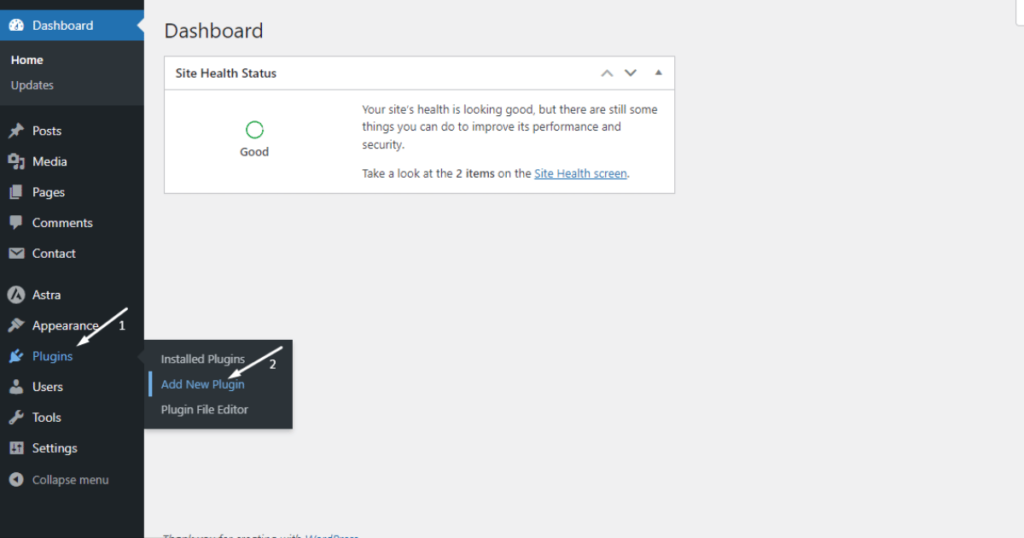
First, install the Ultra Addons For Contact Form 7 plugin. To do this, navigate to the WordPress Admin Dashboard and head to the Plugins > Add New Plugin.
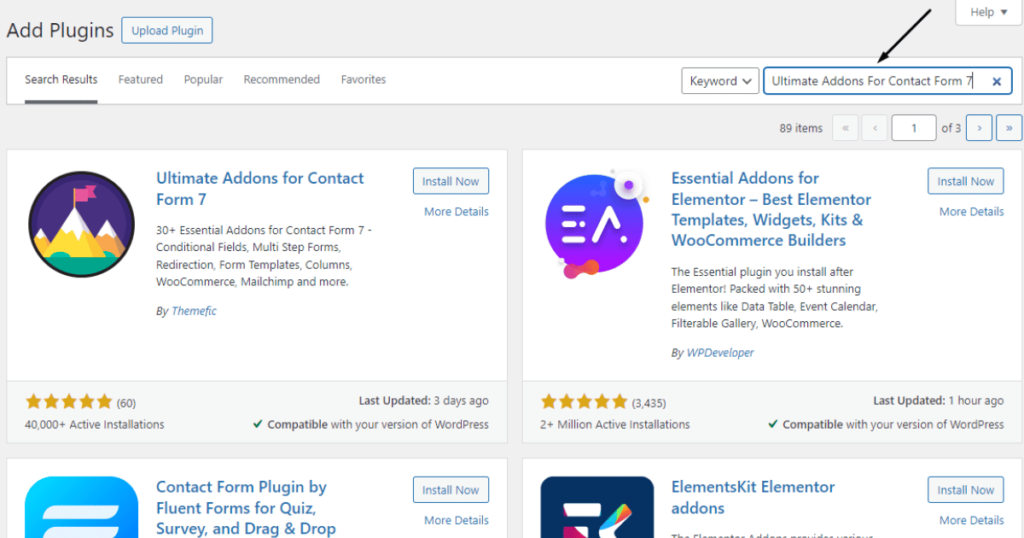
Search with the keyword “Ultra Addons For Contact Form 7” in the plugin search bar.
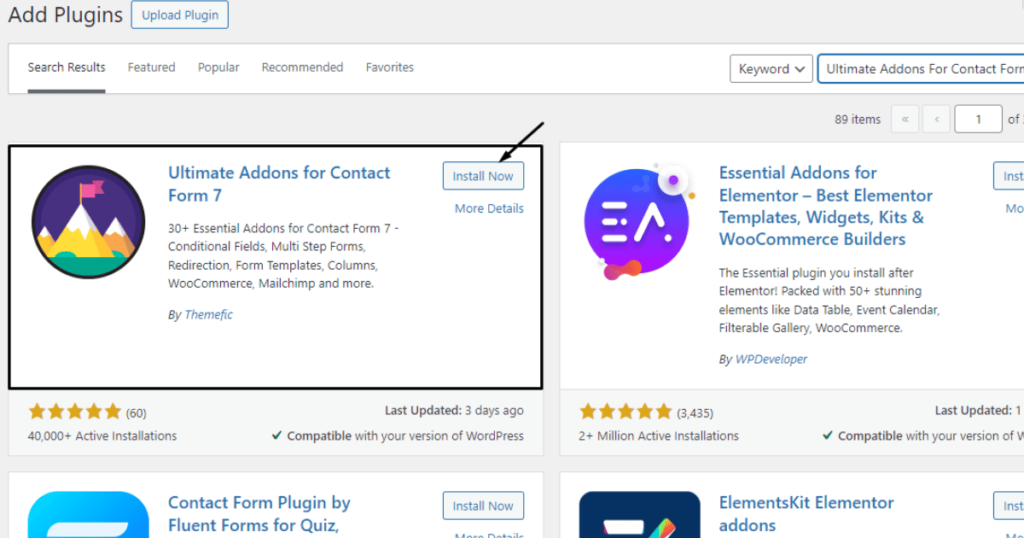
Click the Install Now button of the Ultra Addons For Contact Form 7 plugin.
Then, hit the Activate button.

You’ll now notice the UACF7 Setup Wizard page.

At this stage, slowly scroll down and toggle on all the free features you need.

Once you’ve enabled all the necessary free features of this plugin, click the Next button.
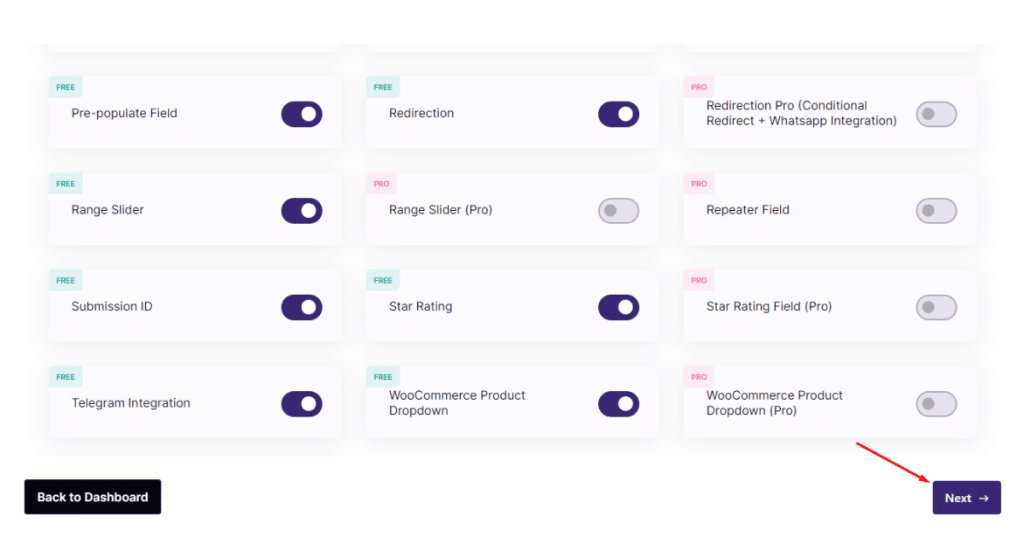
At this point, you’ll see the AI Form Generator page.

You can either use the AI Form Generator to build a basic form or click the Back to Dashboard button to visit the WordPress Admin Dashboard.
We won’t create a new form. Instead, we’ll return to the admin dashboard and redesign our existing form.

There you have it! That’s how you install the Ultra Addons For Contact Form 7 plugin.
Edit color, background, and other features
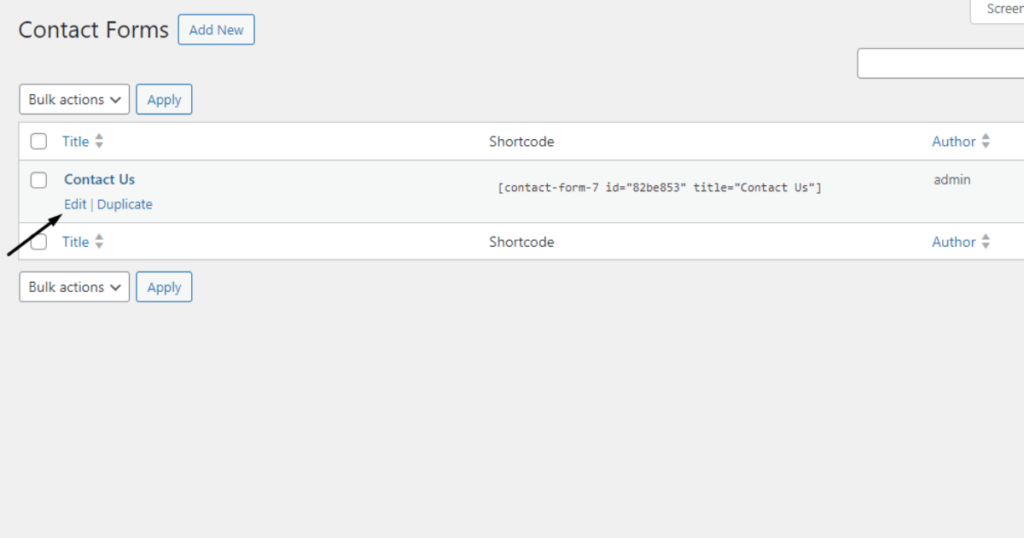
To design a form with the Ultra Addons For Contact Form 7, go to the WordPress Admin Dashboard and then navigate to Contact > Contact Forms.

Now, hover the mouse pointer over the form you’ve created. You’ll see Edit | Duplicate options appearing out of nowhere. Click on Edit.
You’ll now visit the form editor.
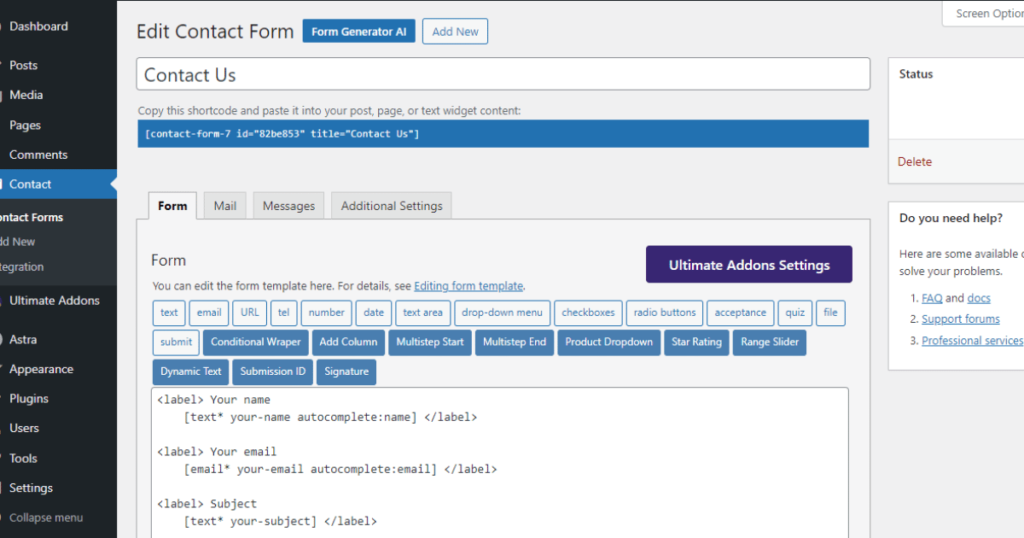
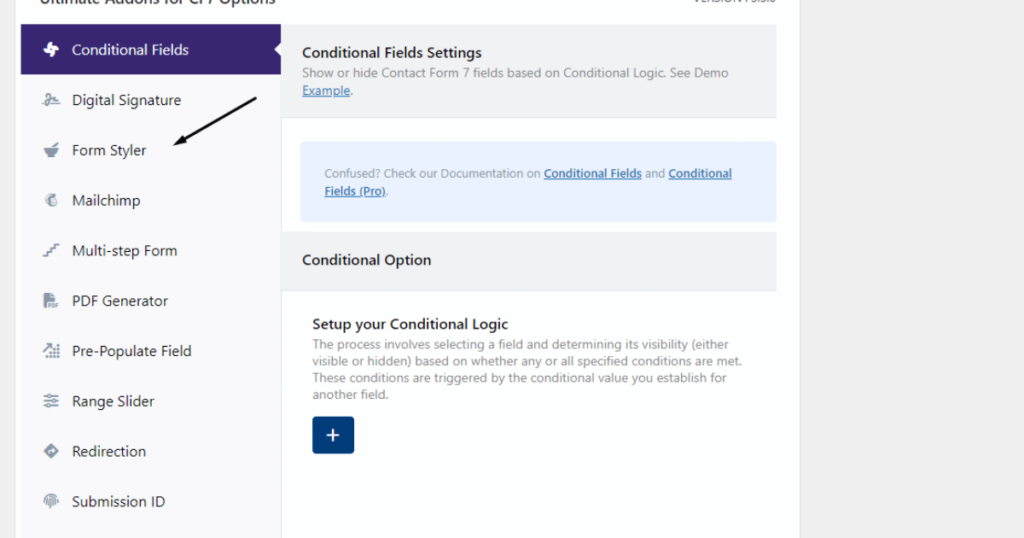
Afterward, scroll down a little and click the Form Styler tab of the Ultra Addons For Contact Form 7.
Now, toggle on the Enable Form Styles feature.
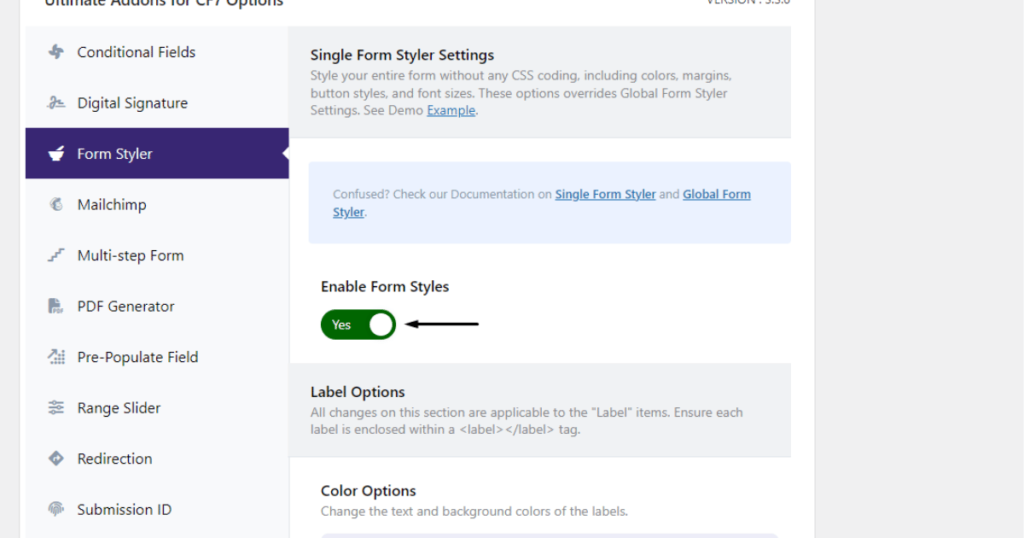
Then scroll down, and you’ll notice Label Options, which you can utilize to change the text and background colors of labels.
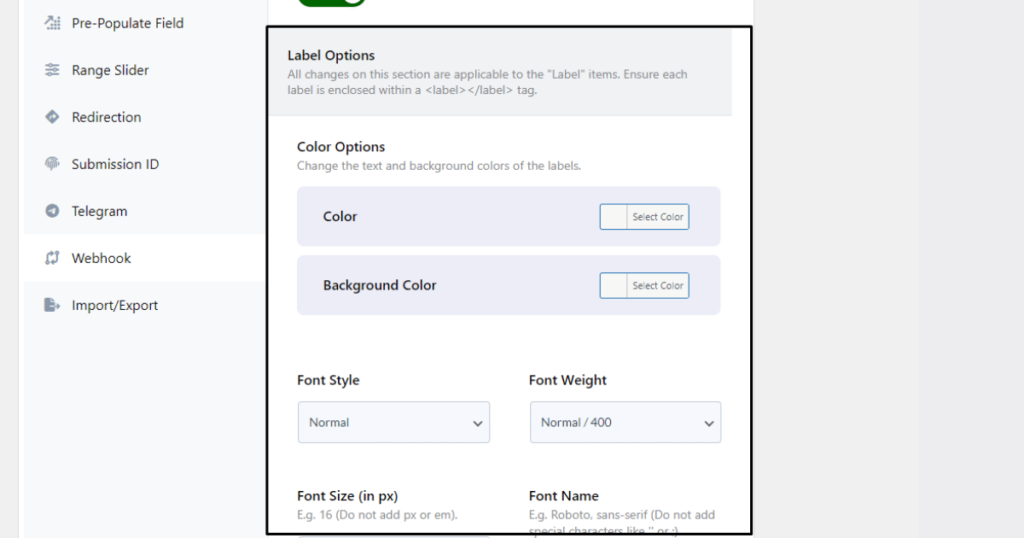
Let’s see how these features work in the animation below.
As you can see in the animation, we’ve changed the background color and edited the font, padding, and margins of the labels. Let’s glance at the end result.
See how easily you can design a form with the Ultra Addons For Contact Form 7. Just to let you know, we’ve just scratched the surface of what this plugin can do.
You can do a lot more with this plugin. We encourage you to play around with other features on your own and give a form a professional outlook.
Bonus: Advanced stylization with Ultra Addons for Contact Form 7
We’ve designed a basic-looking form with the Ultra Addons for Contact Form 7. It’s time to explore some advanced features of this plugin that can help you build eye-catching forms.
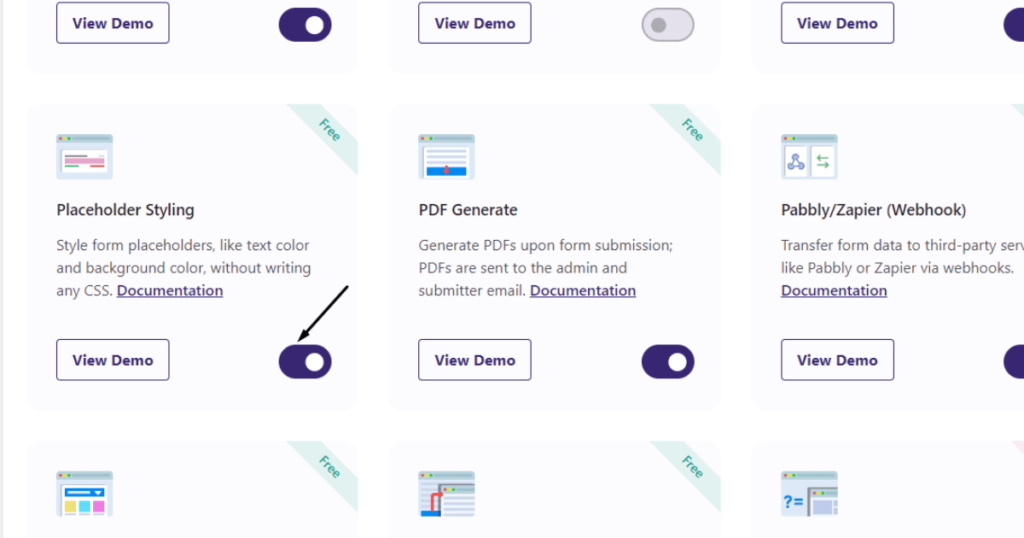
Contact Form 7 placeholder styling
Placeholder Styling is one of the excellent features of Ultra Addons for Contact Form 7. Let’s uncover how you can reap its benefits.
First, enable this feature if you haven’t enabled it during the installation of this plugin. We assume you didn’t activate the Placeholder Styling feature. Hence, let’s turn it on.
To do this, navigate to Ultra Addons > All Addons from the WordPress Admin Dashboard.
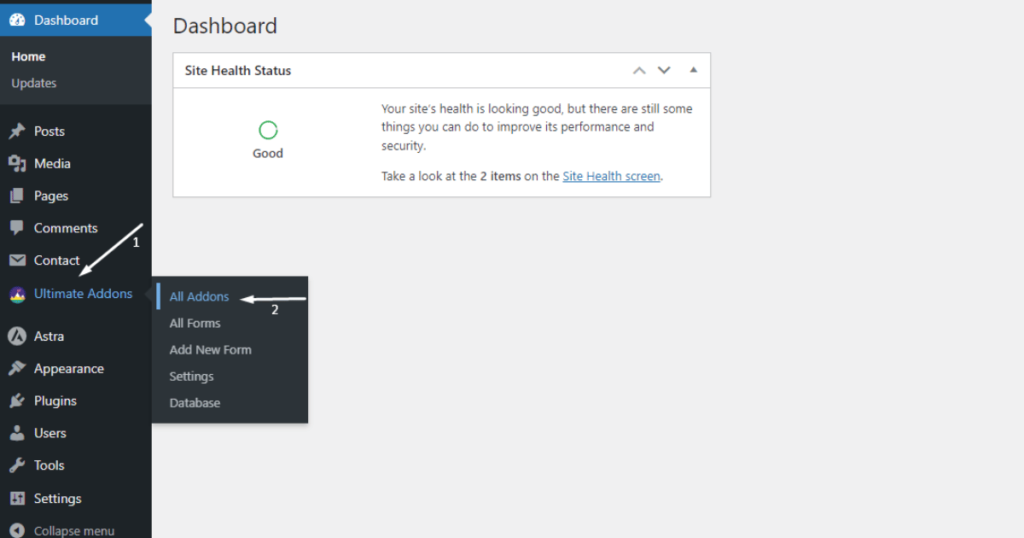
Then, scroll down to find the Placeholder Styling feature. Once you see it, toggle it on.
Afterward, go to Contact > Contact Forms from the WordPress Admin Dashboard.
Click Edit on the contact form you created earlier (you can create a new form, though).
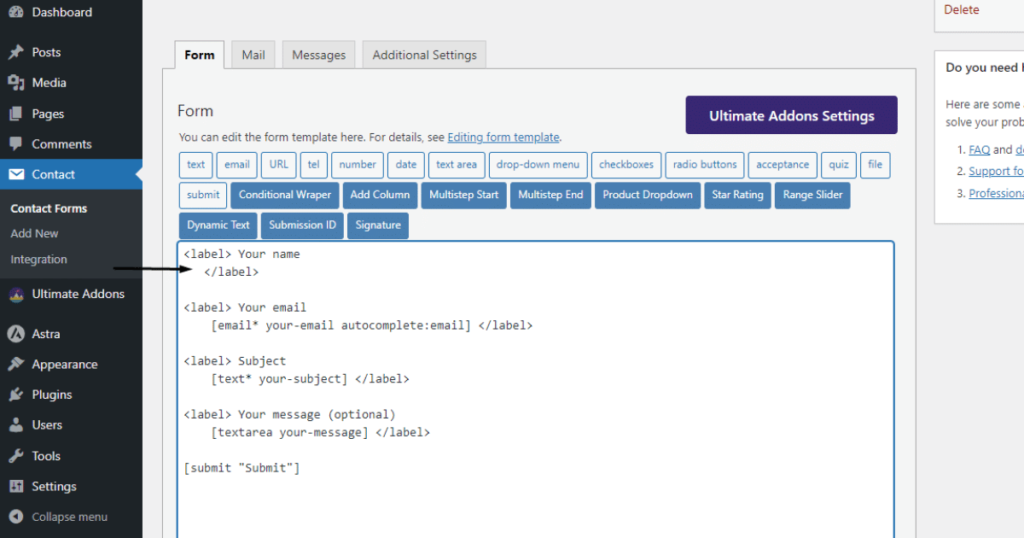
Now, remove the text tag from the label field (or tag) of your form. It’s because we’ll insert a new placeholder text tag.
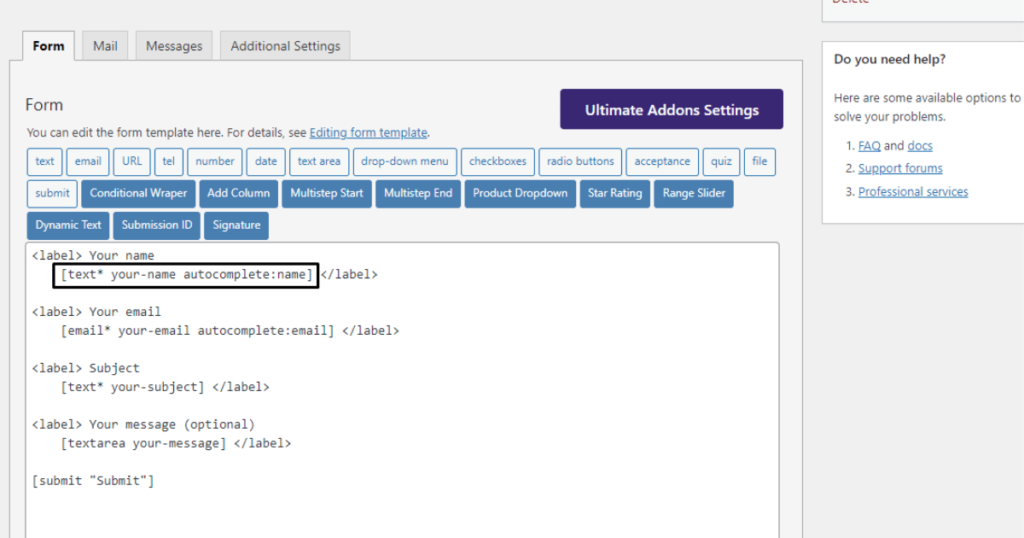
Here’s how this field (label tag) looks empty after removing the text tag.
Now, select the text tab to insert a placeholder text tag inside the form.
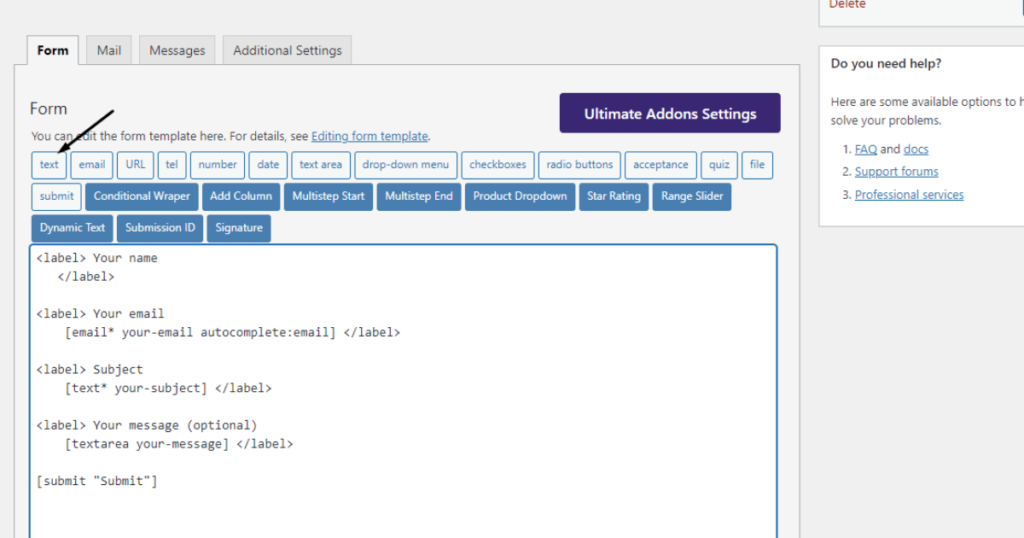
You’ll then see a Form-tag Generator: text popup.

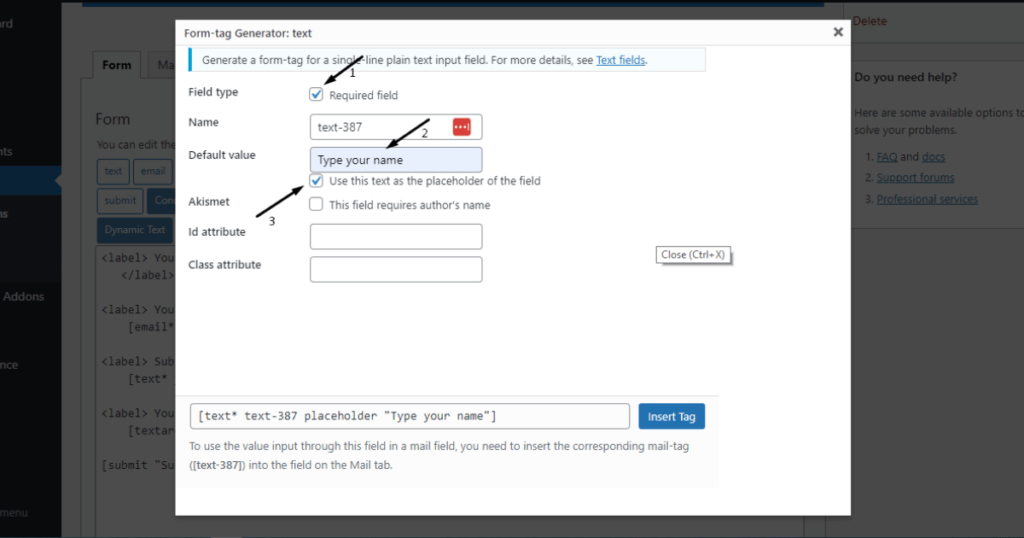
Then, checkmark the Required field option (if users must fill out this field), type your text in the Default value field, and finally, checkmark the “Use this text as the placeholder of the field” option.
Now, hit the Insert Tag button.
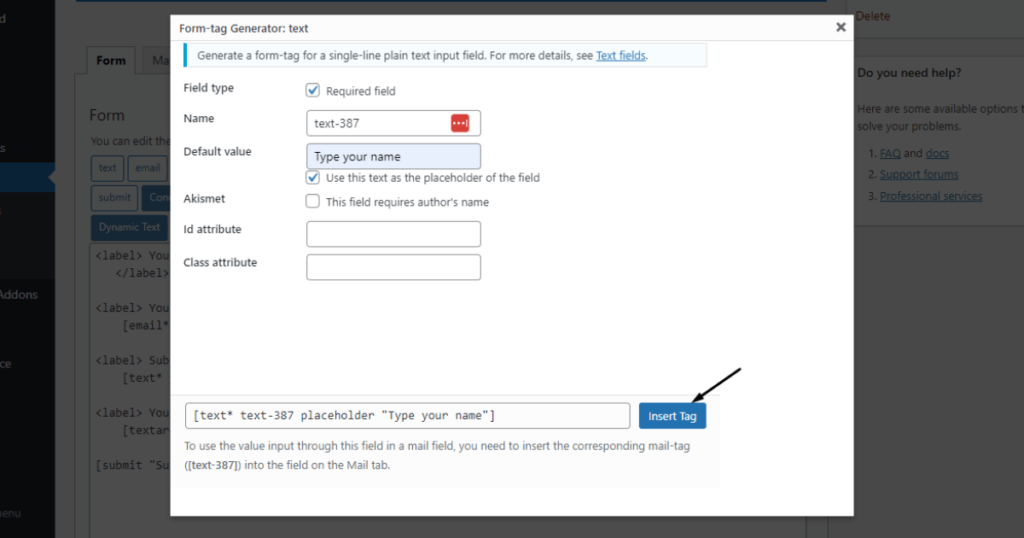
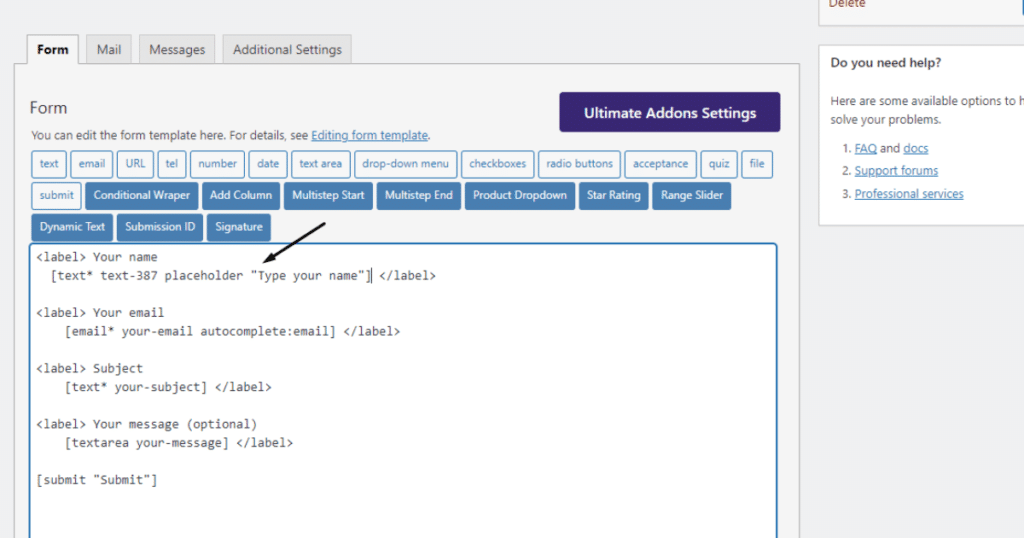
At this point, you’ll see a placeholder text tag under the name label inside the form.
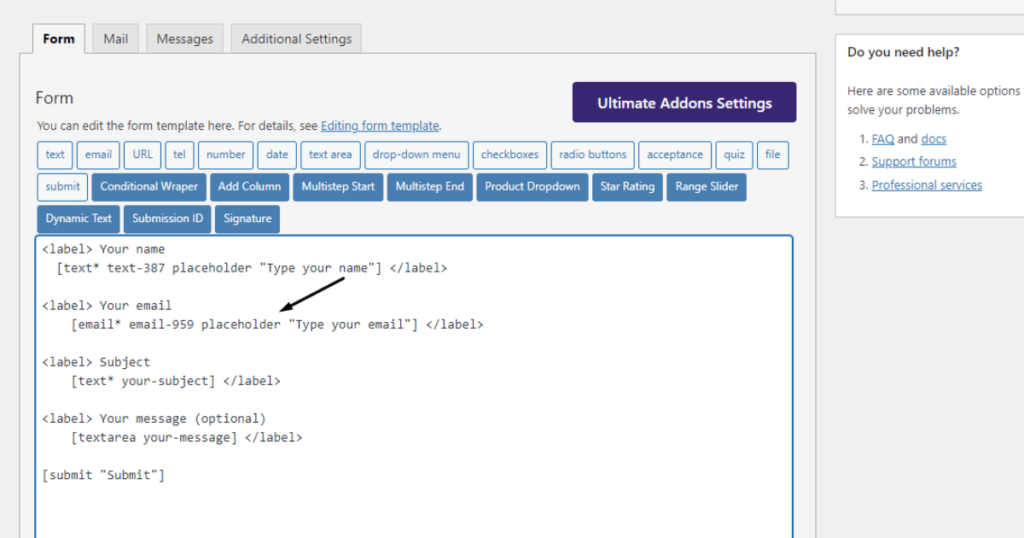
Similarly, you can now follow these exact steps to insert a placeholder for the email field. This means you need to remove the existing email attributes > click the email tab > accomplish all the tasks inside the Form-tag Generator > and hit the Insert Tag button.
After placeholder email tag insertion, the tag should appear like the screenshot below.
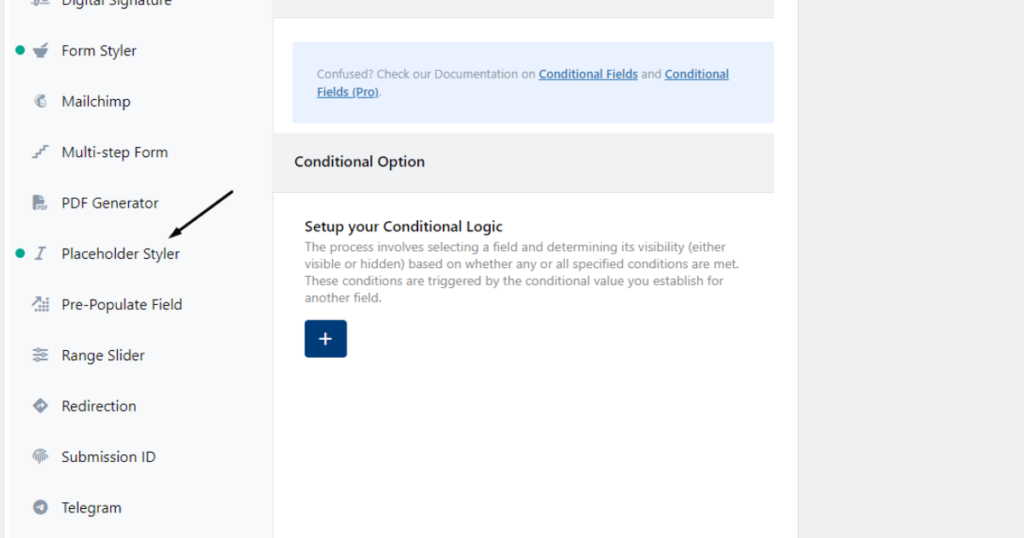
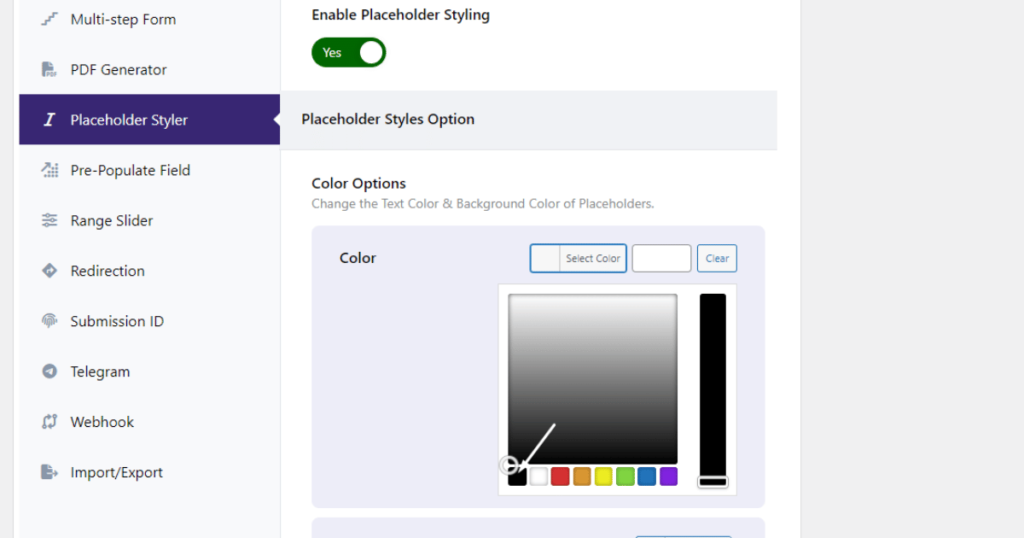
Right now, you need to scroll down a bit to find the Placeholder Styler tab. Once you find it, select the tab.
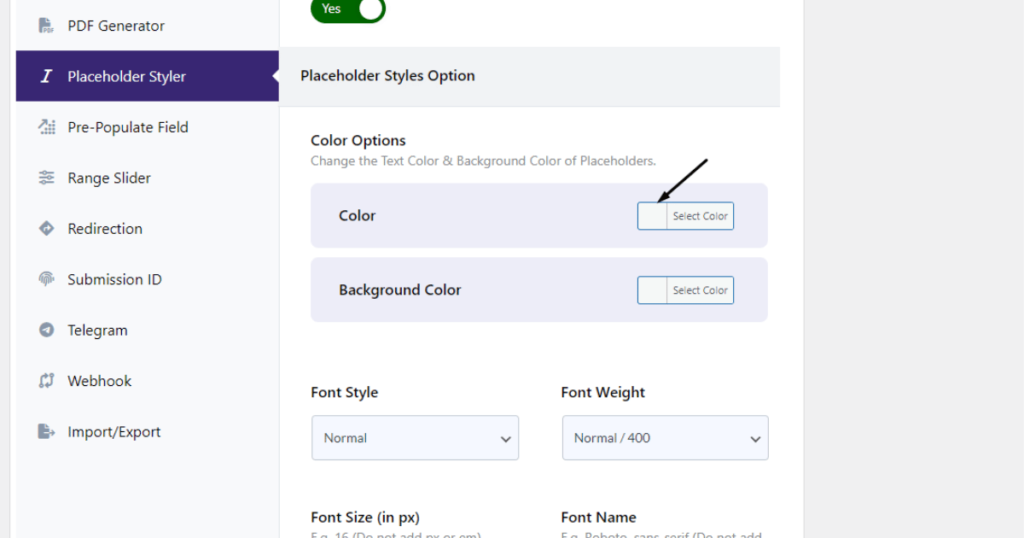
After that, activate it by toggling the Enable Placeholder Styling feature.
Then, scroll down a bit, and you’ll see the Color Options, allowing you to change placeholder text and its background colors. We’ll change the text color. So, we click the Select Color option of Color.
Afterward, we choose black as our placeholder text color.
Now, scroll down and define the Font Name, Font Size, and other font features if needed.
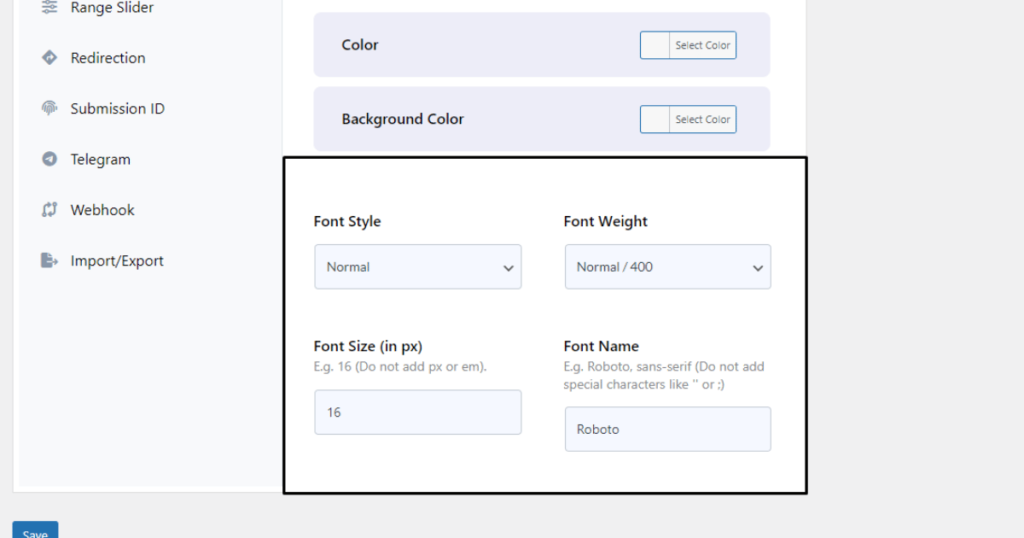
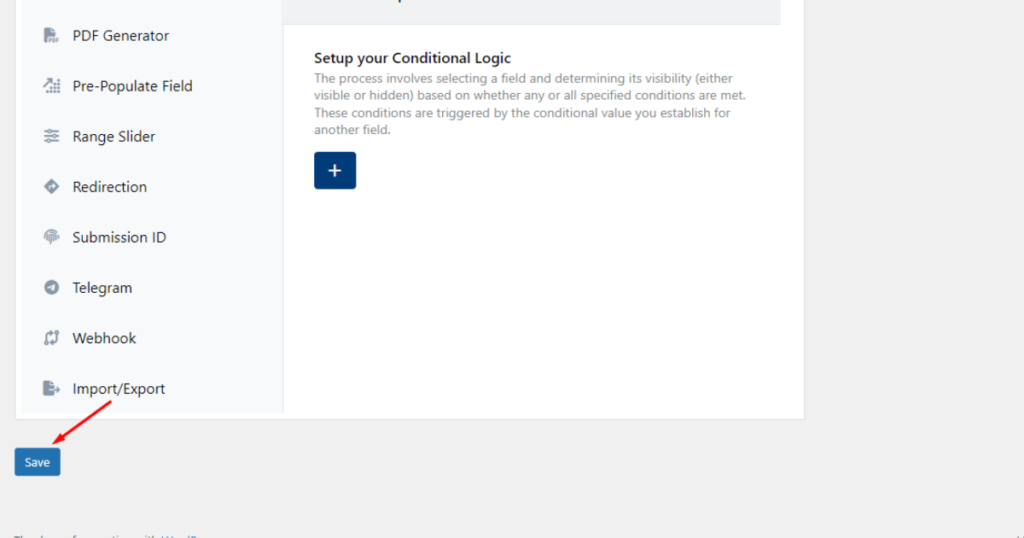
Finally, click the Save button.

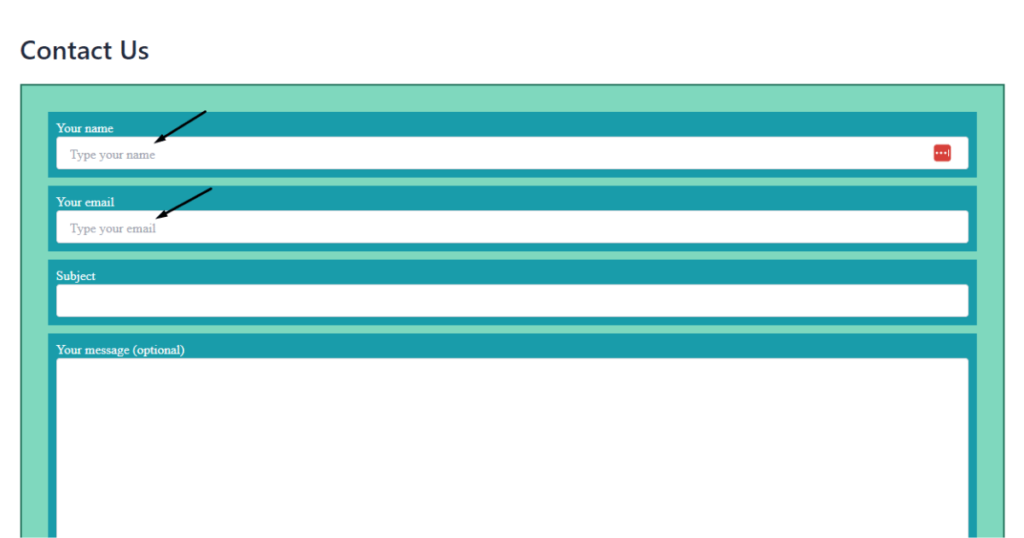
It’s as simple as that! You can now visit the contact form 7 design page to see the result. Here’s how our one looks.
Frequently Asked Questions
How can I style Contact Form 7 forms in WordPress?
You can style Contact Form 7 design forms using custom CSS or by using plugins like Ultimate Addons for Contact Form 7, which provide ready-made styling options without coding.
Can I design Contact Form 7 forms without coding?
Yes, you can design forms without coding by using addons that offer visual styling controls, such as colors, spacing, and layouts. This makes it easy for beginners to create professional-looking forms.
Why does Contact Form 7 look plain by default?
Contact Form 7 is designed to be lightweight and flexible, so it comes with minimal styling. This allows users to fully customize the design based on their needs.
Can I create modern and responsive forms with Contact Form 7?
Yes, with the right styling tools or addons, you can create fully responsive and modern forms that work well on mobile, tablet, and desktop devices.
Can I use drag-and-drop to design Contact Form 7 forms?
By default, Contact Form 7 does not support drag-and-drop design. However, some addons provide visual controls that make customization easier without writing code.
The Bottom Line
A professional and beautiful Contact Form 7 style enhances your website’s visual appeal and user experience. Your targeted audiences are likely to effectively engage with your website when they notice attractive website elements.
So, prioritize customizing your website and even stylize every form as per the design theme in mind. You can design each form with CSS or use a plugin like the Ultra Addons For Contact Form 7 if you don’t have any coding know-how.
Since you’ll benefit from appealing form design, you need to pay close attention to it.
If you liked this article, don’t forget to share it with your friends so that everyone benefits from it. You can also subscribe to our newsletters to get more exciting articles, tutorials, news, and offers right in your inbox. Thanks!