Seeking ways to integrate Mailchimp with Contact Form 7 seamlessly? You aren’t alone. Many people look for a simple solution when struggling with email marketing efforts.
They spend hours manually transferring contact details from their WordPress websites to the Mailchimp audience. Conversely, some people know they can automate lead capturing just by integrating Mailchimp with Contact Form 7.
But they need help figuring out where to start. Fear not if this sounds familiar to you. Once you read this resourceful and helpful guide, you can easily connect Mailchimp with Contact Form 7.
Plus, you can maximize your email marketing efforts and streamline your lead generation process. So, let’s dive straight into this content without any further delay.
Why do you need to connect Mailchimp with Contact Form 7?
Mailchimp, an excellent email marketing tool, lets you promote your products/services through emails. With it, you can create personalized email marketing campaigns.
So, you don’t need to rely on advanced algorithms to reach your targeted customers and generate revenue. It is one of the benefits this email marketing tool provides.
You can even reap more benefits when you connect it with Contact Form 7. Here’s what advantages you’ll get.
- You can add customers to an automated email marketing campaign.
- You no longer need to add contacts to Mailchimp manually.
- Also, you no longer need to add or tag new contacts.
- You can send any field data (customers’ information) to Mailchimp.
Doing these allows you to monitor your customers and promote offers based on their interests. In short, you can boost sales by integrating Mailchimp with Contact Form 7!
But how will you accomplish this integration task? You can keep reading this article to learn the easiest way to connect Mailchimp to Contact Form 7.
How to Integrate Mailchimp with Contact Form 7
You can follow many ways to connect Mailchimp with Contact Form 7. But we recommend you adhere to the easiest one you’re about to read. Let’s begin.
We assume you already have Contact Form 7 installed on your website. By default, Contact Form 7 doesn’t let you integrate with MailChimp.
So, to integrate MailChimp with Contact Form 7, let’s install another plugin – Ultra Addons For Contact Form 7.
Install Ultra Addons For Contact Form 7
To install Ultra Addons, go to WordPress Admin Dashboard then navigate to Plugins > Add New Plugin.
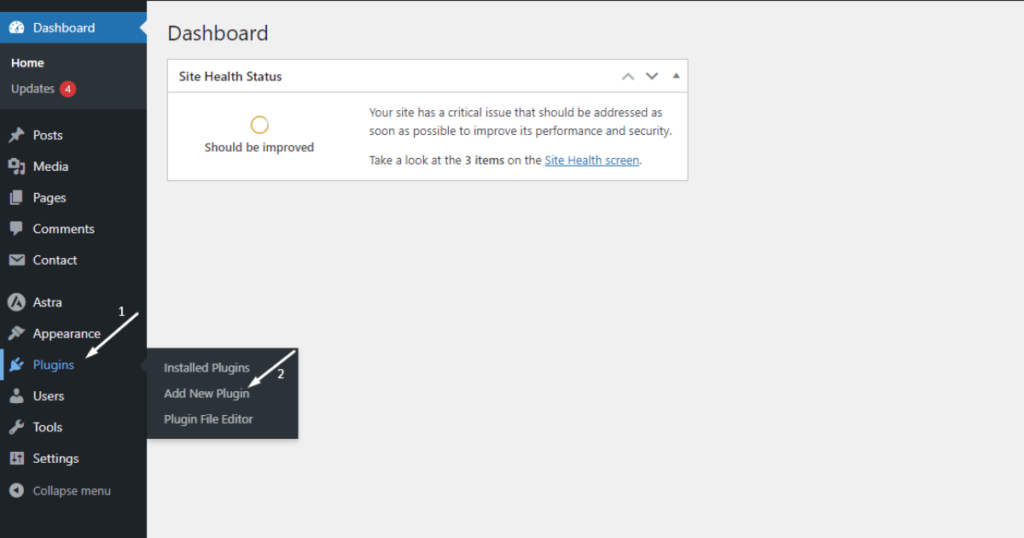
Then, search with “Ultra Addons For Contact Form 7” in the plugin search bar.
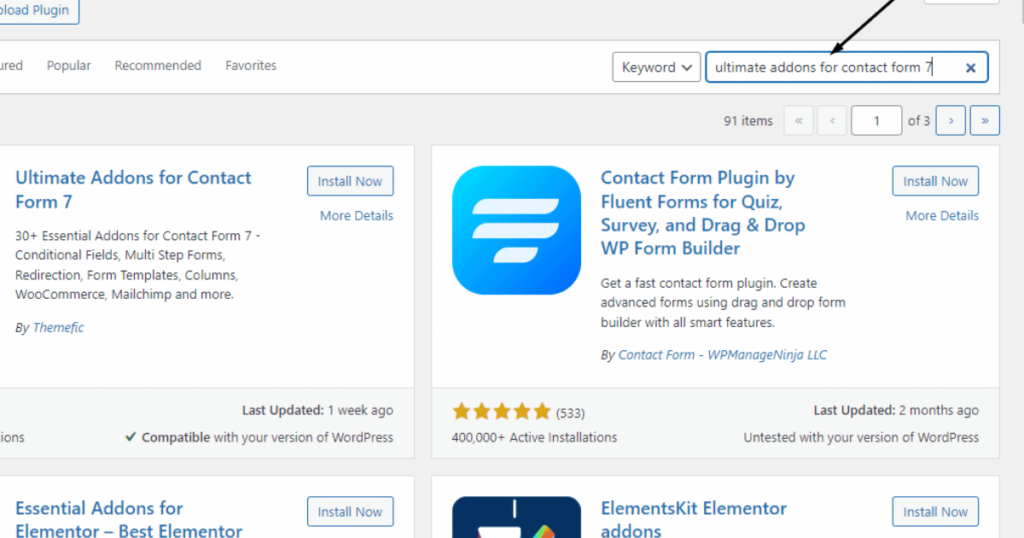
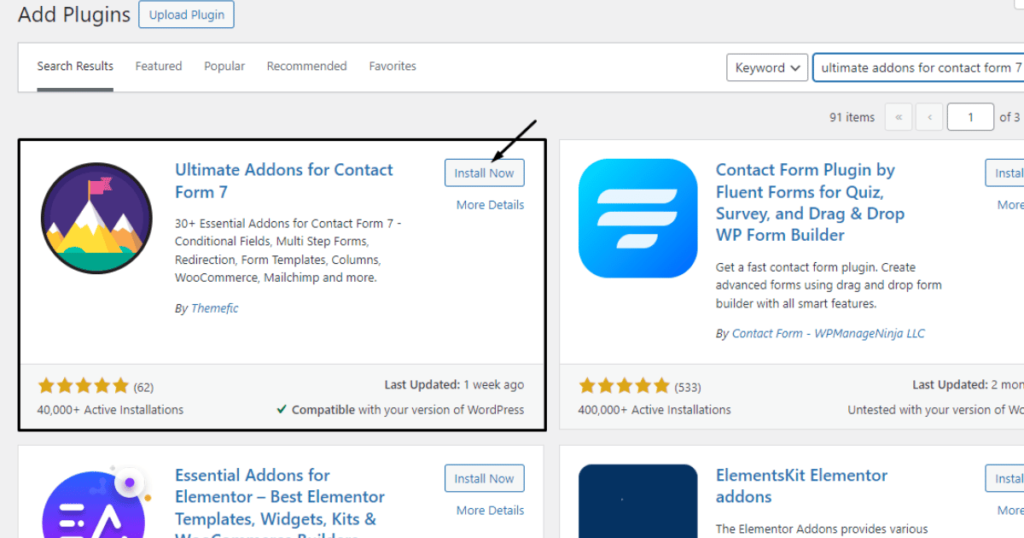
Once you notice the plugin, click the Install Now button.
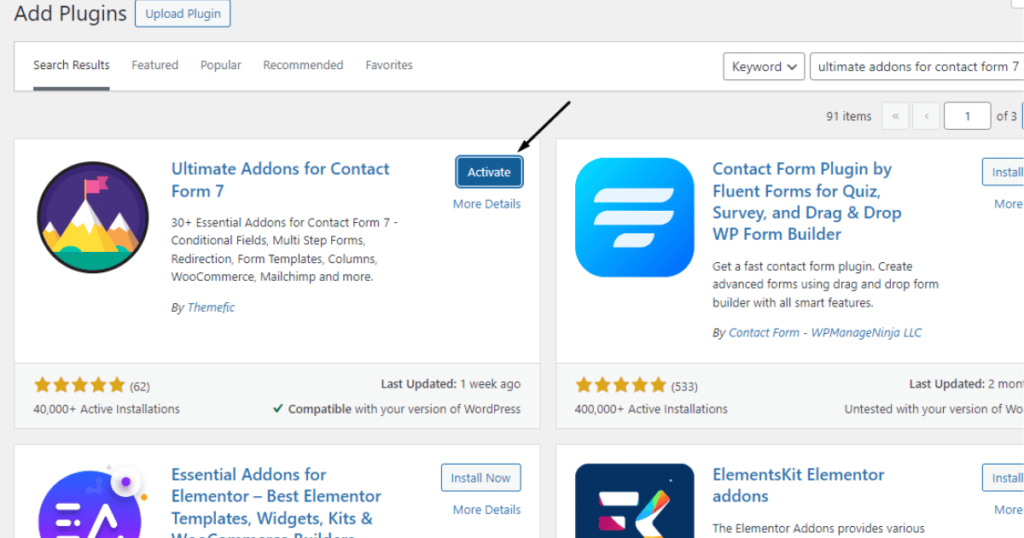
After that, click the Activate button.
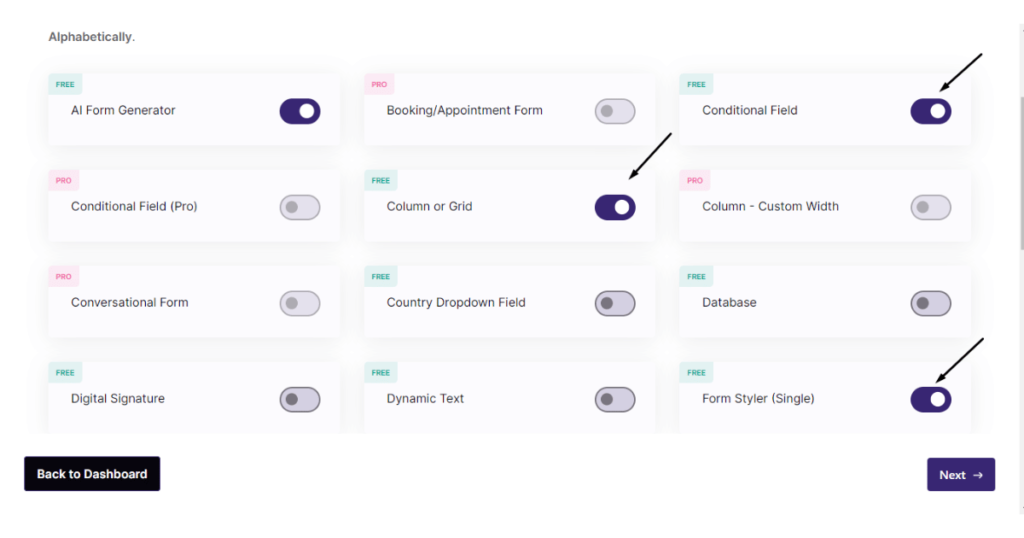
You’ll then visit the UAFC7 setup wizard, as shown in the screenshot below.
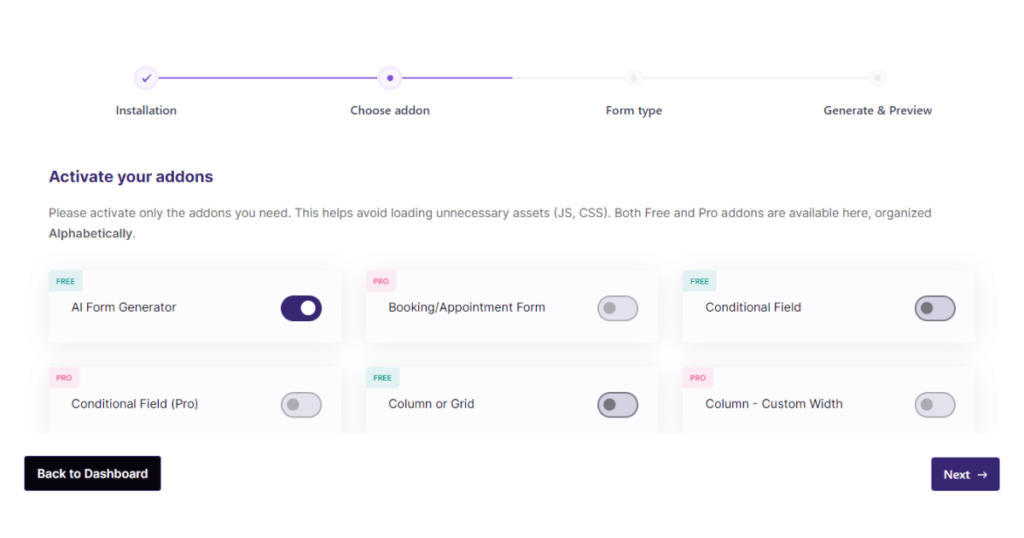
On this page, you can enable a few features based on your preferences.
For instance, we toggle on Conditional Field, Column or Grid, and Form Styler features.
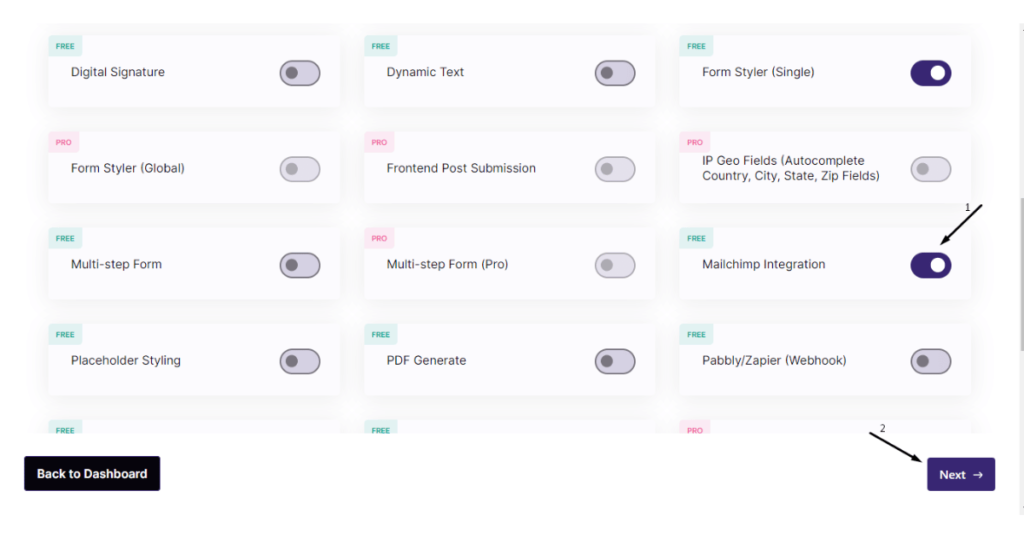
Then scroll down a bit to find the Mailchimp Integration feature and toggle it on. Afterward, click the Next button.
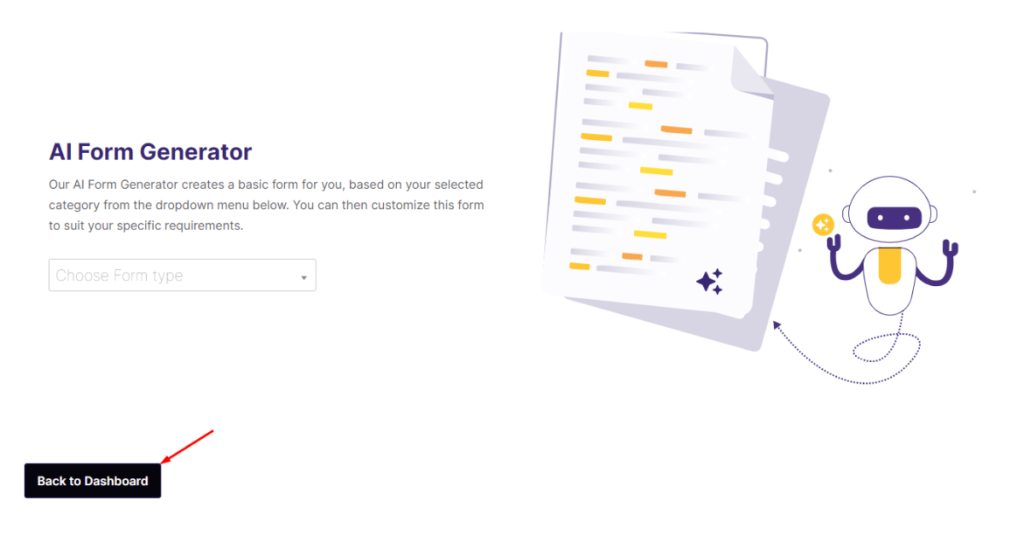
You’ll now see the AI Form Generator page. You can take AI’s help to create your desired form automatically.
You can also click the Back to Dashboard button to create a manual form. However, we’ll go with the second option, which means we’ll hit the Back to Dashboard button.
There you go! We’ve successfully installed Ultra Addons For Contact Form 7. Now, it’s time to integrate Mailchimp with Contact Form 7.
Connect Mailchimp with Contact Form 7
To connect Mailchimp with Contact Form 7, you need to collect Mailchimp’s API key first. Here’s how you perform this task.
Create an API key
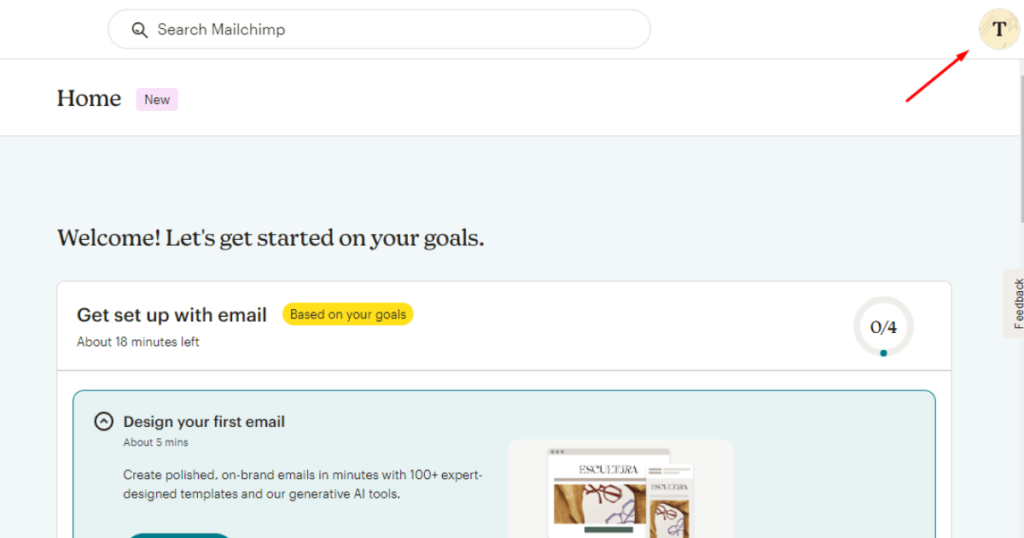
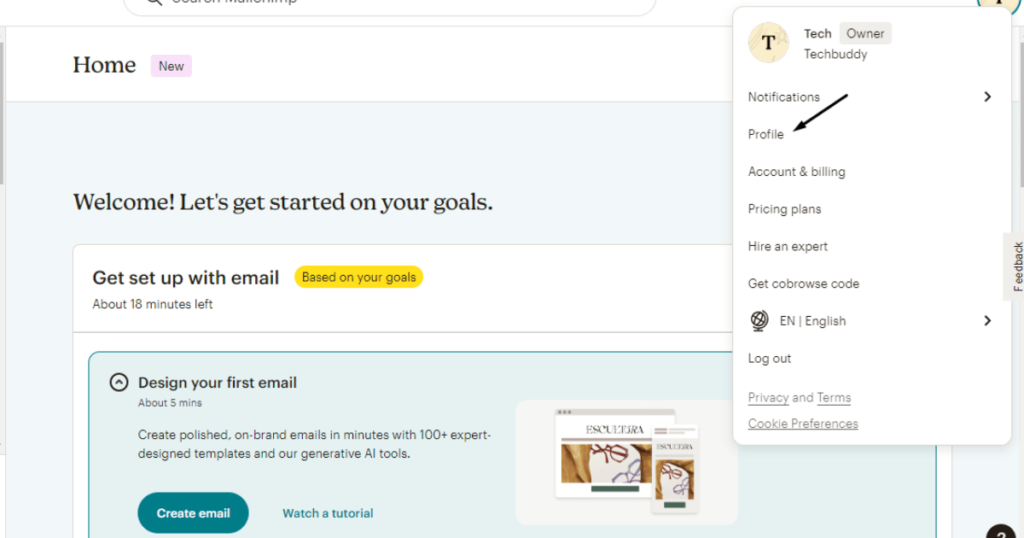
Log in to your Mailchimp account (create an account if you don’t have one). Then, click your profile icon in the top-right corner.
After that, click Profile.
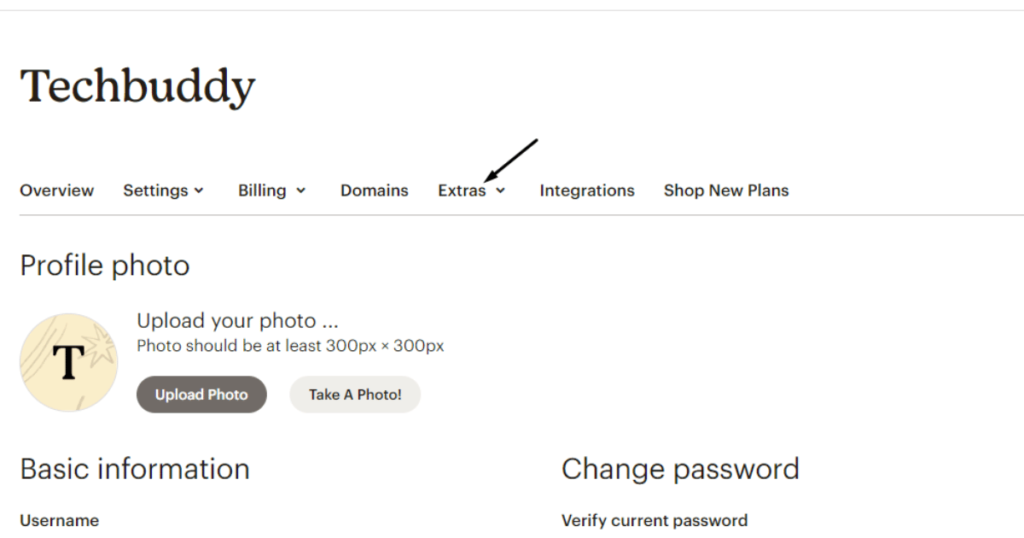
Then, click Extras.
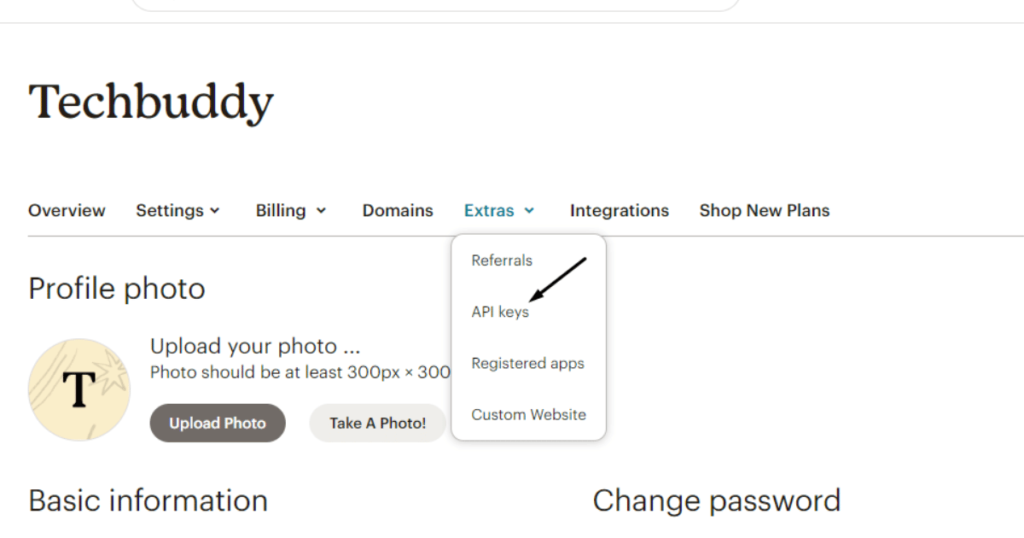
Right now, choose API keys from the drop-down menu.
Afterward, scroll down and hit the Create A Key button under Your API Keys section.
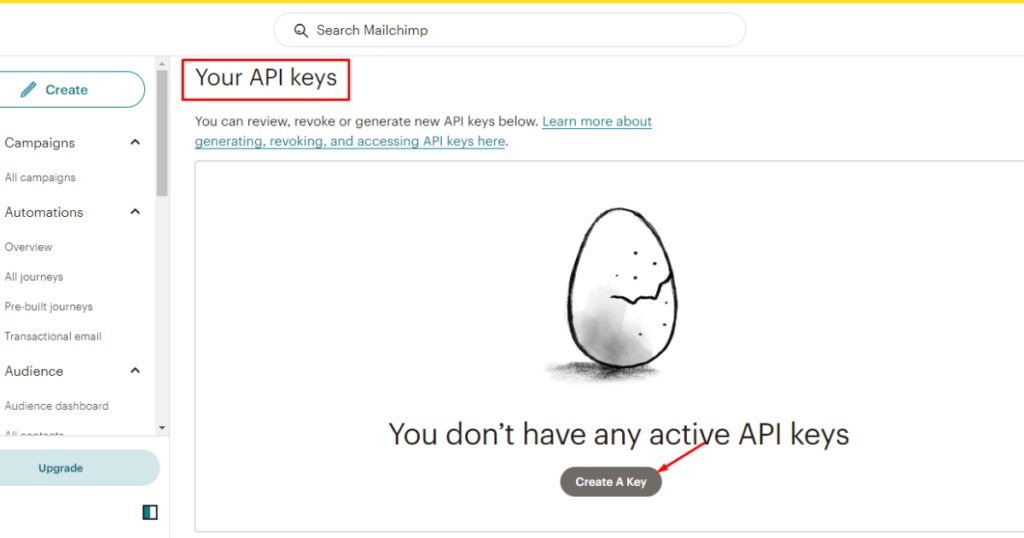
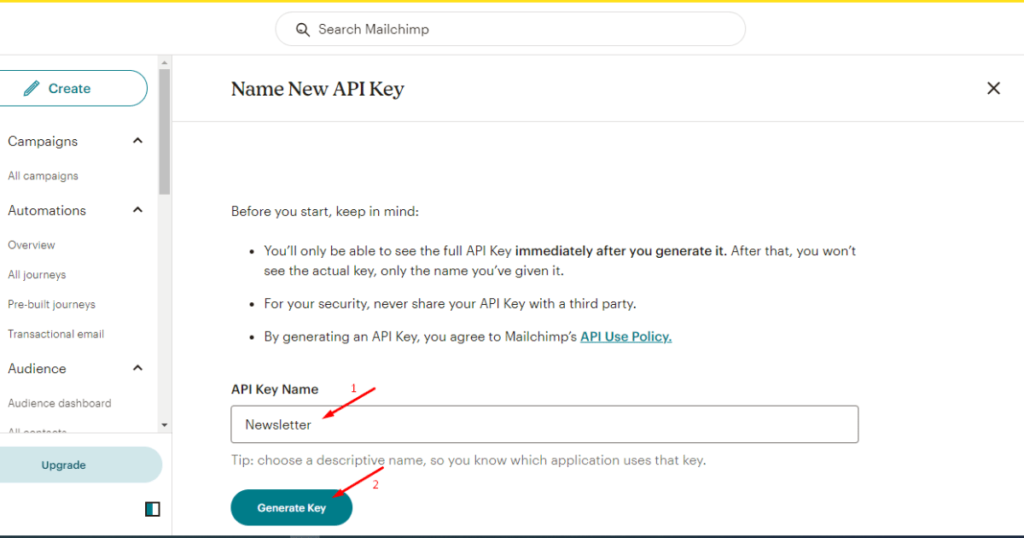
Write down a name for your API key inside the API Key Name field and then click the Generate Key button.
Pro tip: give a descriptive name to remember which form will use this key on your website.
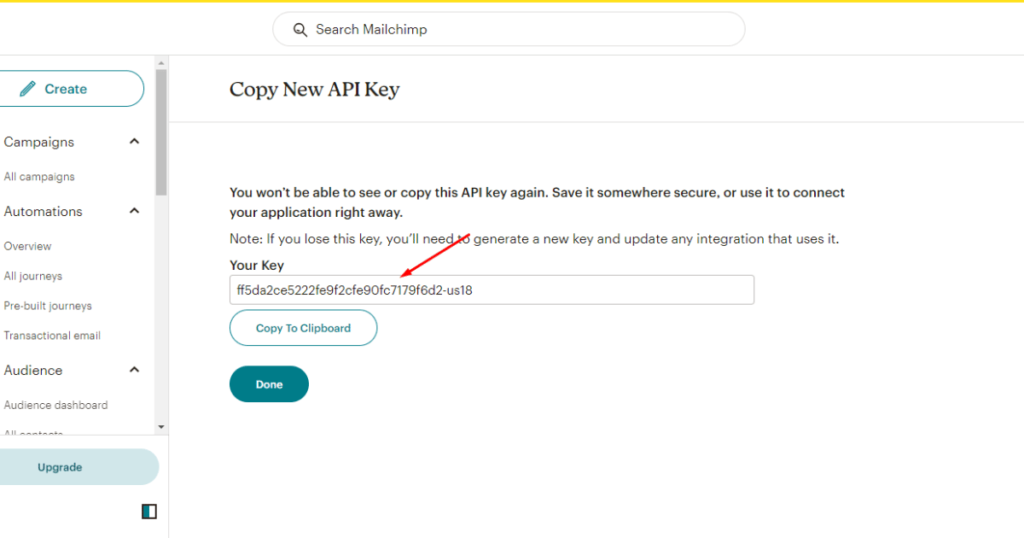
You’ll now see an API key. Copy and paste it into Notepad to use it later.
Okay, you’ve created an API key in Mailchimp. Next, you need to use Ultra Addons for Contact Form 7 to connect Mailchimp with Contact Form 7.
Connect Mailchimp with Ultra Addons For Contact Form 7
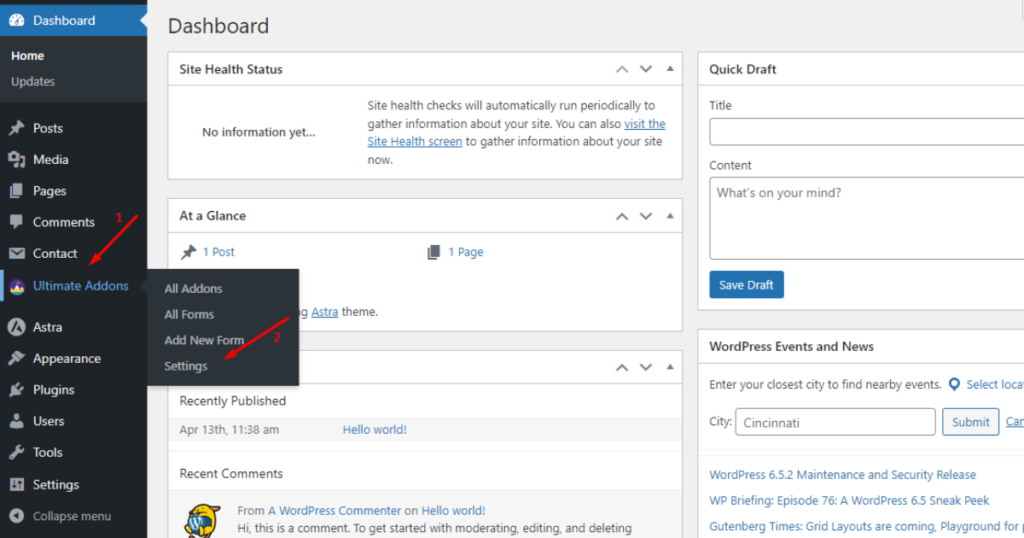
First, go to WordPress Admin Dashboard, then navigate to Ultra Addons > Settings.
You’ll now notice two settings: API Integration and Miscellaneous. Click API Integration and then you’ll see the Mailchimp API option.
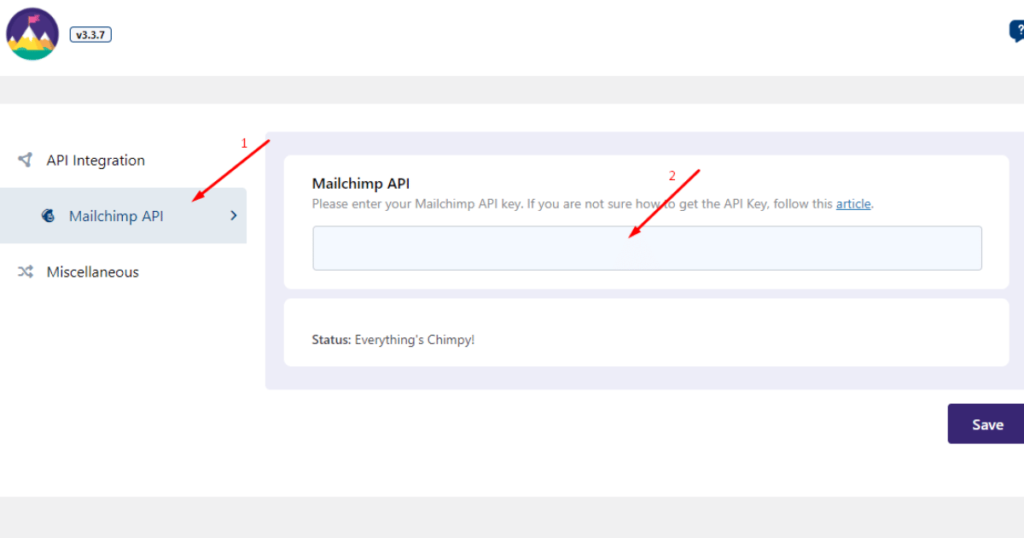
Afterward, paste the API key (we copied and stored it in Notepad a while ago) into the Mailchimp API key field. Then, click the Save button.
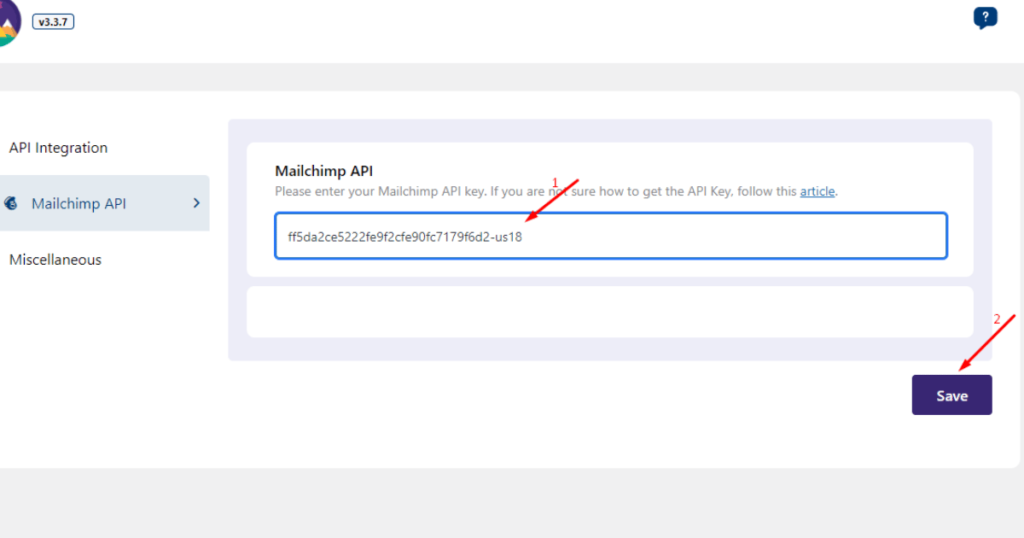
That’s how easy it was to connect Mailchimp with Contact Form 7. It’s time to create a form and check whether Mailchimp functions correctly.
Create a newsletter sign-up form
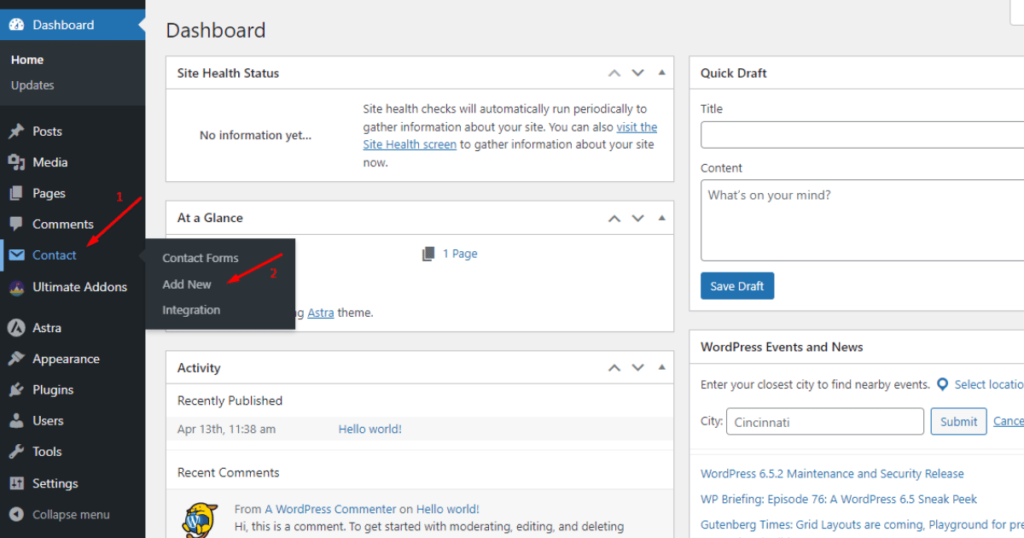
To create a newsletter sign-up form with Contact Form 7, go to WordPress Admin Dashboard > Contact > Add New.
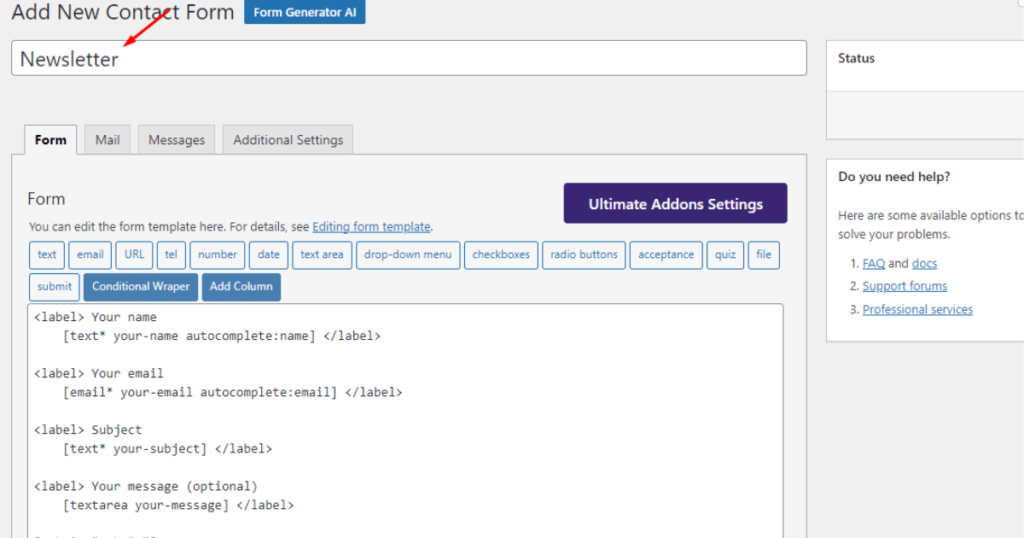
Name the contact form ‘Newsletter’ or any other name you wish.
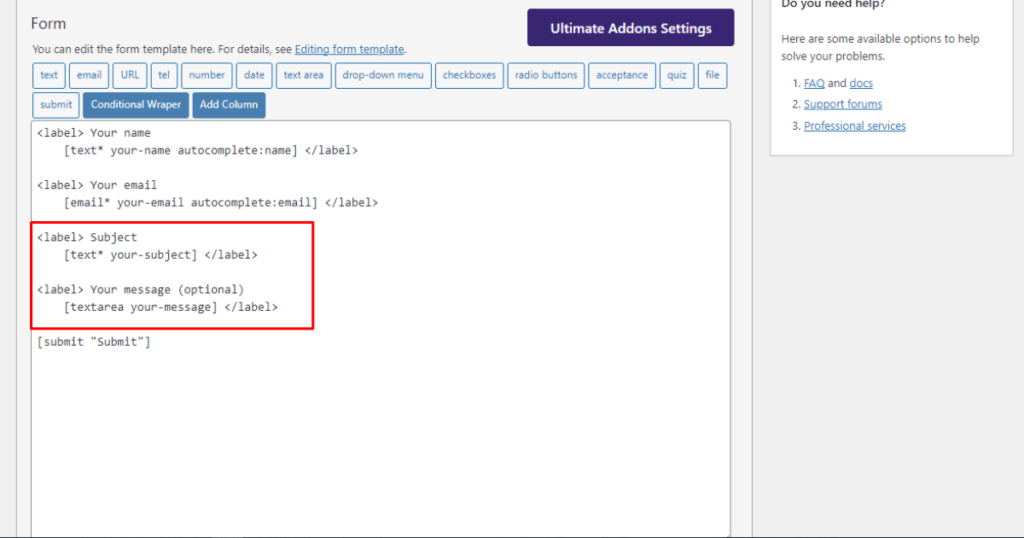
Remove the Subject and your message label tags from the contact form. However, you can keep those tags. We don’t need these additional fields since we are creating a newsletter form.
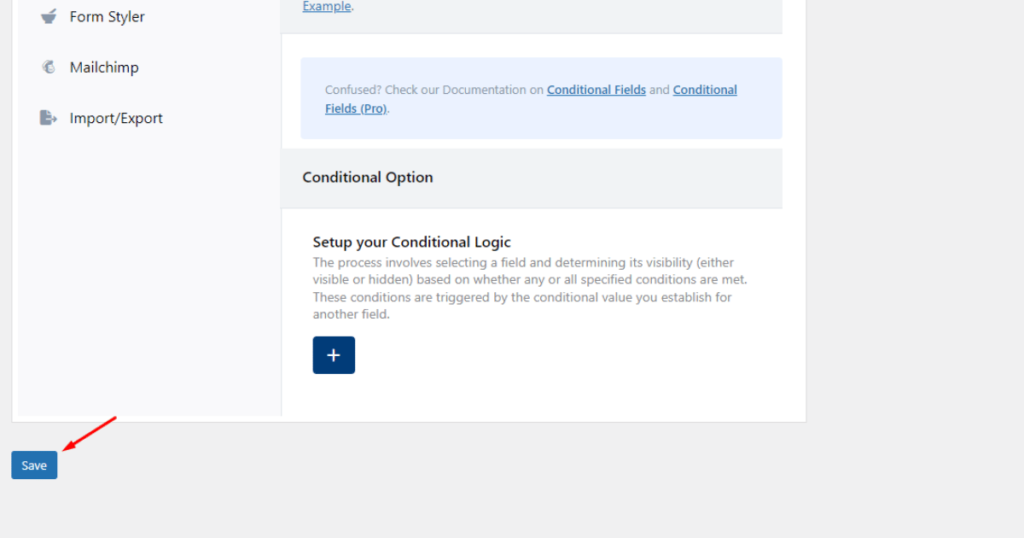
Next, scroll down and hit the Save button.
Before proceeding further, let’s create two extra fields – first and last name fields – in our contact form.
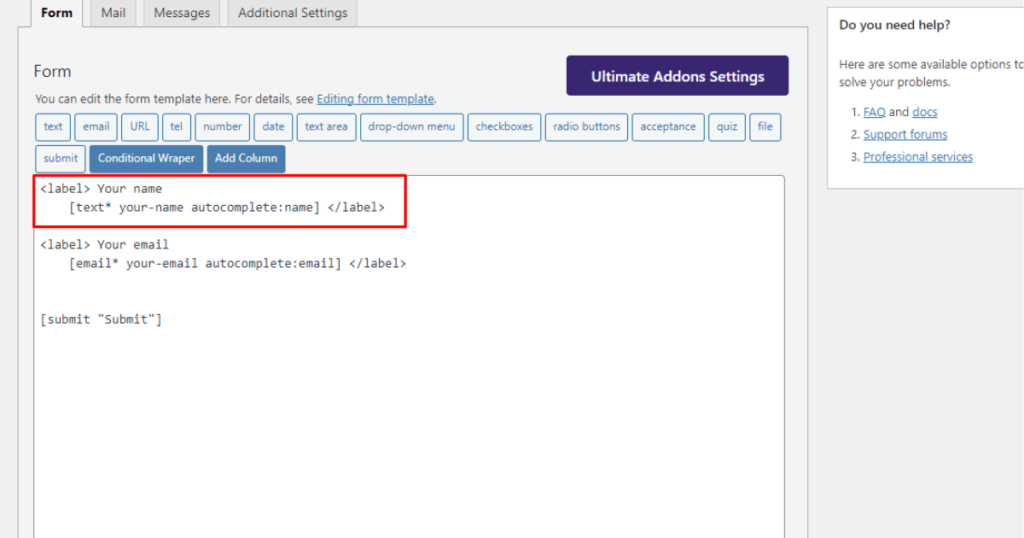
To do this, copy Your name label tag.
Then, paste that label tag under Your name tag.
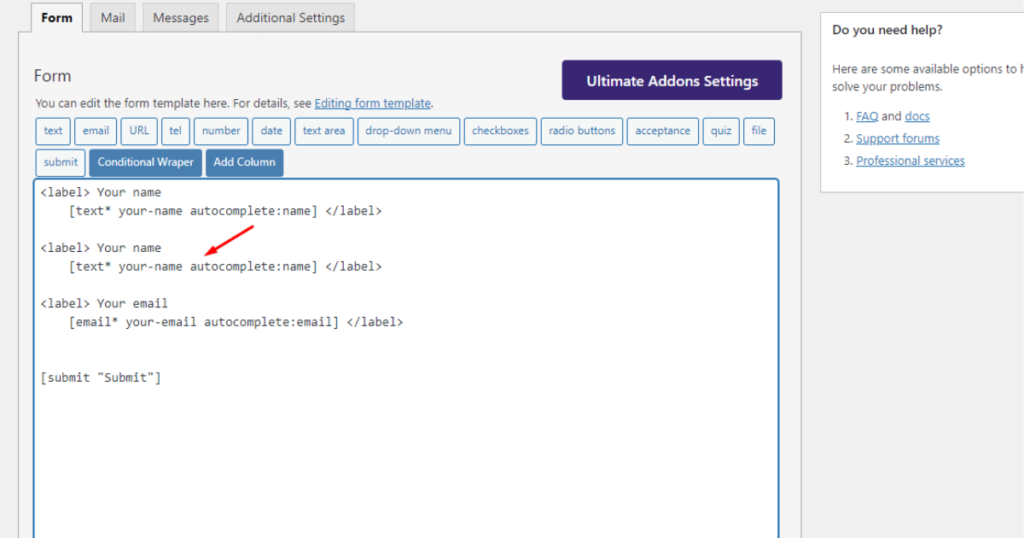
As you can see on the screenshot, we have two label tags with the same name. Hence, we need to rename those tags as First and Last names.
Look at the screenshot below to track what we’ve changed.
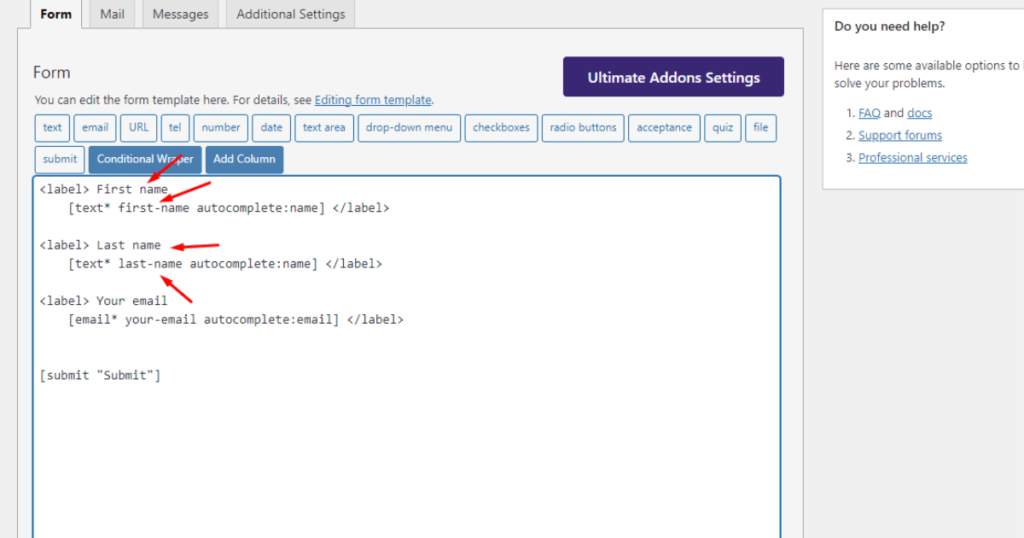
Also, rename the submit button as Subscribe.
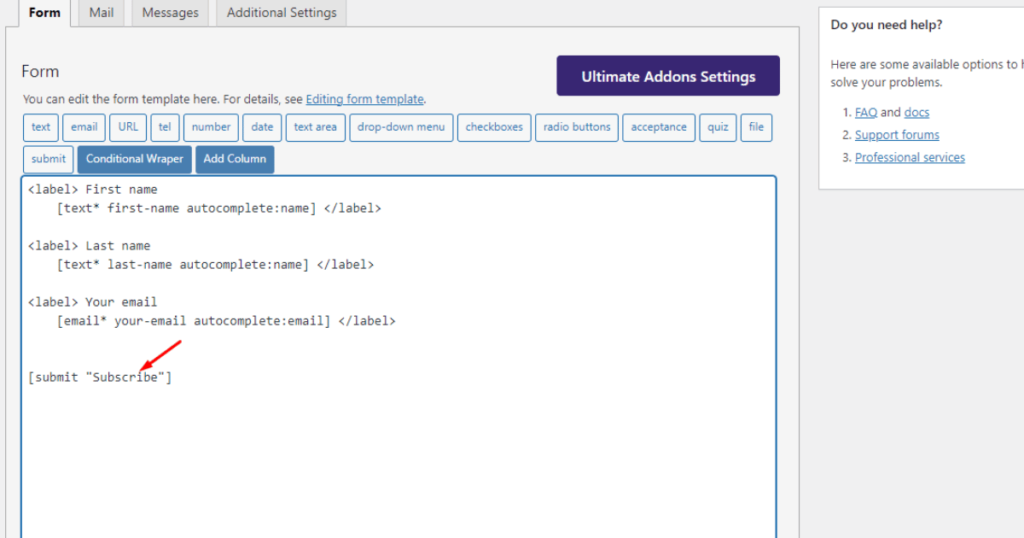
After that, scroll down and click the Save button.

Enable Mailchimp in Ultra Addons For Contact Form 7
Select the Mailchimp tab under Ultra Addons for CF7 Options.
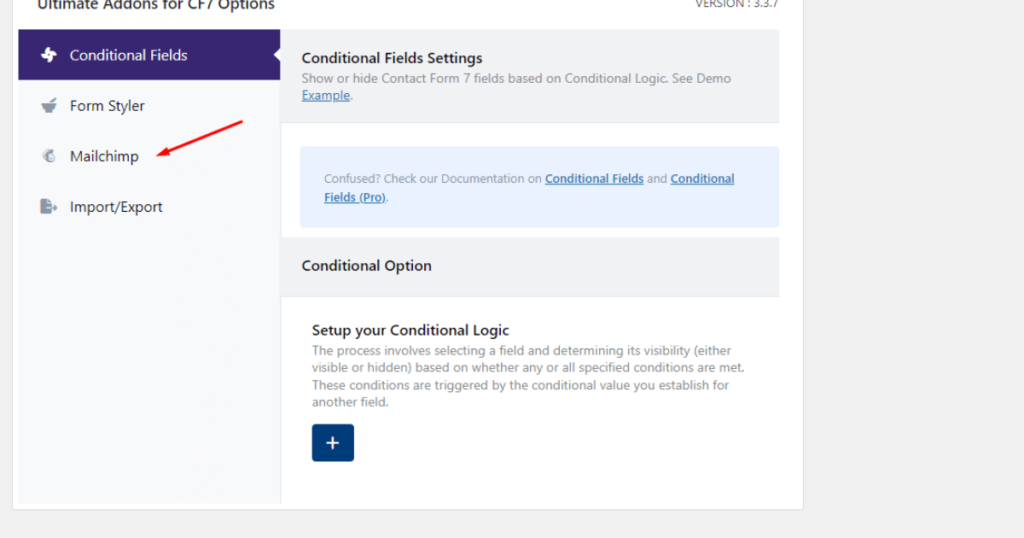
Now, toggle on the Enable Mailchimp option.
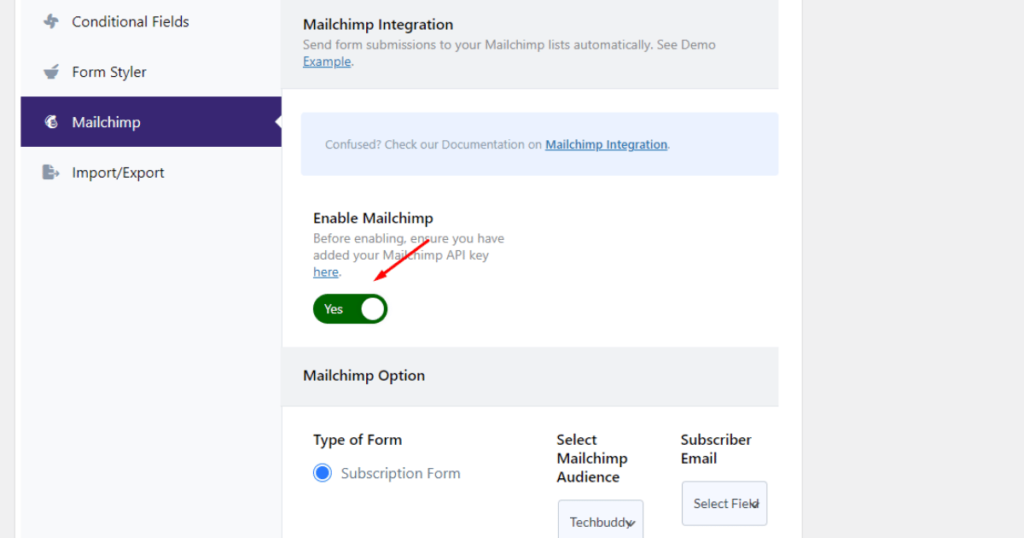
Scroll down and select Subscriber Email as your-email.
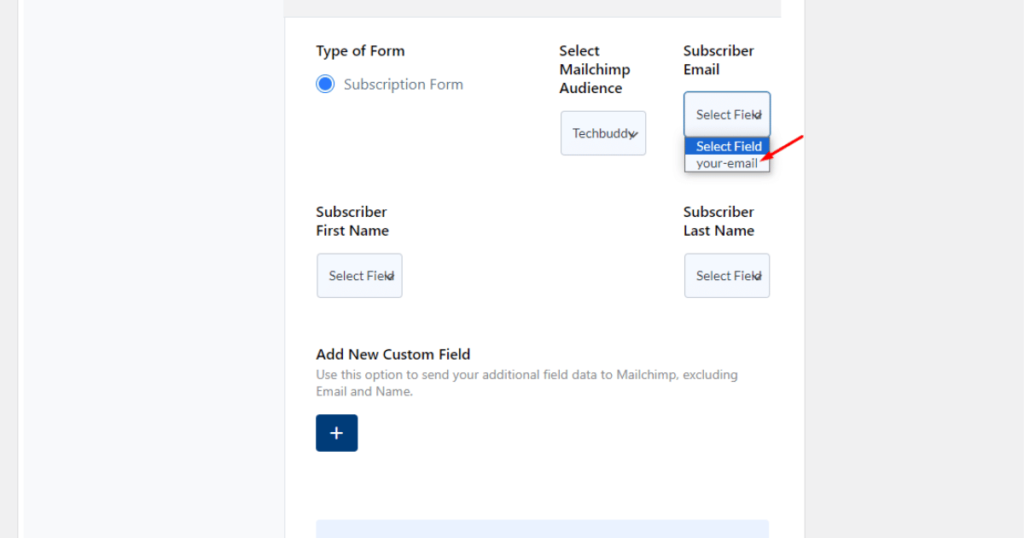
Similarly, select Subscriber First Name as first-name and Subscriber Last Name as last-name.
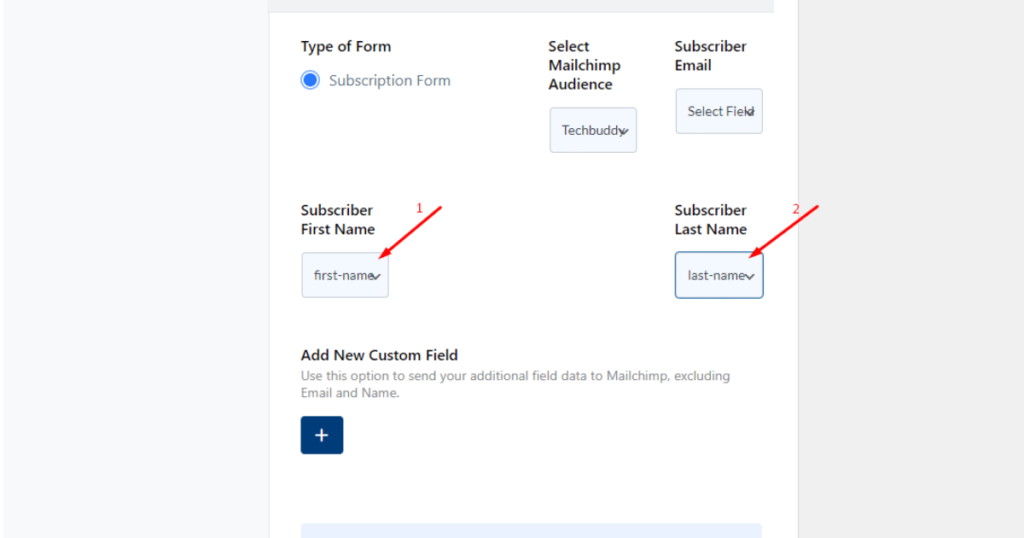
Scroll down and hit the Save button.

At this point, you’ll see a shortcode. Copy that code and save it for later use. We need to insert this code into a page where you want to show the newsletter sign-up form.
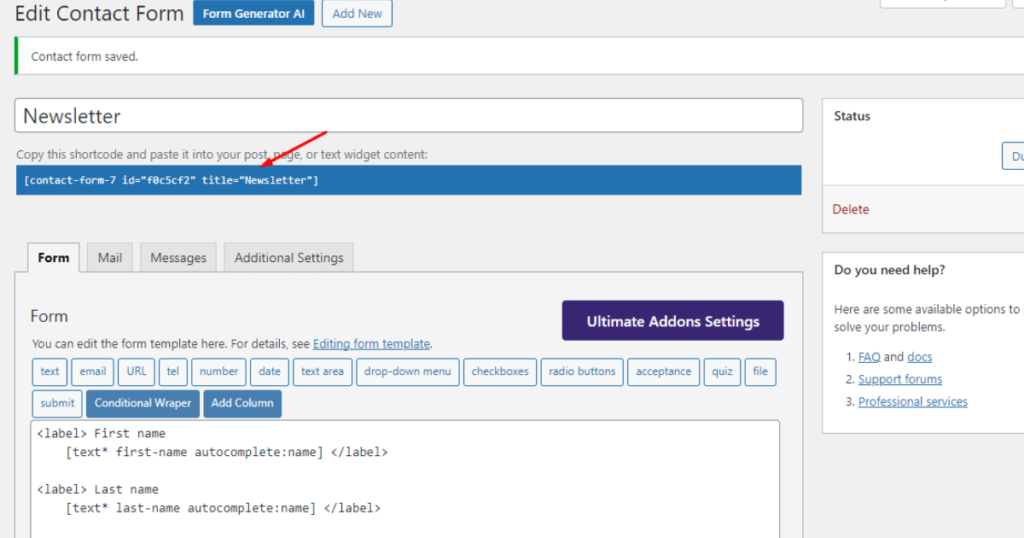
We’re almost done. You just need to create a new page to show the form. Let’s get started with page creation.
Create a Newsletter page
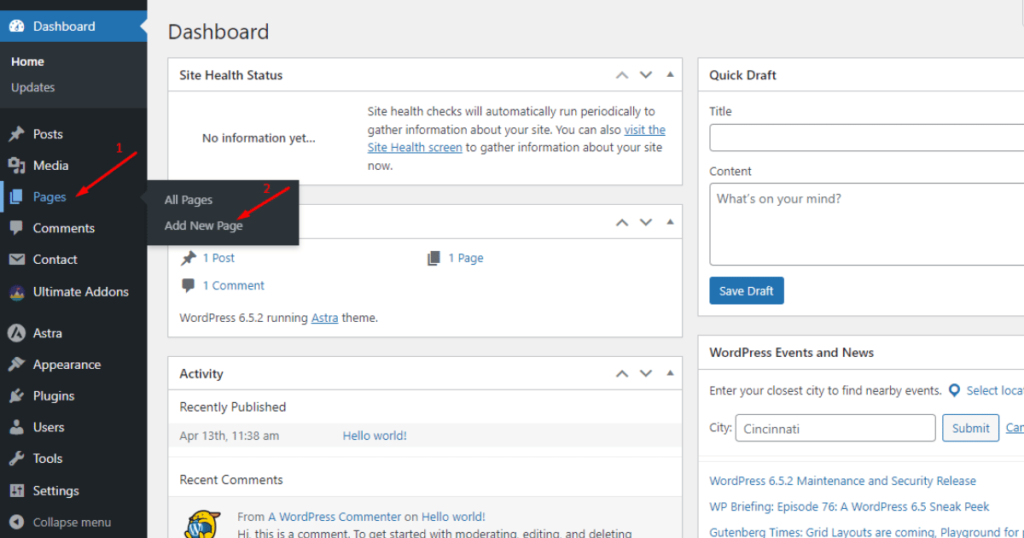
First, go to WordPress Admin Dashboard > Pages > Add New Page.
Afterward, name your page.
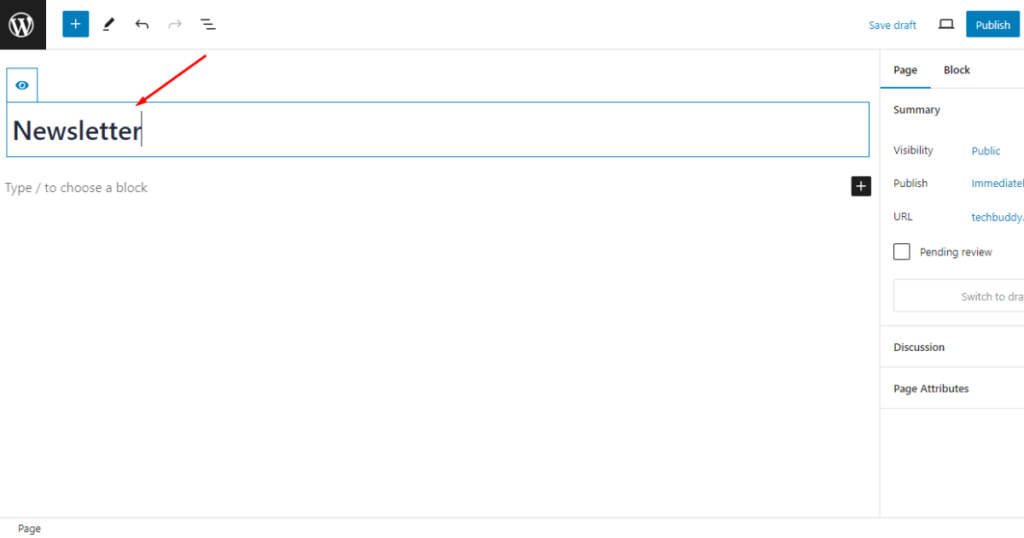
Paste the contact form shortcode we copied a while ago into another block.
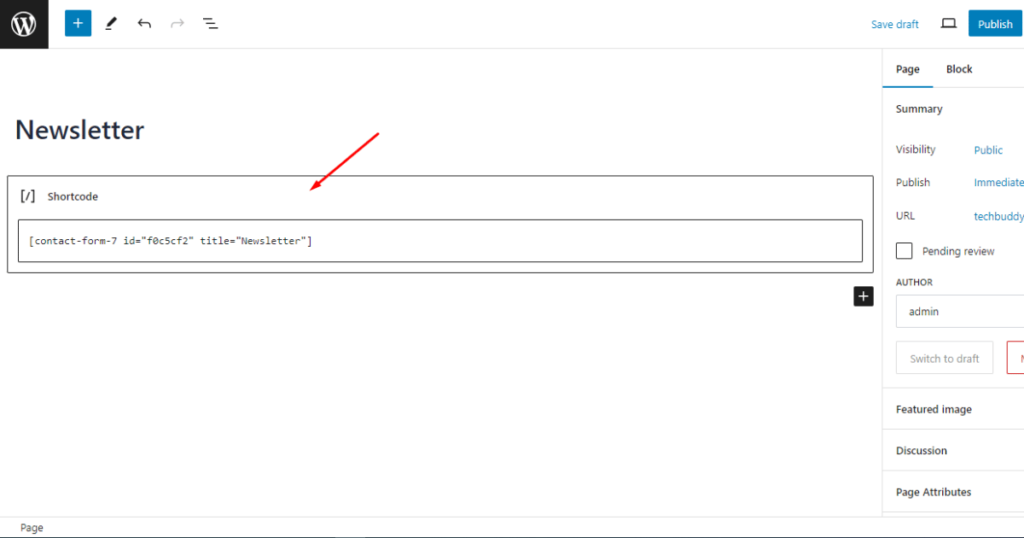
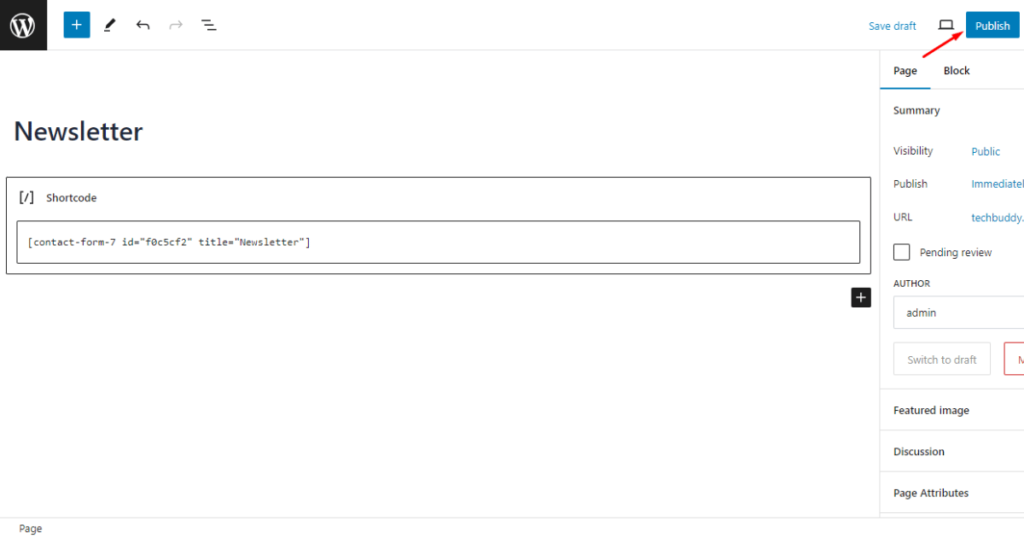
Finally, hit the Publish button.
Let’s now visit the Newsletter page and see how it looks.
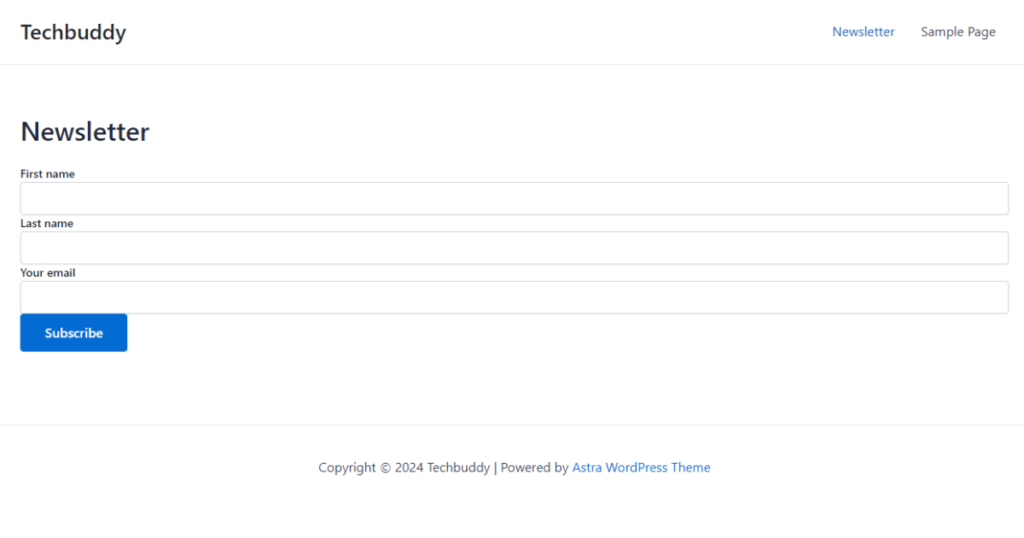
Your form may appear different depending on your website’s theme. Remember, it’s just a basic newsletter sign-up form. You can always design it to make it look professional.
Our guide on Contact Form 7 Style can help you in this case.
So, we’ve integrated Mailchimp with Contact Form 7 and created a newsletter sign-up form and a page. It’s time to check if everything is working appropriately.
Check leads on Mailchimp.
You can begin checking your leads by filling out the newsletter form. See the screenshot below to understand it better.
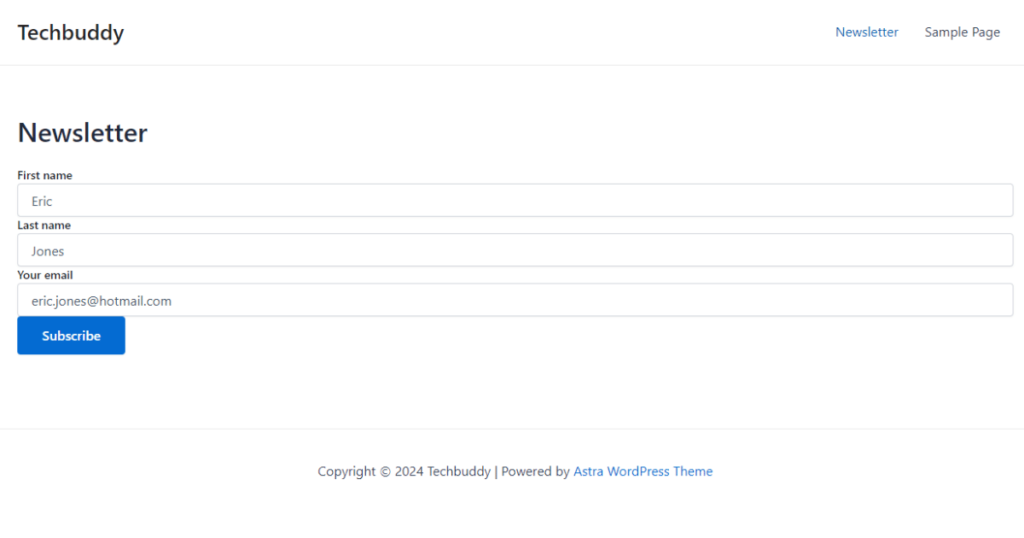
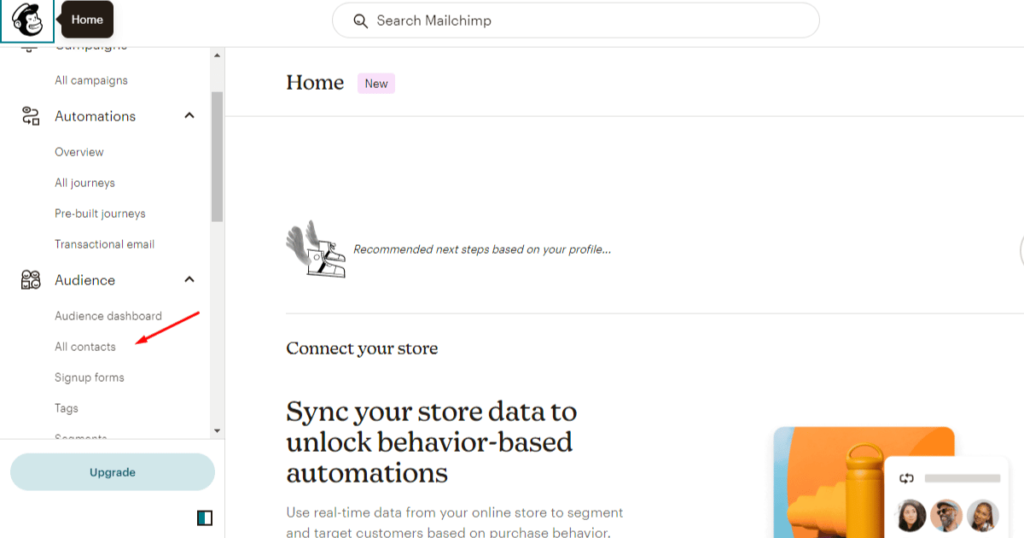
After filling out the newsletter sign-up form, log in to your Mailchimp account. Then, go to the left side panel and click All contacts under the Audience section.
You can now see a lead featuring a first and a last name and an email address you submitted through the newsletter sign-up form on your website.
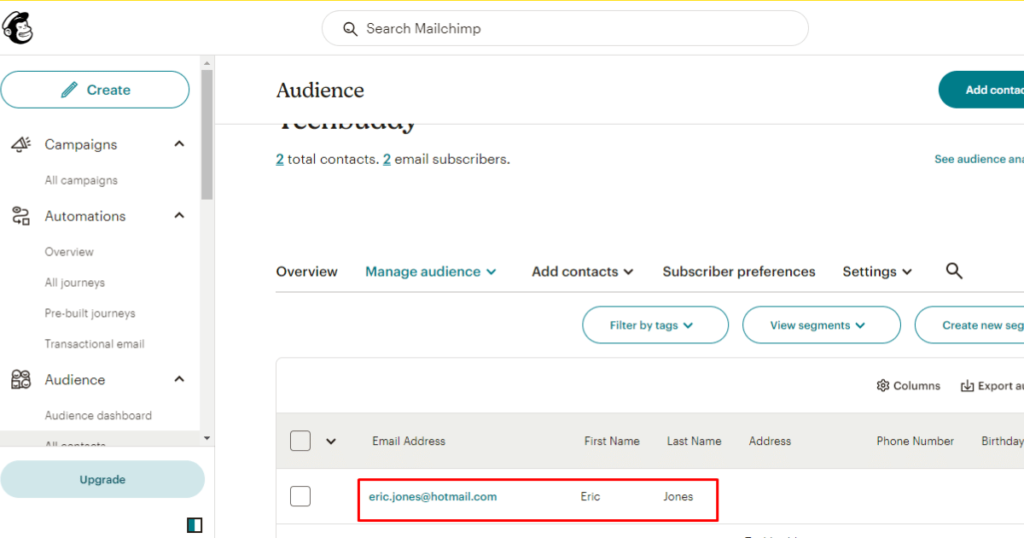
So, everything is fine. You’ve successfully integrated Mailchimp with Contact Form 7.
N:B: Be patient if you don’t see any lead in Mailchimp. Sometimes, this marketing tool takes a few minutes to retrieve information from your website.
Wrapping up
Congratulations! You’ve successfully connected Mailchimp with Contact Form 7. From now on, you can effortlessly capture leads.
With this integration, you’ve unlocked a seamless data flow, ensuring that every form submission becomes a valuable addition to your Mailchimp audience.
You can now nurture leads, build relationships, and drive conversions like never before.
Witness the power of Mailchimp and Contact Form 7 with Ultra Addons for Contact Form 7.
Enjoy the adventure as your email list flourishes and your business thrives. Happy emailing!
