Zapier is one of the most popular automation tools that allows you to connect With Zapier with your favorite apps and automate workflows effortlessly. You can send and receive data between different platforms, making your processes more efficient and reducing manual work.
Using Ultra Addons for Contact Form 7, you can easily integrate Contact Form 7 with Zapier to automate tasks such as saving form submissions, sending data to CRMs, triggering emails, and more.
In this blog, we will guide you step by step on how to connect Contact with Zapier to streamline your workflow and enhance productivity. Let’s dive in!
What is Zapier?
Zapier is a no-code automation platform that allows you to connect different apps and automate workflows without requiring programming skills. It acts as a bridge between applications, enabling users to create automated workflows (Zaps) that trigger specific actions when an event occurs.
For example, with Zapier, you can:
- Send Contact Form 7 submissions to Google Sheets automatically.
- Add new leads from Contact Form 7 to Mailchimp or HubSpot.
- Trigger Slack notifications whenever a form is submitted.
- Create Trello or Asana tasks based on form entries.
- Send automated follow-up emails when someone fills out a form.
How to Connect Contact Form 7 with Zapier? – The Step By Step Guide
Prerequisites
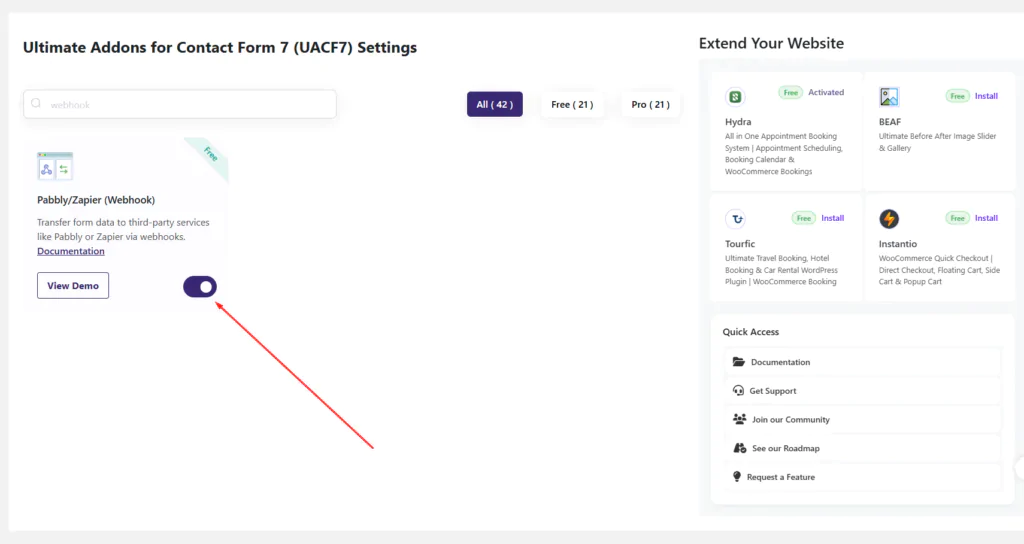
- Ensure that both Contact Form 7 and Ultra Addons for Contact Form 7 are installed on your WordPress site.
- Go to Ultra Addons > All Addons menu in your WordPress dashboard and enable Pabbly/Zapier (Webhook) checkbox.
Step 1: Generate the Webhook URL from Zapier
First of all you need to log in to your Zapier account from here.
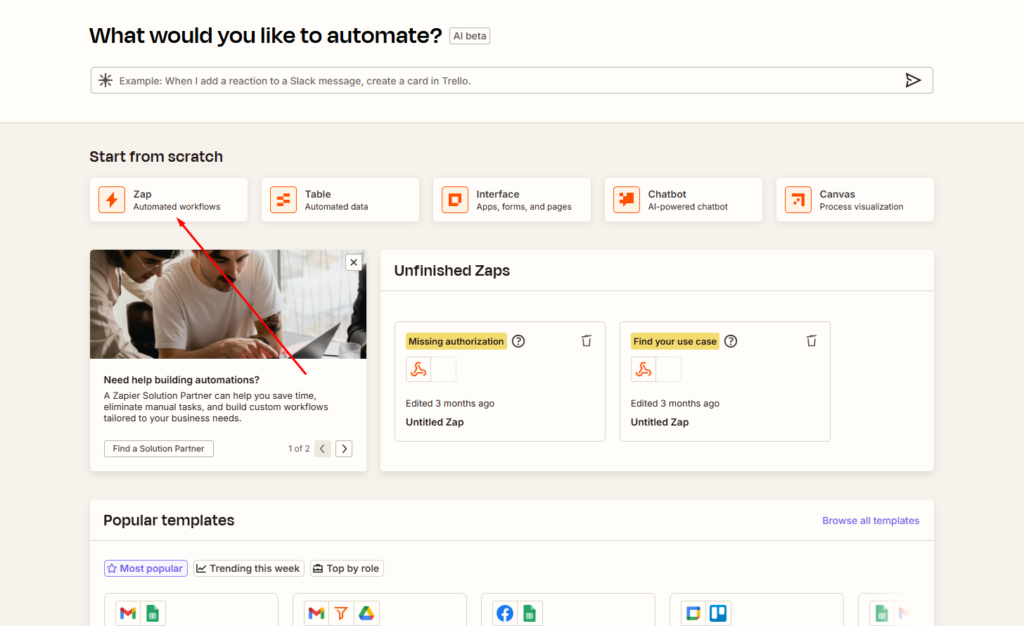
Once you’ve successfully logged in, locate Zap in your dashboard and click on it.
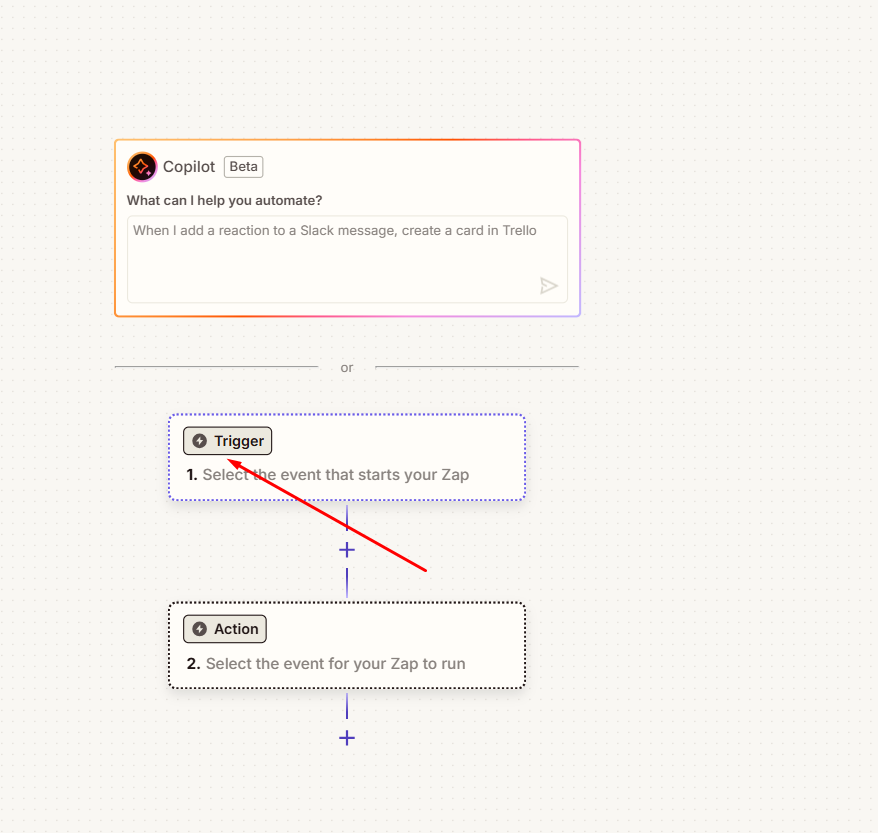
Once the new page loads, locate the Trigger section and click on the Trigger button.
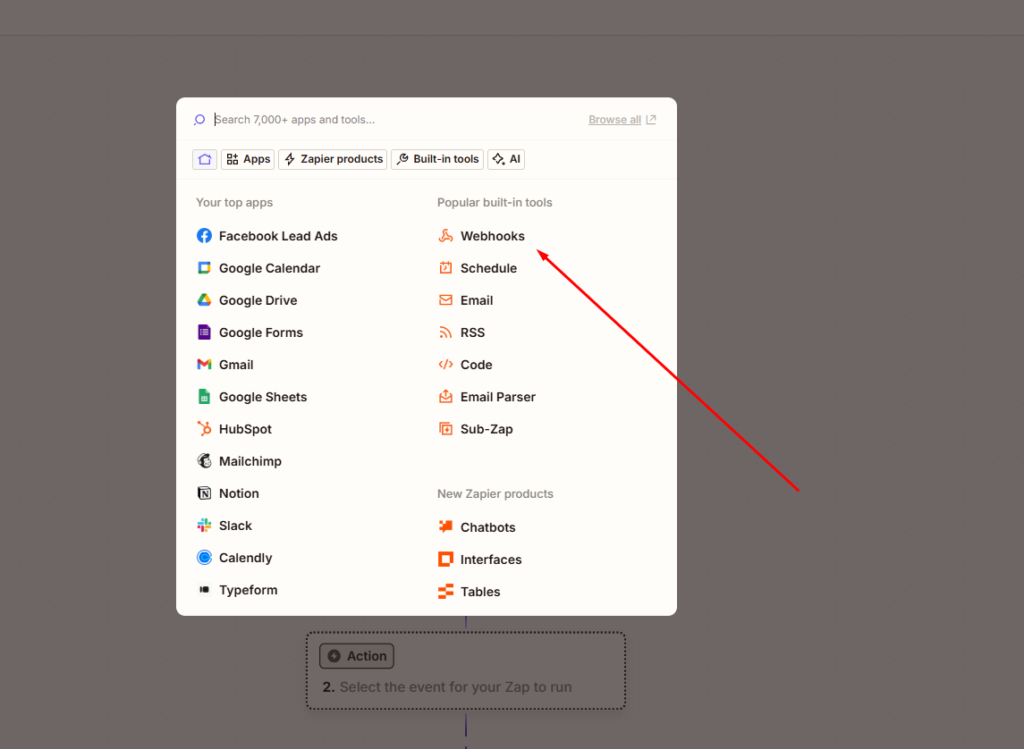
After clicking the Trigger button, a popup will appear displaying several apps and services. Select the Webhooks option from the list.
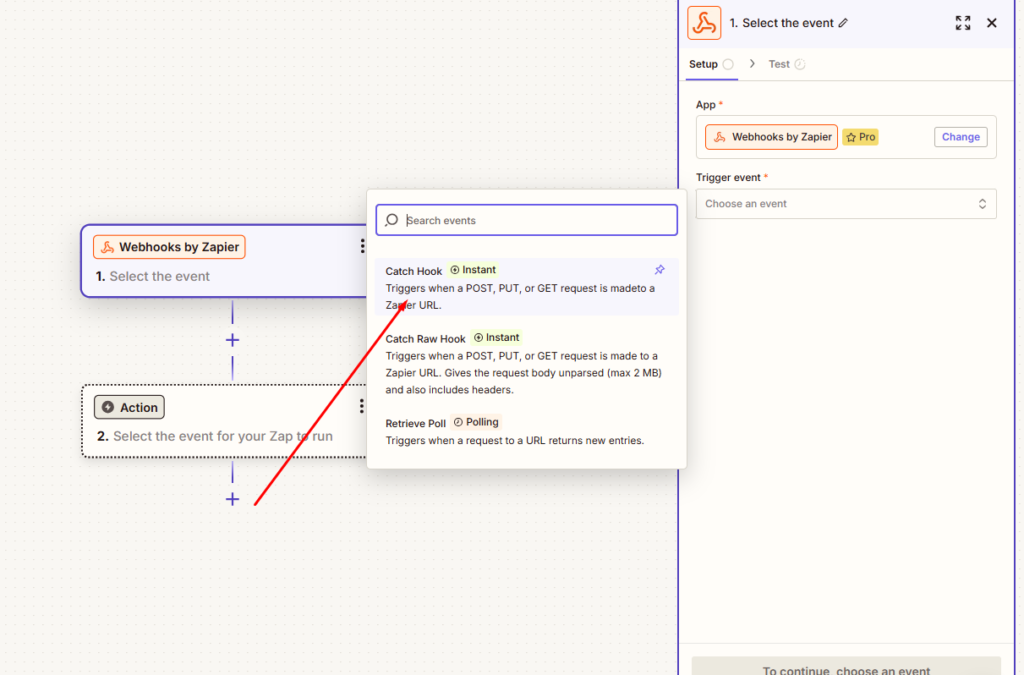
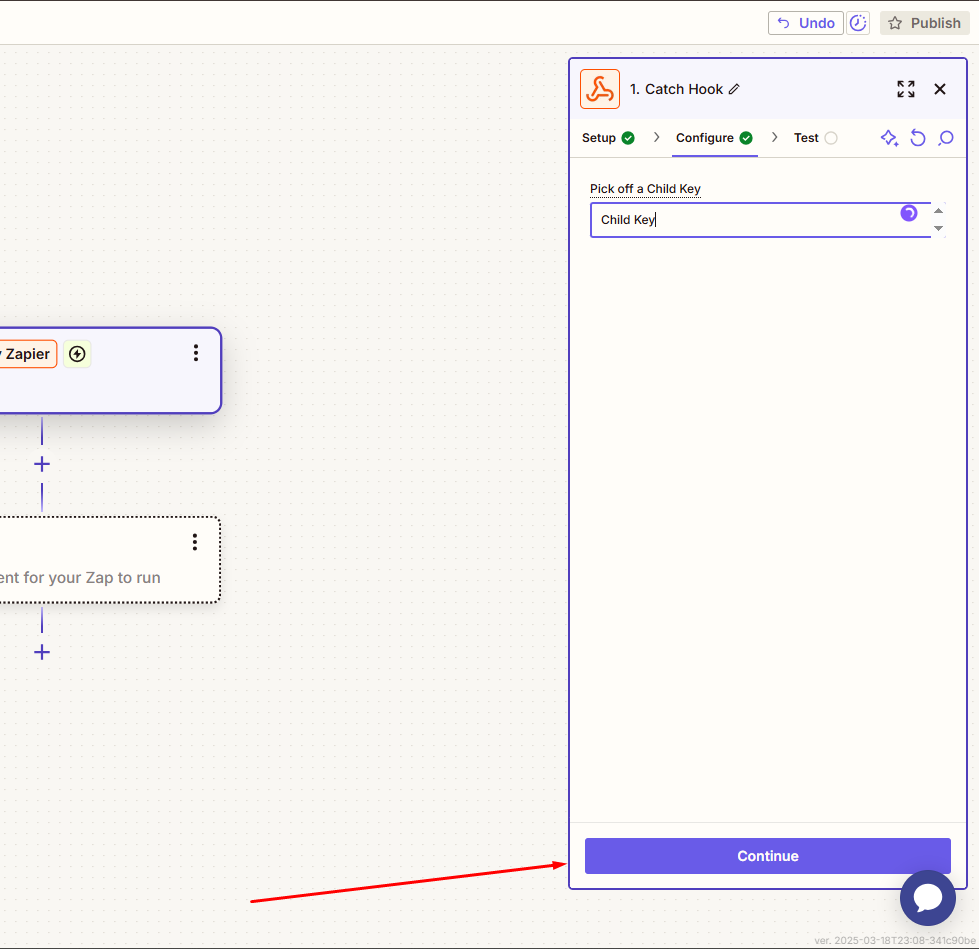
From the Trigger Event dropdown, select Catch Hook and click the Continue button.
After clicking the Continue button, you’ll see a field called Pick Off a Child Key. Here, you need to enter a key so that Zapier can catch the data and organize it under this specified “child key” as its value. After providing the “Child Key” click on Continue button again.
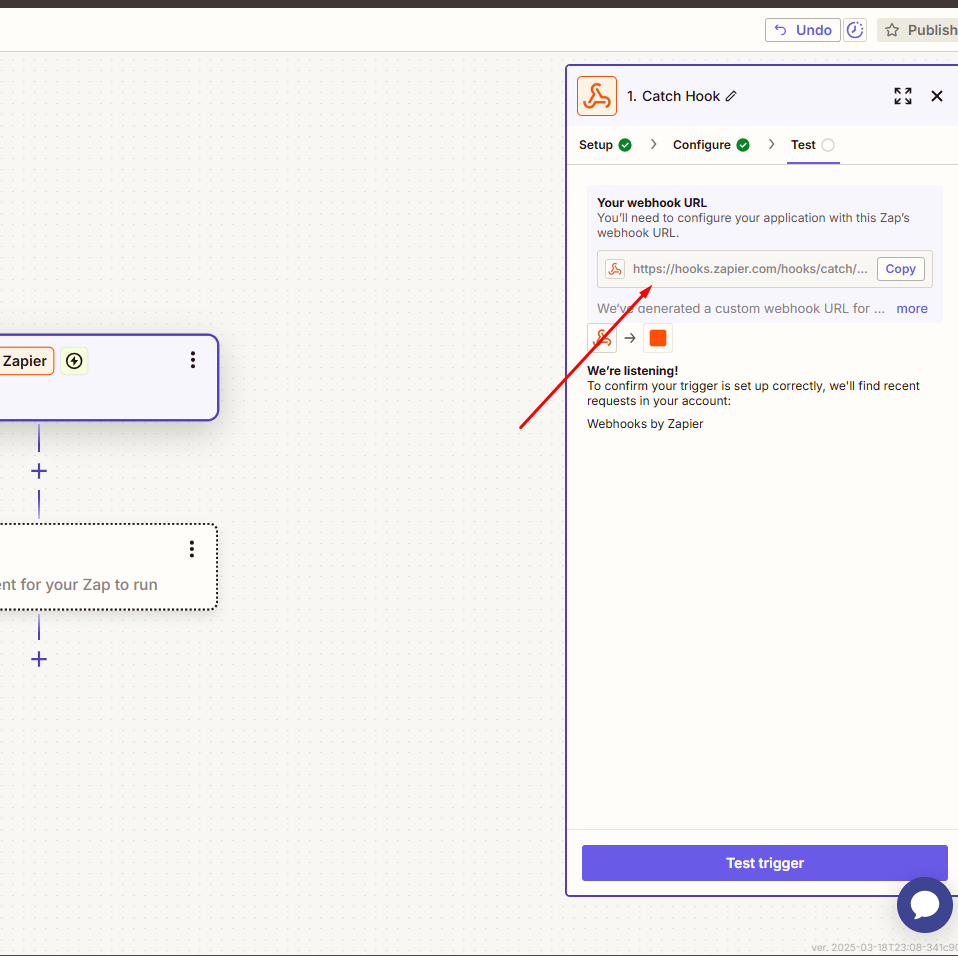
After that, a Webhook URL will be generated. Simply copy this URL, as we’ll need it to configure it with Contact Form 7.
Step 2: Configure the Contact Form 7 Webhook settings
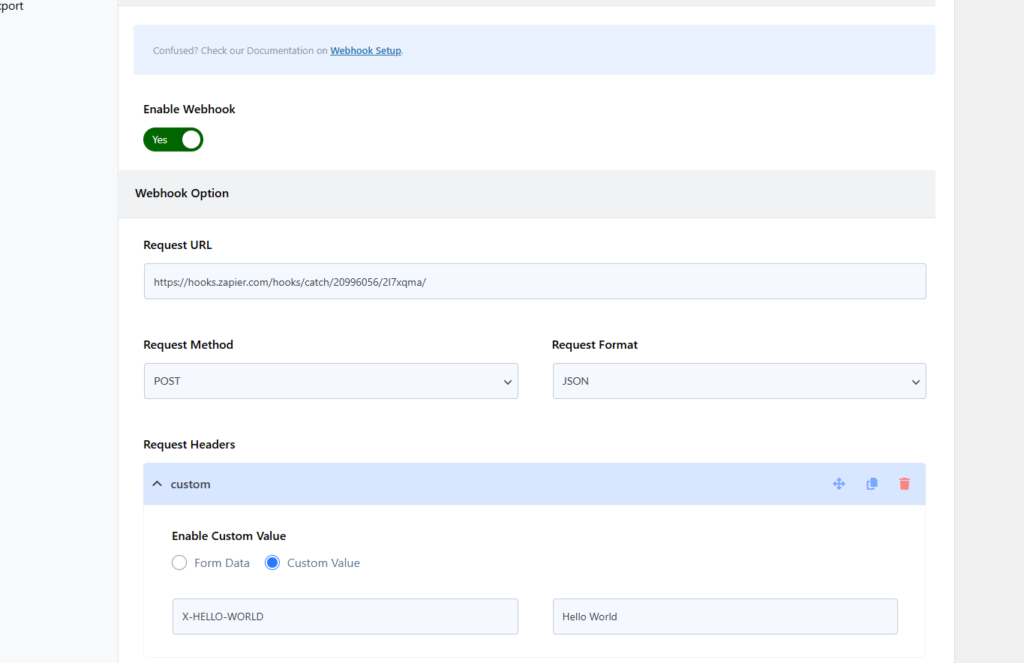
After obtaining the webhook URL, navigate to Ultra Addons for CF7 Options > Webhook and toggle the “Enable Webhook” option to ON.
Please note that without enabling this option, the webhook feature will not work, and your form data will not be sent to Zapier.
After enabling the Webhook option, paste the Webhook URL that we obtained in Step 1 into the “Request URL” field. This will ensure that form submissions are sent to zapier for processing.
Request Method: To send data to Zapier, you need to use the POST method. Select POST from the dropdown menu to ensure the data is correctly transmitted.
Request Format: Zapier supports both JSON and Form Data as data formats. Choose the format that best suits your needs. If you’re dealing with structured data, JSON is recommended, while Form Data works well for standard form submissions.
Request Headers: This option allows you to send any required headers or authentication tokens along with your webhook request. If Zapier requires specific headers for authentication or data processing, you can add them here. For this demonstration, I am creating a test header to send to zapier , but you can customize it according to your needs.
Request Body: This section defines the data you want to send to Zapier. Here, you need to configure the form fields and assign appropriate keys to ensure the correct information is transferred. Each field in your Contact Form 7 form should be mapped to a corresponding key that Zapier will recognize. This setup allows seamless data transfer, ensuring that all relevant form submissions are properly received and processed on Zapoier end.
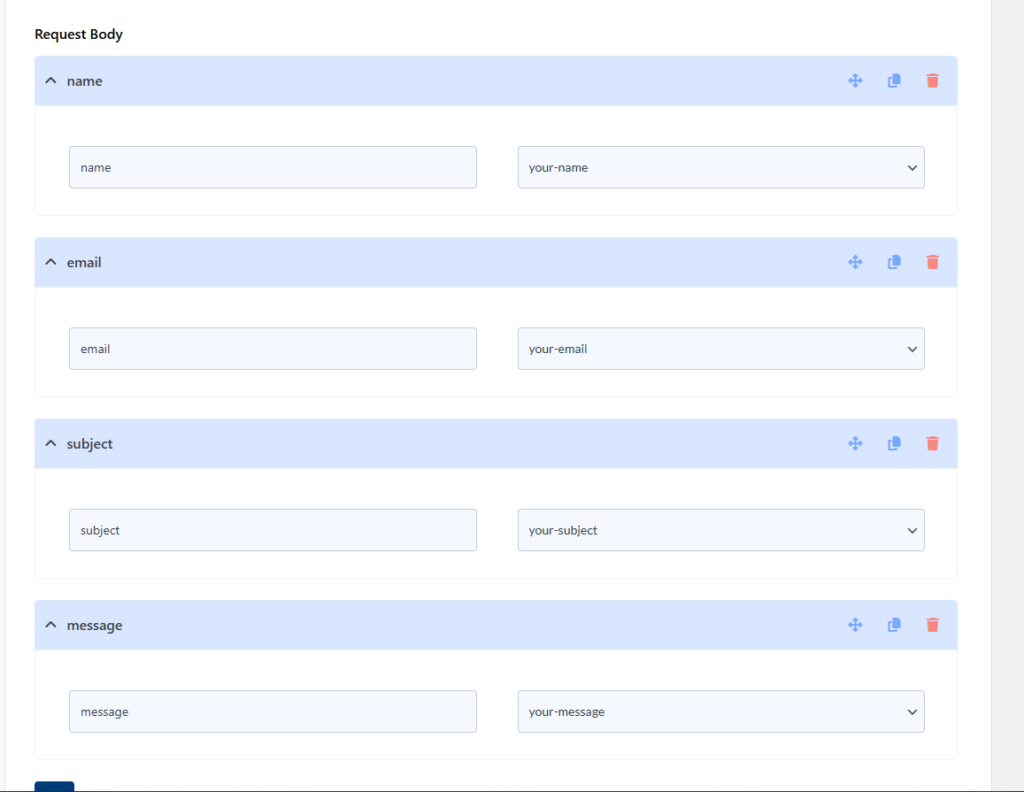
here is my fields and keys.
After setting up everything correctly, click on the “Save” button to apply the form settings. Once the settings are saved, it’s time to test whether the data is being sent properly.
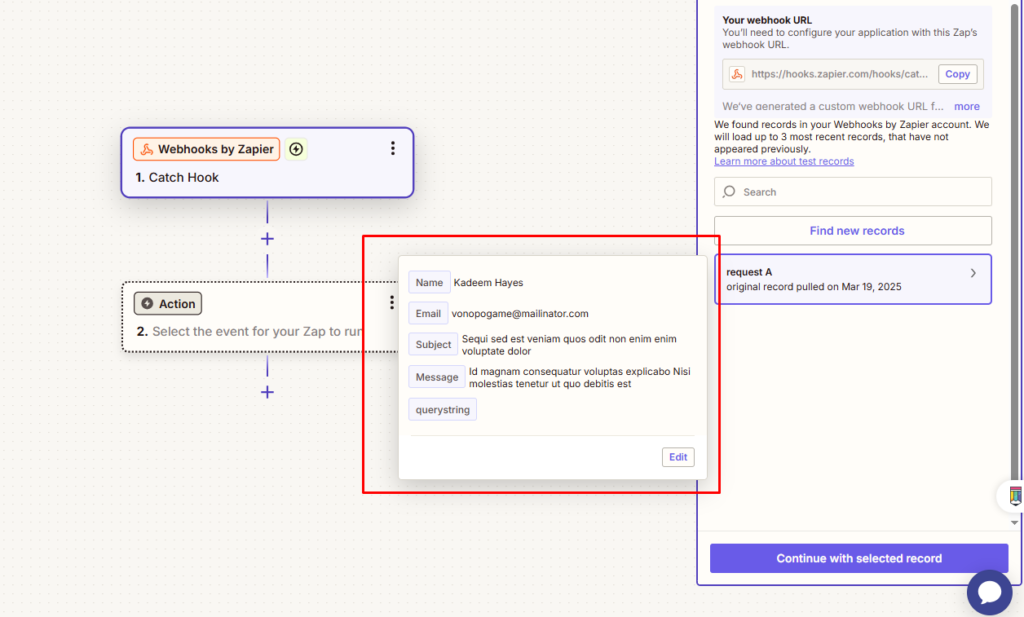
Step 3: Testing the connect with Zapier settings
Now, after submitting some dummy data, I can confirm that the data has been successfully sent and captured by zapier. Below, you can see that all the form fields and values have been received correctly in the zapier workflow. This confirms that the webhook integration between Contact Form 7 and zapier is working as expected.
Video Guide
You can check the video tutorial for more info about connect with zapier.

Final Words
Integrating Contact Form 7 with Zapier is a game-changer for automating workflows, eliminating manual tasks, and ensuring seamless data processing. By setting up Zapier Webhooks, you can instantly send form submissions to Google Sheets, CRMs, email marketing platforms, Slack, and thousands of other applications.
This integration helps businesses streamline lead management, automate email responses, store customer inquiries efficiently, and trigger advanced workflows—all without requiring coding knowledge. Whether you’re handling customer inquiries, order forms, or service requests, Zapier ensures that your data flows smoothly between applications.