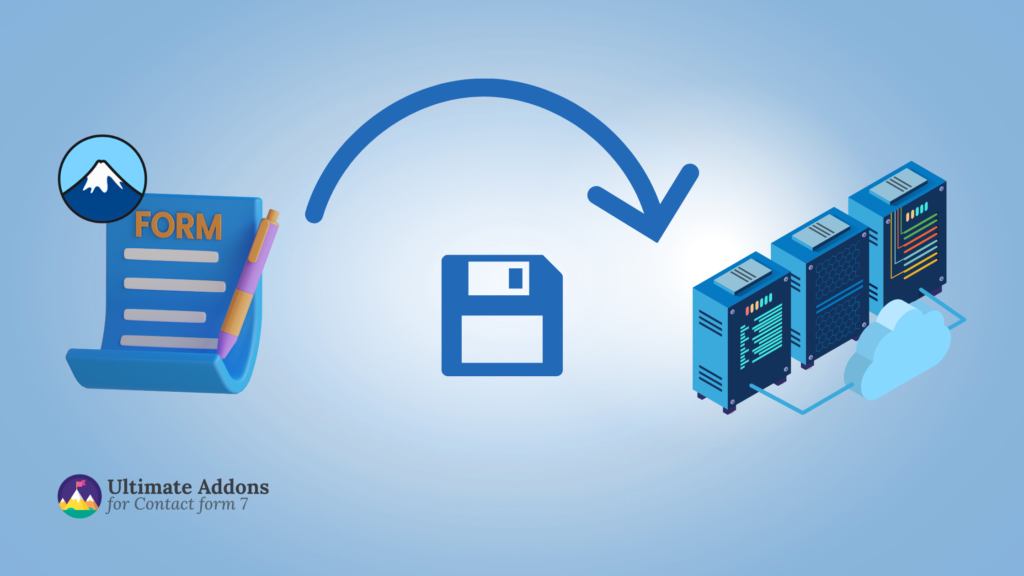
Did you know that nearly 50% of businesses lose significant customer inquiries because of poor form management? What if you get dozens of submissions daily but they disappear into the air after an email mishap? This is where saving your form data directly to your WordPress database becomes a game-changer.
Imagine safely storing every message in one location that you can access anytime. You can effortlessly do that with Contact Form 7 and the Ultra Addons plugin. No more worries while handling form submissions!
This guide walks you through the ways you can save your Contact Form 7 data to the database features with Ultra Addons and access them seamlessly from your WordPress dashboard.
Let’s start transforming how you handle contact form submissions – because every message matters!
Contact Form 7 Save to Database – A Step by Step Guide
If you’re using form submissions on your WordPress website, it’s essential to store them securely in your database. When paired with the Ultra Addons plugin, Contact Form 7, one of the most popular WordPress plugins, makes this process quite easy.
Step 1: Installing Contact Form 7
To get started, you need to install the Contact Form 7 plugin. Let’s go through the steps with screenshots.
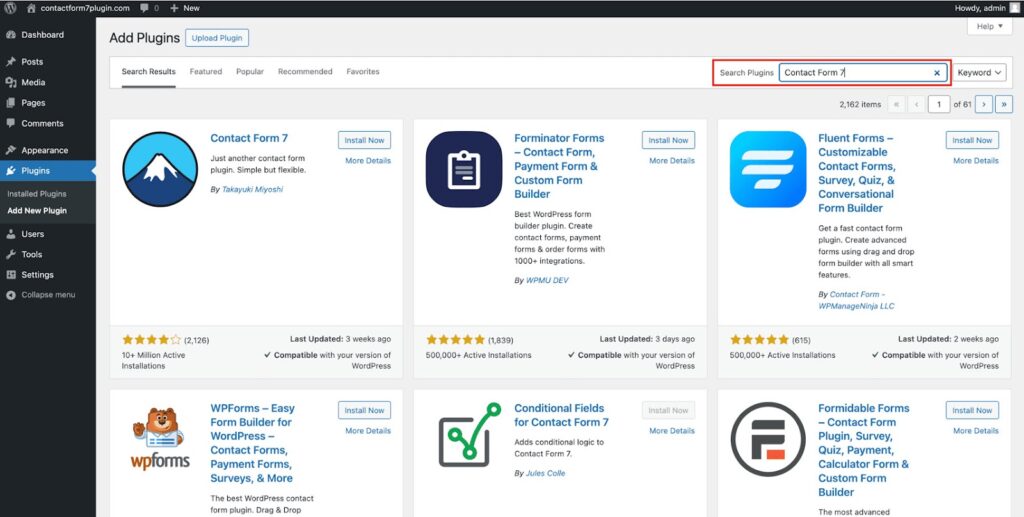
Go to your WordPress admin dashboard and navigate to Plugins.
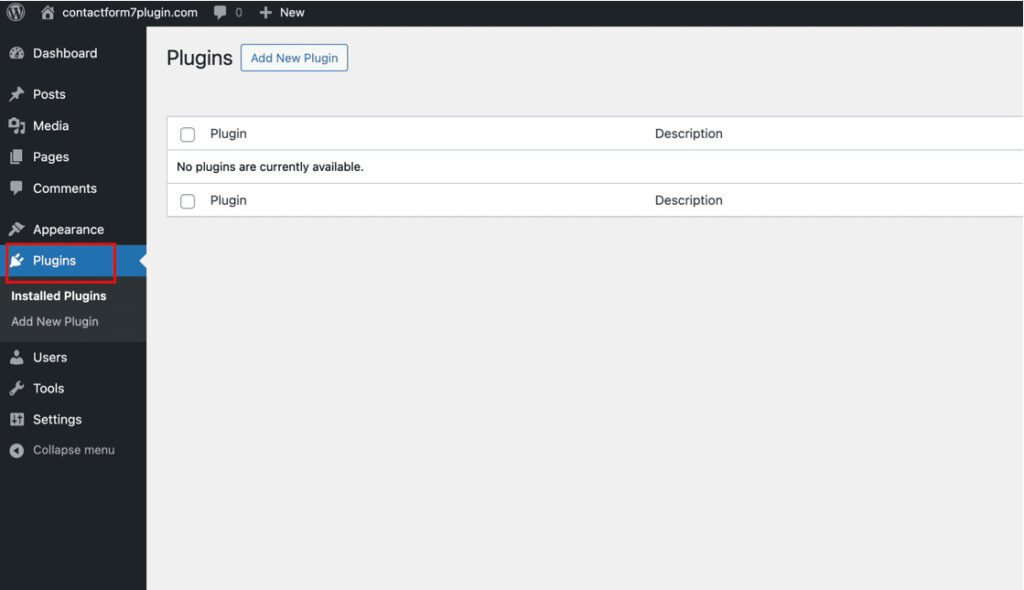
Then click “Add New Plugin” to open WordPress’s search panel.

In the search bar, type “Contact Form 7” and search.
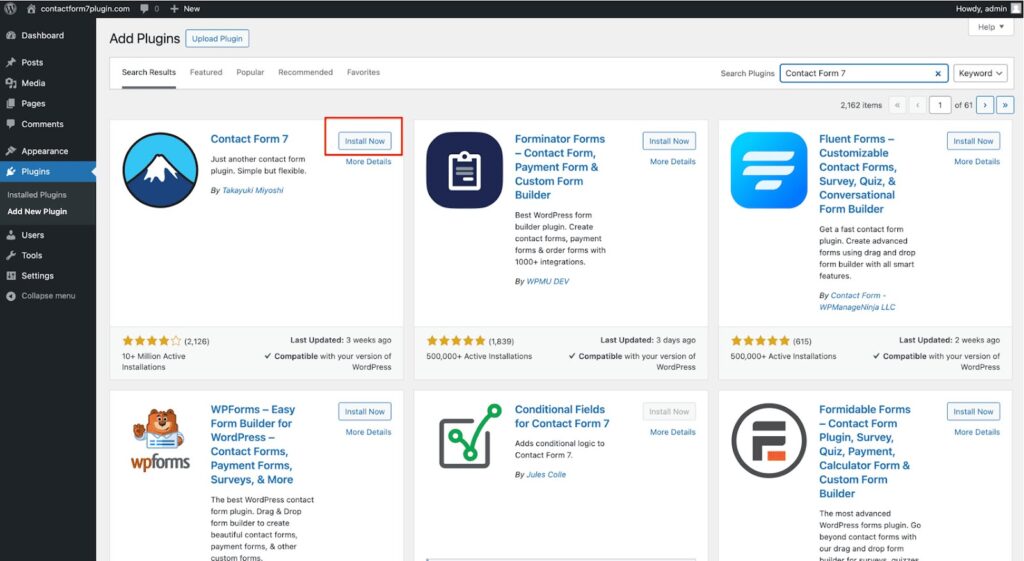
In the search results, click “Install” next to Contact Form 7.
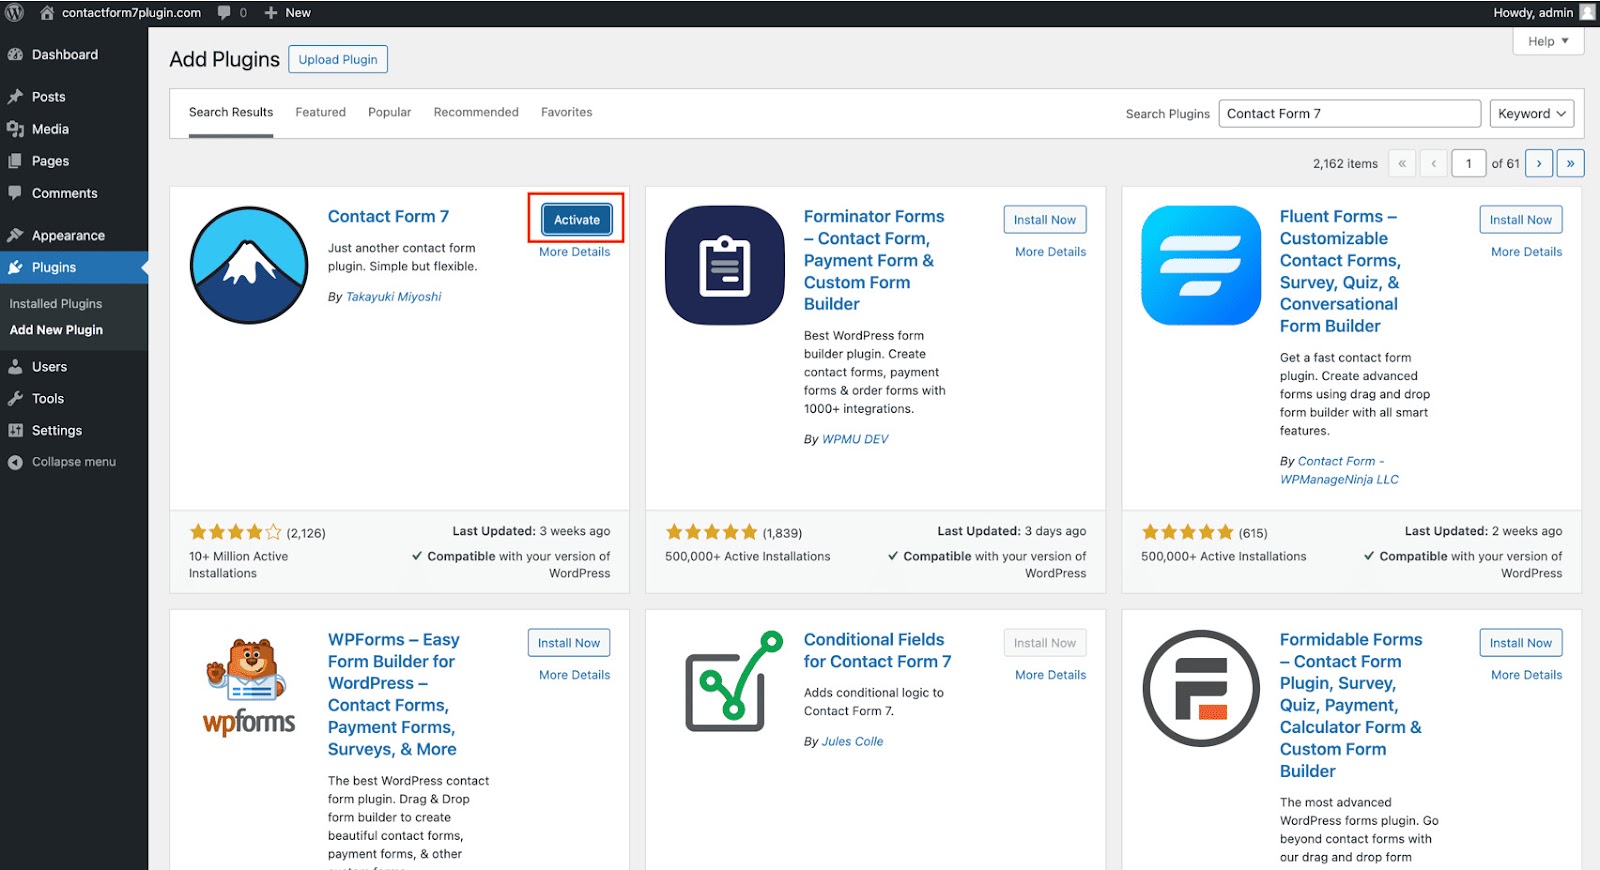
After installation is complete, click Activate.
To get a seamless experience from the contact form builder tool, download the plugin directly from WordPress.org to ensure that your WordPress version is up-to-date and compatible.
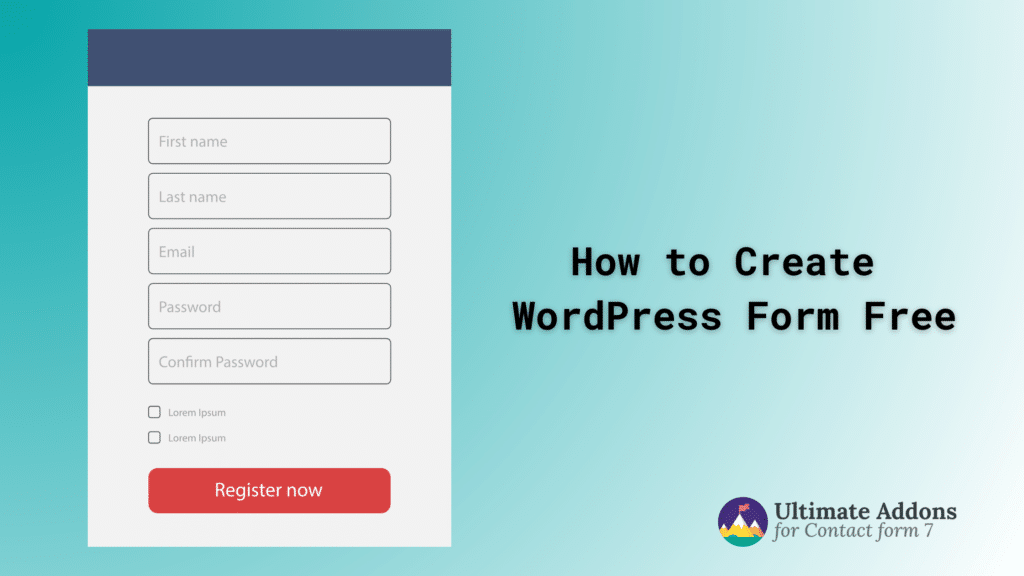
Step 2: Creating a Contact Form
Now that the plugin is installed, it’s time to create your first contact form:
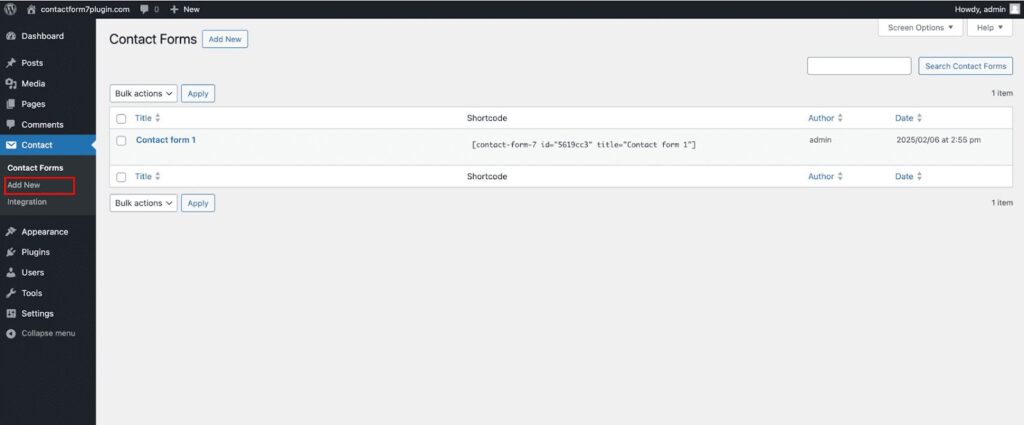
To create a contact form, click “Contact” in the WordPress Dashboard.
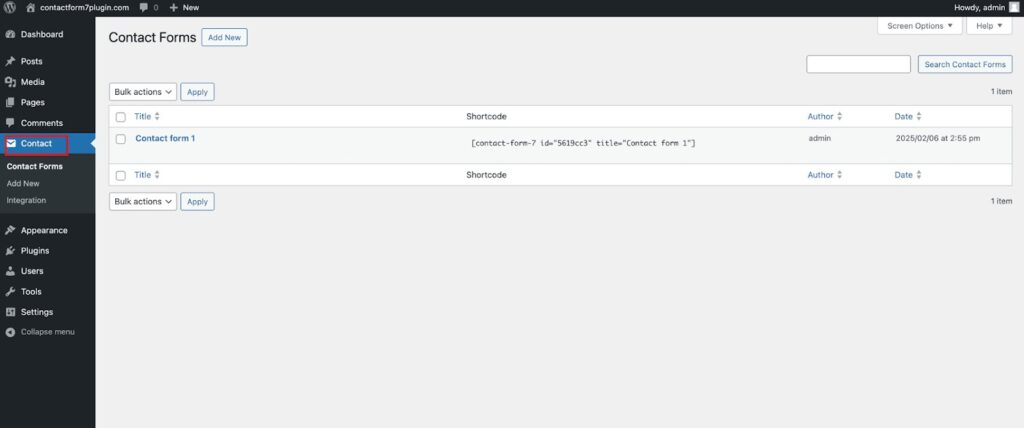
Then click the “Add New” to create a new contact form.
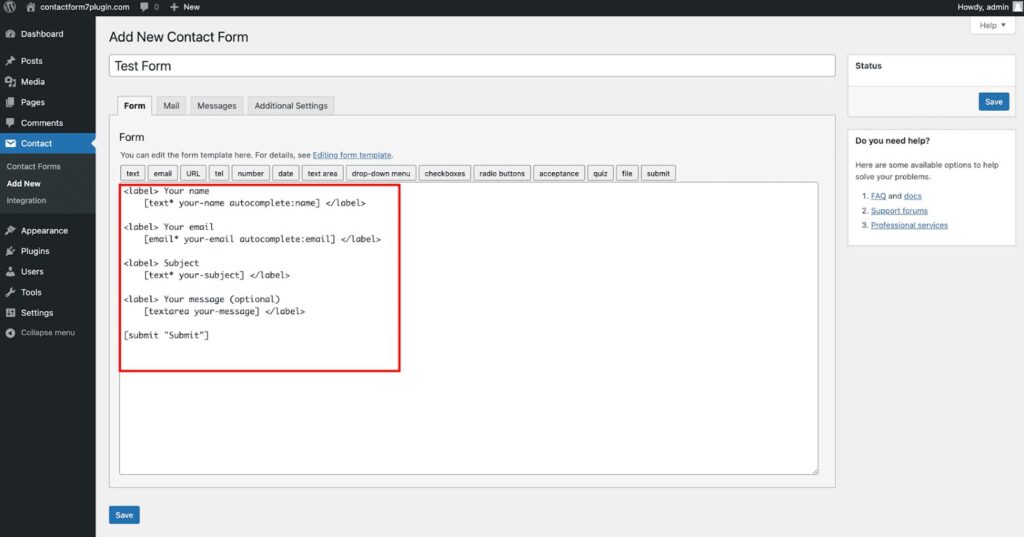
Now, you can customize the form fields according to your preference. For instance, you can add fields such as name, email, and message and then “save” the form.
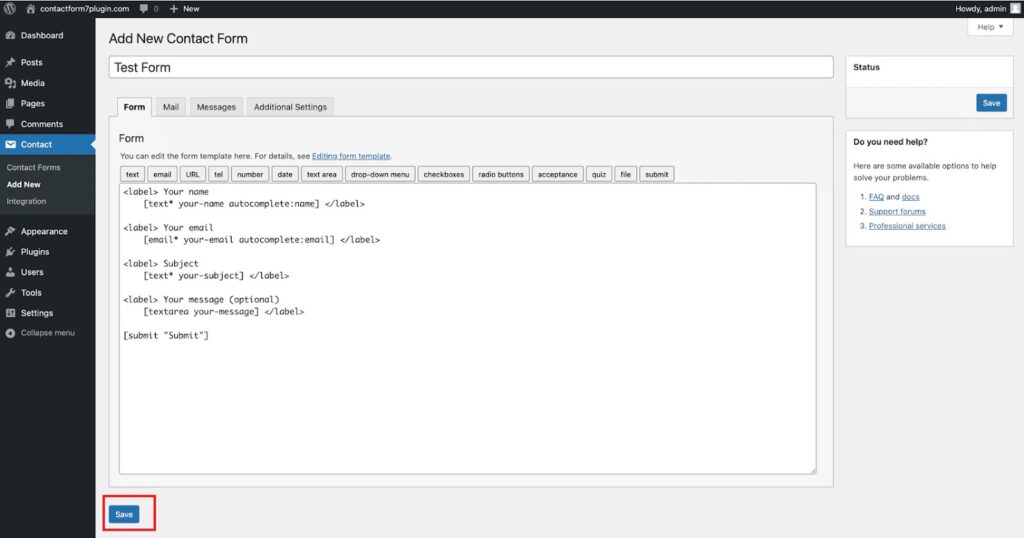
Then, you can “Save” the form.
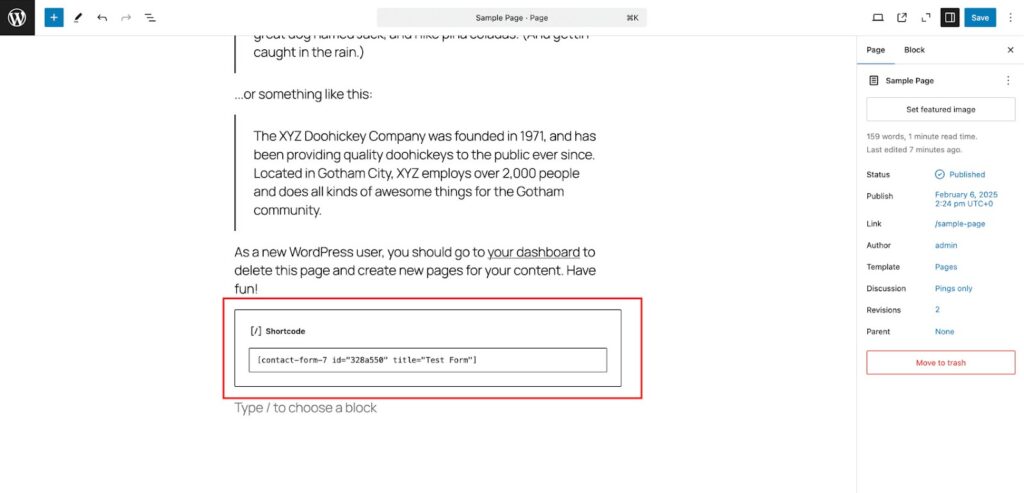
You will receive a shortcode after you save the form.
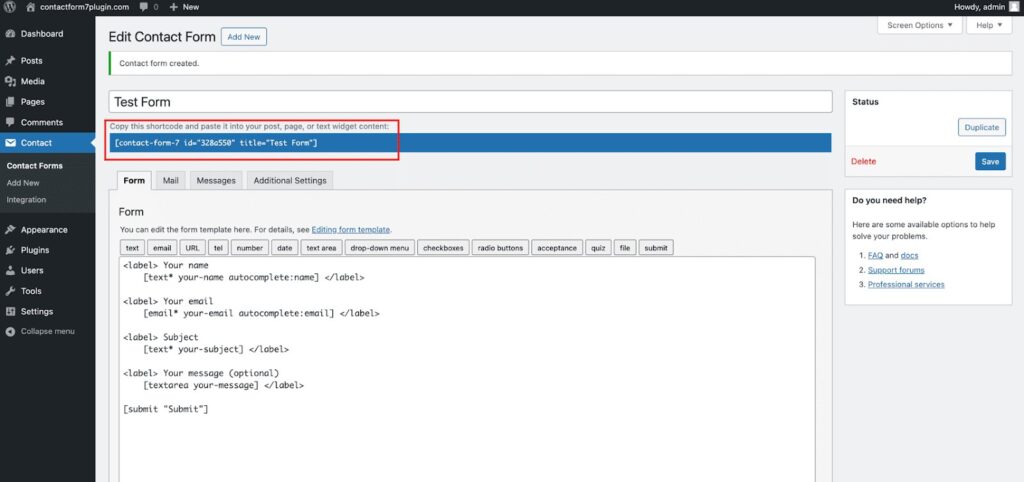
You can copy and paste this shortcode wherever you want the form to appear, such as any page or post. To do that, select “Pages” from the WordPress Dashboard.
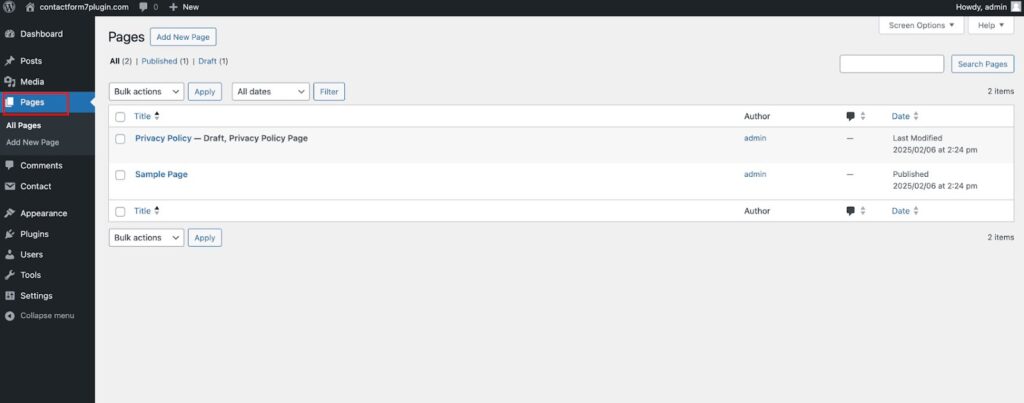
Then select “Sample Page” to edit.

Now paste the shortcode and “Save” it.
In the preview, you can see the Form is fully functional.
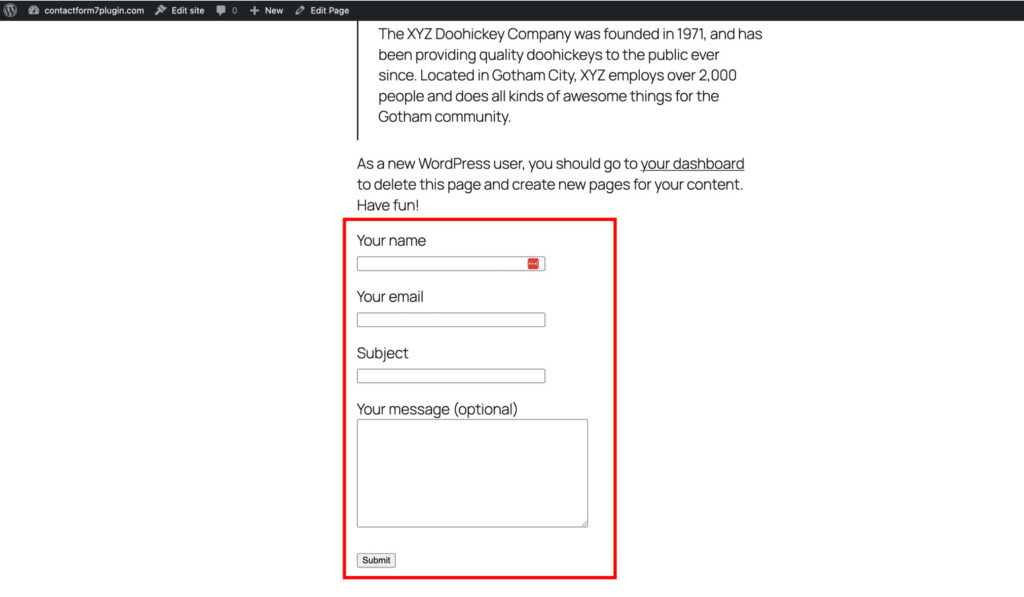
With this simple setup, your visitors can fill out the form, and you’ll receive their inquiries or messages.
Step 3: Setting Up Ultra Addons for Contact Form 7
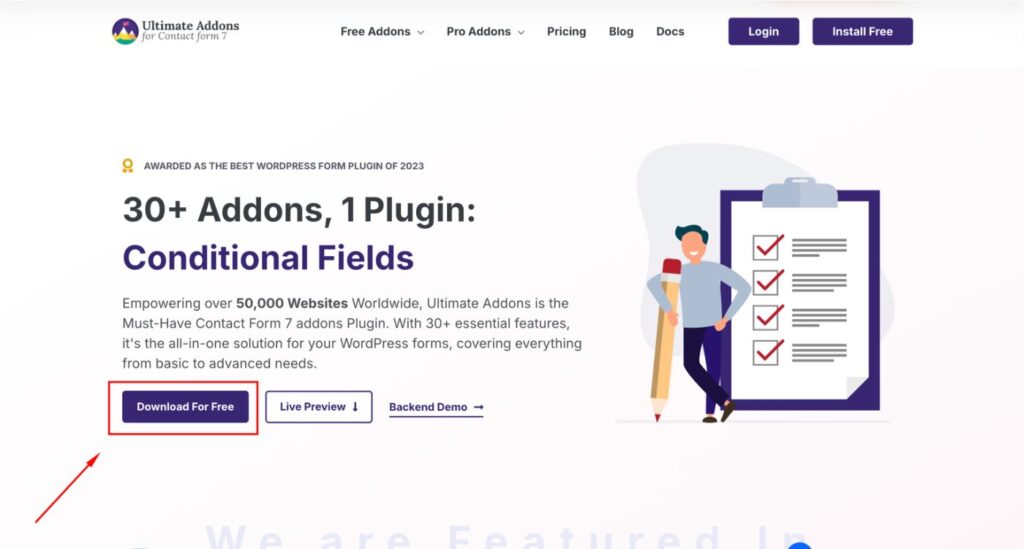
To save submissions directly to your WordPress database, you need to install the Ultra Addons plugin:
Visit Ultra Addons for Contact Form 7 to download the plugin for FREE.
Go to Plugins ⮕ Add New Plugin in your WordPress dashboard as we did in the previous one.
Click the “Upload Plugin” button to open the file upload window.

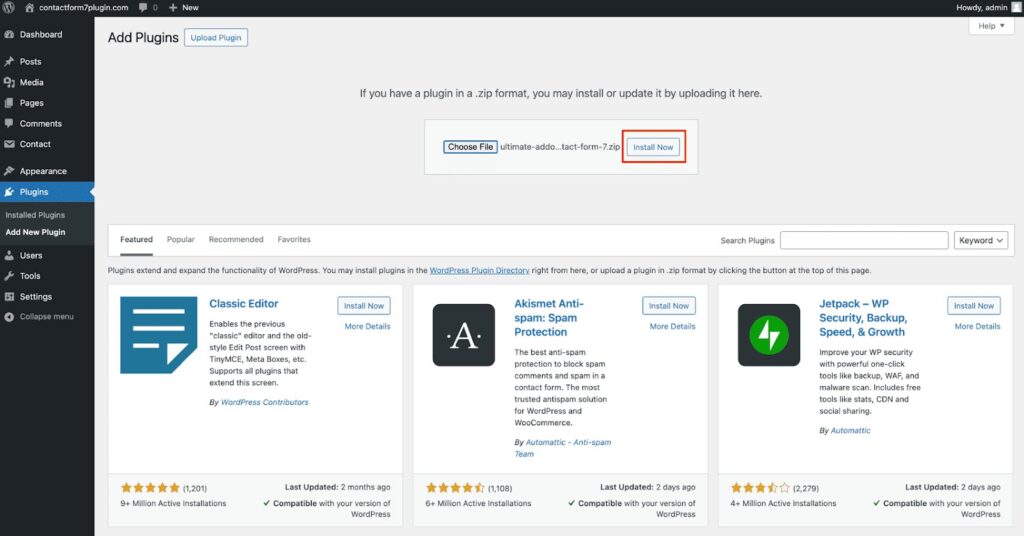
Now click “Choose File” to upload the plugin’s ZIP file from your computer
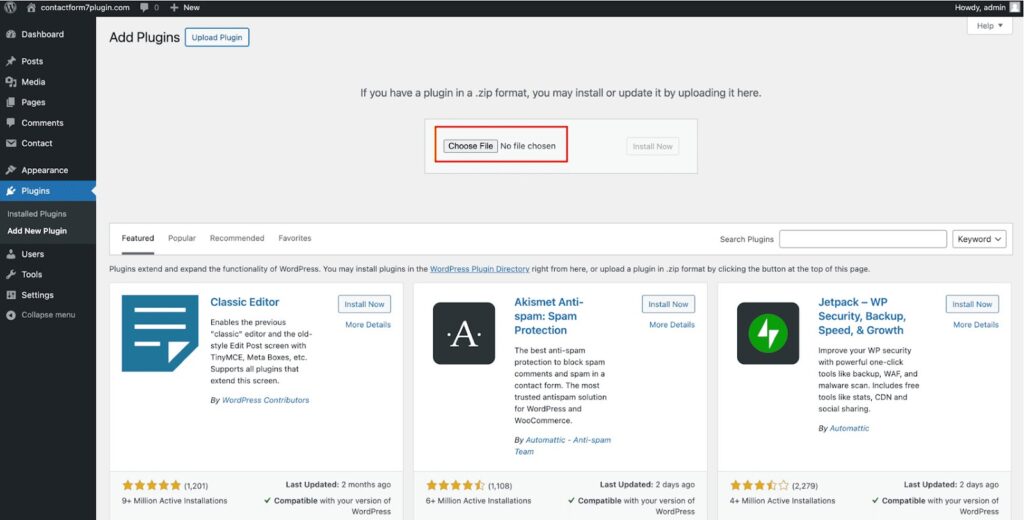
Then click “Install” on the right side of the window.
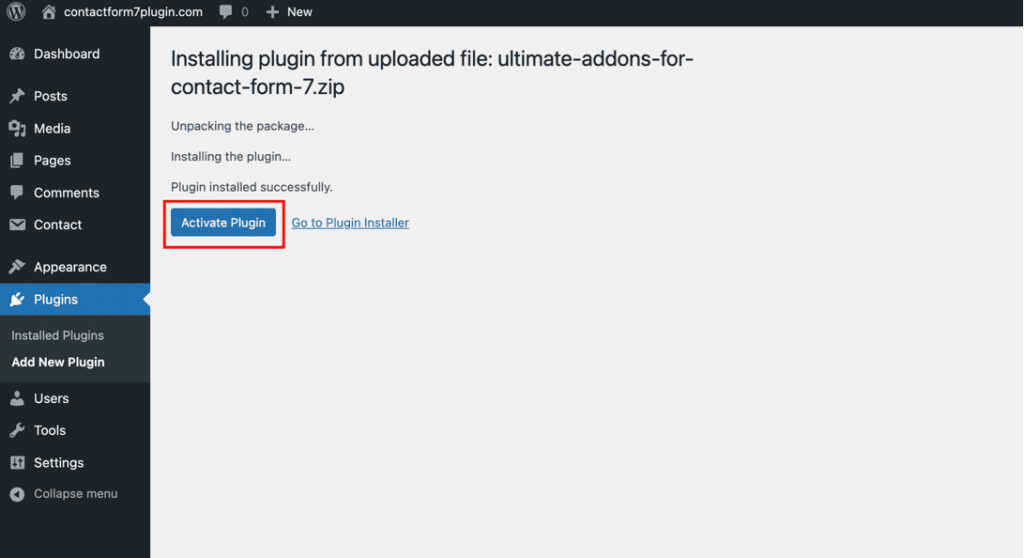
After installation, click “Activate Plugin” to start using the plugin.
This addon enhances Contact Form 7 by adding advanced features, including the ability to save form submissions in the backend.
Step 4: Enabling Database Storage
With both plugins installed and activated, follow these steps to enable database storage:
Now, from the WordPress dashboard, select Ultra Addons ⮕ All Addons.
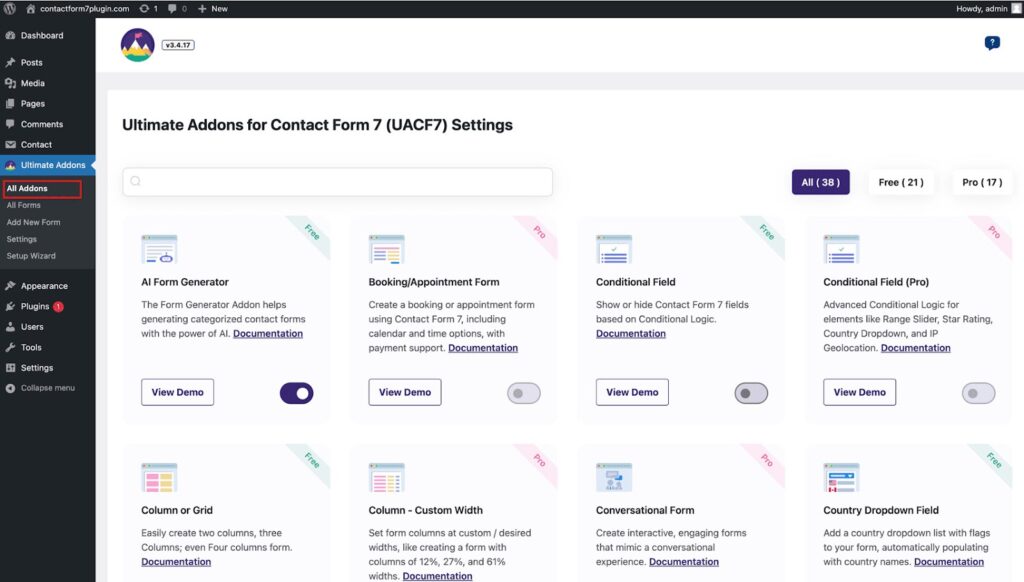
Then click “Free” to see all the available free options.
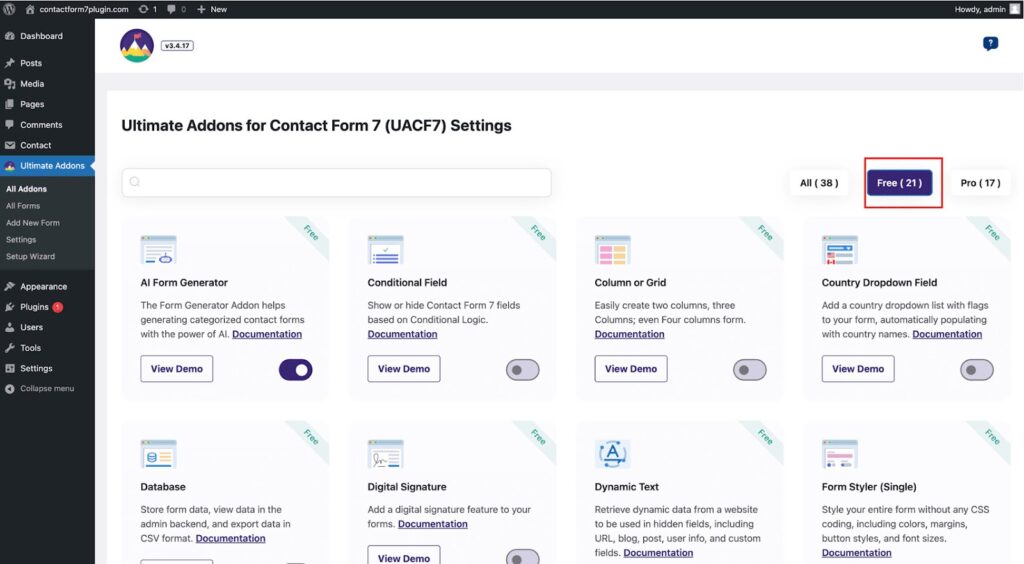
Then enable the options based on your requirements, such as AI Form Generator, Digital Signature, etc.
Once enabled, every form submission will be securely stored in your WordPress database, eliminating the risk of losing valuable inquiries.
Step 5: Viewing Submissions in the WordPress Dashboard
To access saved form submissions:
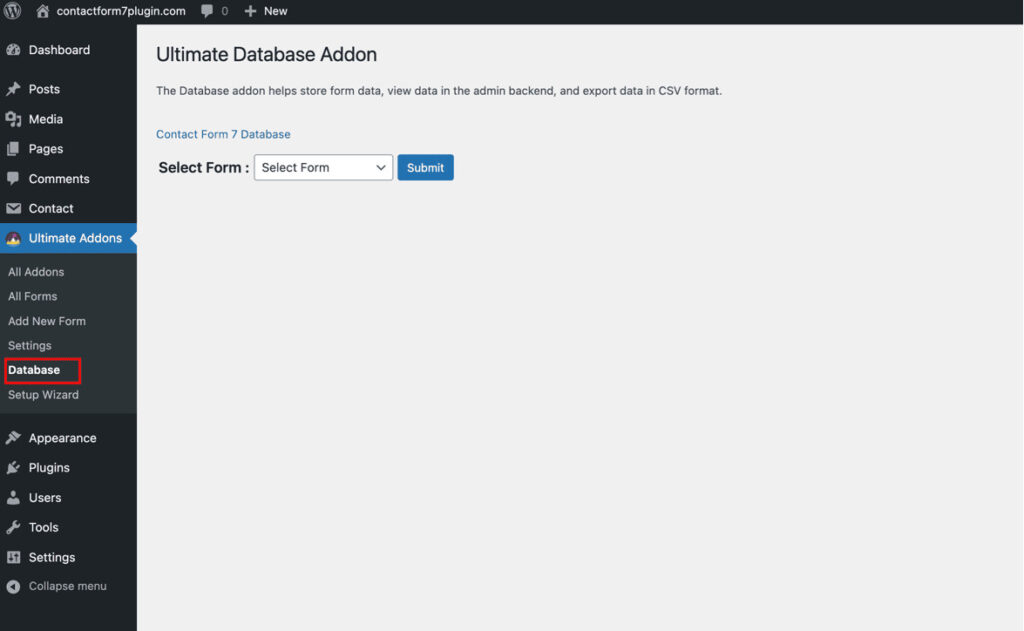
Navigate to Ultra Addon
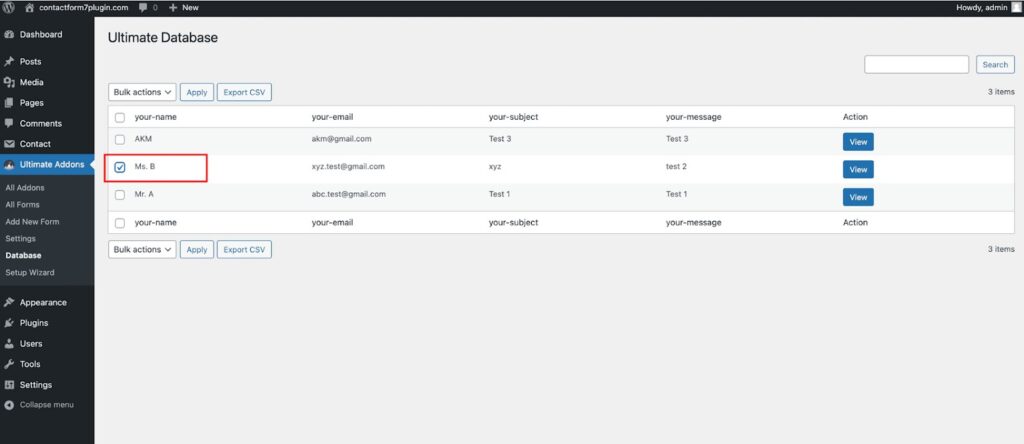
Select “Database” to open your dashboard’s “Ultra Database Addon” window.
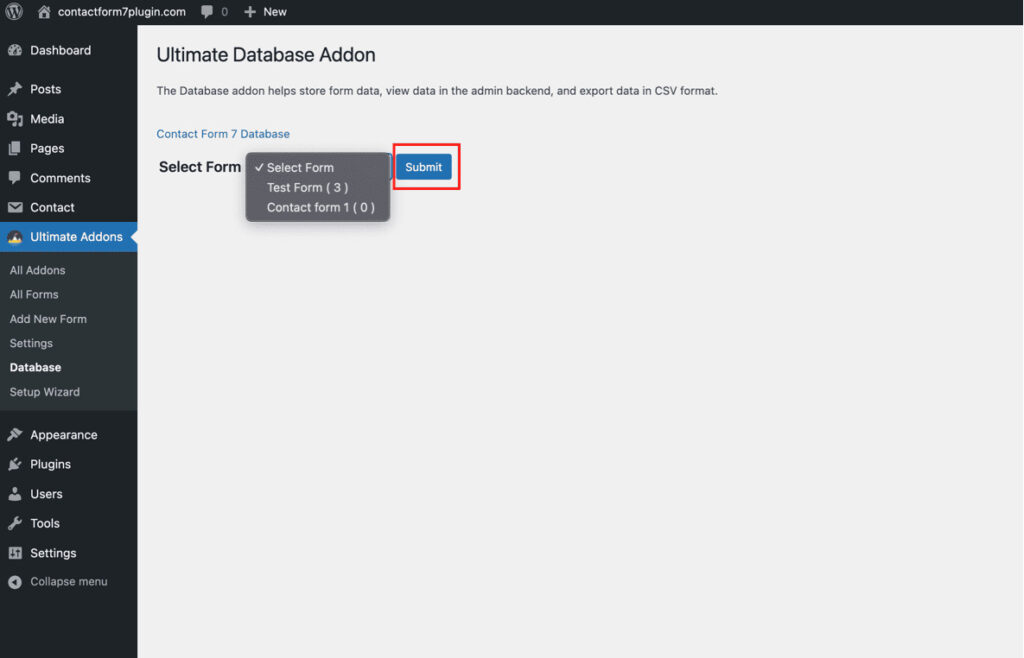
Here, you will see a list of all forms. Select one form to view the submission data, which includes the sender’s name, email, and message. So, click “Submit.”
Now you can see all submissions in one place.
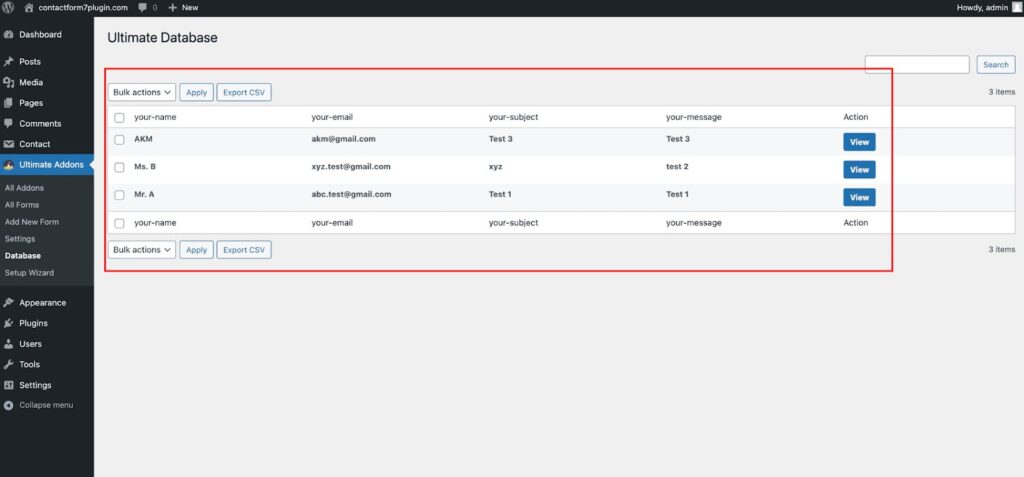
You can click the “View” option from the right side to see all data from any individual submission.
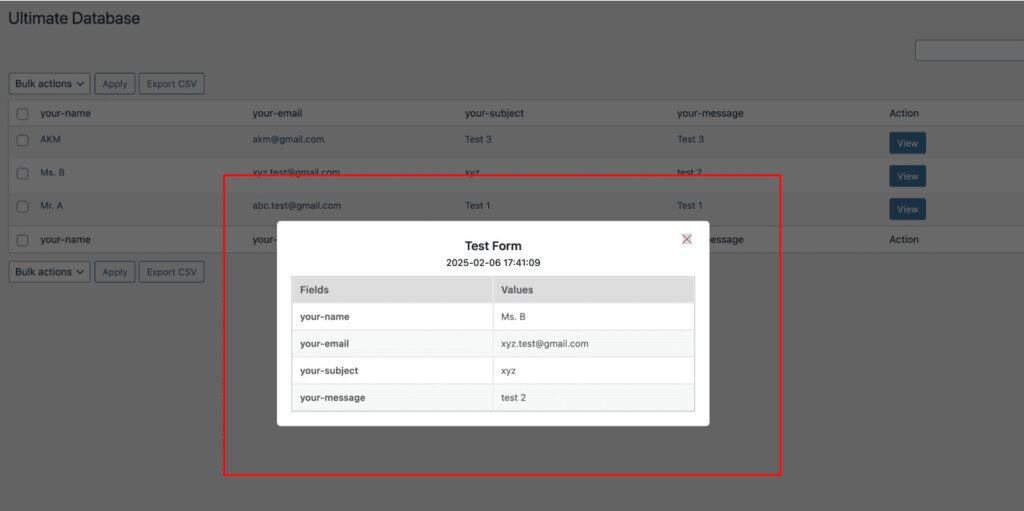
Organizing submissions in one place makes it easy to follow up with leads or analyze customer interactions.
Step 6: Exporting Submissions
Exporting submissions is simple and allows you to use the data for analytics or reporting:
In the Database dashboard, select the entries you want to export.
Click the “Export CSV” button and it will download in CSV format.
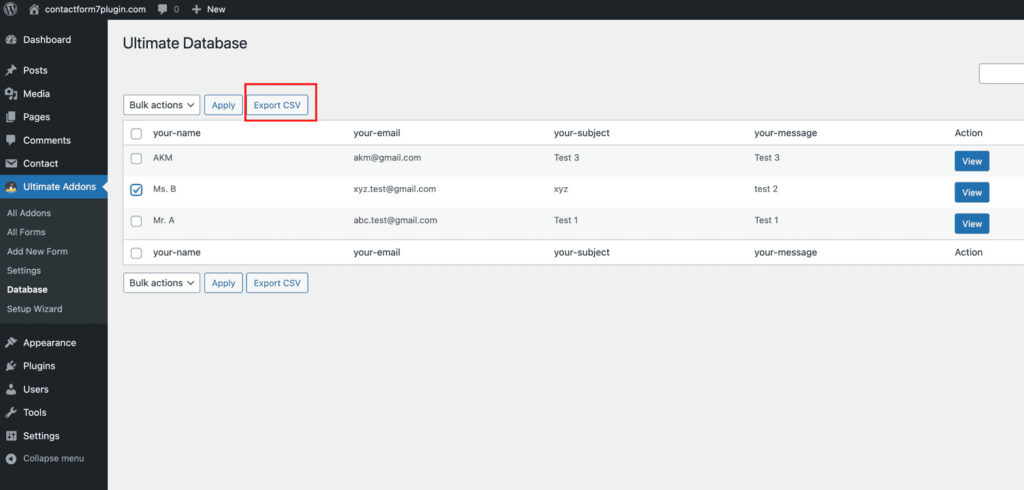
The file will be downloaded onto your computer for further analysis or sharing with your team.
This feature helps generate insights or import data into tools like CRMs or marketing platforms.
Benefits of Using Contact Form 7 with Ultra Addons
If you use Contact Form 7 with Ultra Addons, you gain access to an armory of powerful features that revolutionize form management for WordPress. In this case, let’s look into the ways this combination can boost your website page performance and workflow as data permits.
Enhanced functionality for storing and managing submissions
With Ultra Addons and Contact Form 7, you know that every form submission will be saved to your WordPress database securely. Research shows that businesses lose up to 50% of potential leads due to missed or unrecorded inquiries. So this gives you a centralized hub and stops you from losing important data.
Improved workflow for customer communication and data analysis
To begin with, well-organized data puts you in a great position to communicate with customers efficiently. It’s faster and more accurate than following up on inquiries with submissions nicely stored in the backend. A HubSpot report states that businesses that respond to inquiries within 5 minutes are 21 times more likely to convert leads. It also helps to analyze submission trends by gaining insights into customer needs and to make your strategies better.
Flexibility to handle large volumes of submissions
No matter if you’re a tiny business or a big site, this setup works at scale. WordPress powers 43.2% of all websites globally, and as your traffic grows, this solution will keep your form submissions neat, organized, and manageable, even through a busy peak time or heavy volume campaign.
Seamless export options for advanced reporting
Integrated with analytics tools and CRMs, it is also possible to export data to formats like CSV. This feature, given 90% of marketers prioritize data driven decisions, gives you the power to create rich reports and take advantage of insights in your strategy.
User-friendly setup and configuration
This means that both plugins have been built to be as simple as possible so all types of users can make use of them. To make things simple, WPBeginner tells us that 70% of WordPress users value ease of use when choosing plugins. Intuitive interfaces and clear documentation mean that it will take you no more than a couple of minutes to configure these plugins, even if you don’t have coding skills.
Automated data organization
In the backend, Ultra Addons categorizes submissions by field, for example, name, email and message. It eliminates manual sorting, saves time and reduces errors. Businesses report that automation reduces repetitive tasks by 30%, freeing resources for more critical activities.
Enhanced data security
Since your sensitive information is directly stored in your WordPress database, you are in complete control. Unlike email-only submissions, this method eliminates risks associated with accidental deletion or third-party breaches. In a world where data breaches cost businesses an average of $4.45 million, having a secure system is non-negotiable.
Integration with third-party tools
The combination of this plugin duo happens in coordination with the analytics platform, CRM system or email marketing tool. This feature is important because 73% of businesses use at least one marketing automation tool and you want your website to be fully incorporated and operationally sound.
Final Remarks
Saving your Contact Form 7 submissions to your WordPress database is a straightforward process when you have the right tools. By installing and configuring Contact Form 7 and the Ultra Addons plugin, you can securely store every submission in one place, making it easy to manage and utilize valuable data.
Storing form submissions in your database ensures you never lose important customer inquiries, enhances your workflow, and provides a solid foundation for follow-ups or data analysis. This approach is especially useful for businesses looking to streamline their operations and improve customer interaction.
Ready to transform how you manage form submissions? Get started today by downloading Contact Form 7 and Ultra Addons for Contact Form 7. These powerful plugins will take your WordPress form management to the next level!